background image


control the unit, you can follow User Manual of VD-T. 


5.1 

Master/Slave Built In Preprogrammed Function


By linking the units in master/slave connection, the first unit will control the other units to 
give an automatic, synchronized light show. This function is good when you want an instant 
show.  In Master/Slave mode, the first fixture  whose DMX input jack has with nothing 
connect will be master automatically, set other units to slave mode. 


5.2 

DMX Controller


Use universal DMX controller to control the units, you have to set DMX address from 1 to 
512 channel so that the units can receive DMX signal. 
Press the 

MENU

 button up to when the 

  is showing on the display. Press 

ENTER


button and the display will blink. Use 

DOWN

 and 

UP

 button to change the DMX512 

address. Once the address has been selected, press and keep 

ENTER

 button pressed up 

to when the display stops blinking or storing automatically 8 seconds later. To go back to 
the functions without any change press the

 MENU

 button again.   

 
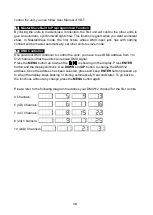
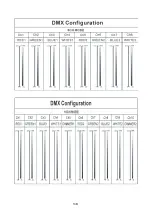
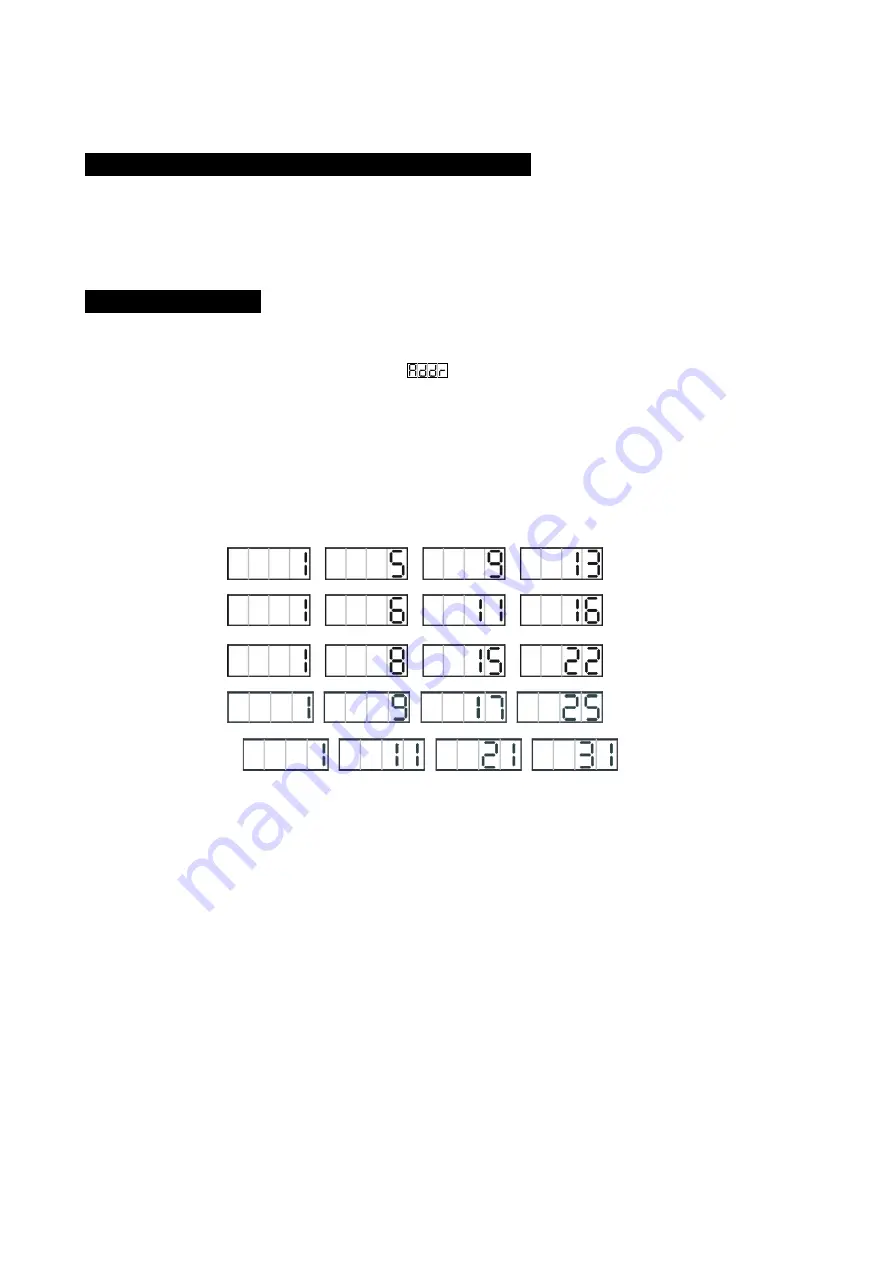
Please refer to the following diagram to address your DMX512 channel for the first 4 units


4 Channels


5 (4D) Channels: 
     
7 (4C) Channels: 
       
8 (24) Channels: 
 
10 (24D) Channels: 


11B 

Содержание BW-54-10FC II RL

Страница 1: ......

Страница 2: ...on 4 4 How To Set The Fixture 5 4 1 Control Panel 5 4 2 Main Functions 6 5 How To Control The Unit 10 5 1 Master Slave Built In Preprogrammed Function 11 5 2 DMX Controller 11 5 3 DMX 512 Configuration 12 5 4 DMX512 Connection 14 6 Troubleshooting 15 7 Cleaning and Maintenance 16 1B ...

Страница 3: ...t It s important to ground the yellow green conductor to earth in order to avoid electric shock Maximum ambient temperature is Ta 40 DO NOT operate it where the temperature is higher than this Don t connect the device to any dimmer pack First run there will be smoke or smells and all disappearing a few minutes later Make sure there are no flammable materials close to the unit while operating as it...

Страница 4: ...ed out by unskilled people can lead to damage or malfunction Please contact the nearest authorized technical assistance center Disconnect the mains power if the fixture is not used for a long time Do use original packing materials once transport it again Do not look directly at the LED light beam while the fixture is on To protect the machine power off 10s rear can electrify 2 Techical Specficatio...

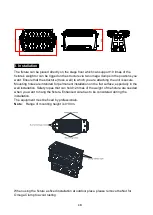
Страница 5: ...secure Mounting holes are intended for permanent installation on the flat surface especially in the wall installation Safety ropes that can hold 12 times of the weight of the fixture are needed when you want to hang the fixture Enhanced care has to be considered during the installation The equipment must be fixed by professionals Note Range of mounting height is 0 30m When using the fixture as fix...

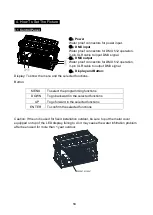
Страница 6: ...splay and Button Display To show the menu and the selected functions Button Caution If the unit is used for fixed installation outdoor be sure to put the metal cover equipped on top of the LED display failing to do it may cause the water infiltration problem after been used for more than 1 year outdoor MENU To select the programming functions DOWN To go backward in the selected functions UP To go ...

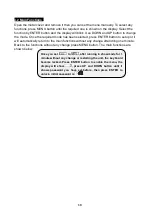
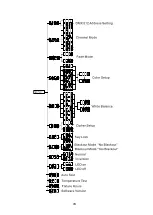
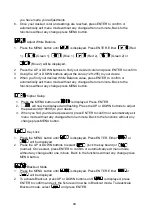
Страница 7: ... press ENTER button to setup or it will automatically return to the main functions without any change after idling one minute Back to the functions without any change press MENU button The main functions are shown below Once you set to after running in show mode for 1 minute without any change or restarting the unit the key board become locked Press ENTER button to enable the menu the display will...

Страница 8: ...7B ...

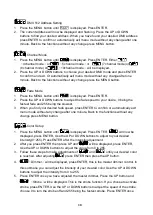
Страница 9: ...you find your desired fade speed press ENTER to confirm or automatically exit menu mode without any change after one minute Back to the functions without any change press MENU button Color Setup 1 Press the MENU button until is displayed Press ENTER will now be displayed press ENTER Use the UP or DOWN buttons to adjust to your desired intensity 0 255 Press ENTER after the intensity adjustment 2 Af...

Страница 10: ...e MENU button until is displayed Press ENTER 2 will now be displayed and flashing Press the UP or DOWN buttons to adjust the password 0 9999 to your desire 3 When you find your desired password press ENTER to confirm or automatically exit menu mode without any change after one minute Back to the functions without any change press MENU button Key Lock 1 Press the MENU button until is displayed Pres...

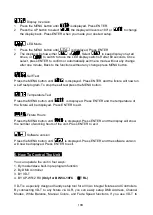
Страница 11: ...test press the MENU button Temperature Test Press the MENU button until is displayed Press ENTER and the temperature of the fixture will be displayed Press ENTER to exit Fixture Hours Press the MENU button until is displayed Press ENTER and the display will show the number of working hours of the unit Press ENTER to exit Software version Press the MENU button until is displayed Press ENTER and the...

Страница 12: ...controller to control the units you have to set DMX address from 1 to 512 channel so that the units can receive DMX signal Press the MENU button up to when the is showing on the display Press ENTER button and the display will blink Use DOWN and UP button to change the DMX512 address Once the address has been selected press and keep ENTER button pressed up to when the display stops blinking or stor...

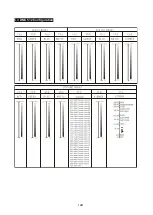
Страница 13: ...5 3 DMX 512 Configuration 12B ...

Страница 14: ...13B ...

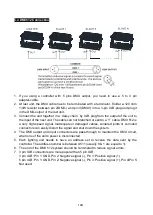
Страница 15: ... speed signal Inadequate or damaged cables soldered joints or corroded connectors can easily distort the signal and shut down the system 4 The DMX output and input connectors are pass through to maintain the DMX circuit when one of the units power is disconnected 5 Each lighting unit needs to have an address set to receive the data sent by the controller The address number is between 0 511 usually...

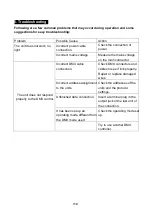
Страница 16: ...nector The unit does not respond properly to the DMX control Incorrect DMX cable connection Check DMX connectors and cables to see if link properly Repair or replace damaged wires Incorrect address assignment to the units Check the addresses of the units and the protocol settings Unfinished data connection Insert a terminal plug in the output jack of the last unit of the connection It has been set...

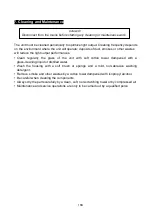
Страница 17: ...ed with a glass cleaning liquid or distilled water Wash the housing with a soft brush or sponge and a mild non abrasive washing detergent Remove smoke and other wastes by a cotton towel dampened with isopropyl alcohol Be careful when cleaning the components Always dry the parts carefully by a clean soft non scratching towel or by compressed air Maintenance and service operations are only to be car...

Страница 18: ...17B ...

Страница 19: ... the provision of the Electromagnetic Compatibility EMC Directive 89 336 EEC EN55103 1 2009 EN55103 2 2009 EN62471 2008 EN61000 3 2 2006 A1 2009 A2 2009 EN61000 3 3 2008 Harmonized Standard EN60598 2 17 1989 A2 1991 EN60598 1 2008 A11 2009 EN 62471 2008 EN 62493 2010 Safety of household and similar electrical appliances Part 1 General requirements 18B ...

Страница 20: ...Innovation Quality Performance ...

Отзывы: