


Installation
28
3.
Screw the mounting block, the rear cover plate and the 2-part front cover plate in fin-
ger tight.
Ensure that the cables are not pinched in the process.
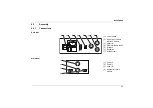
5.3.6
Connection with PC
Connect the USB interface on the workstation to the PC.
5.4
Checking the Installation
Please check the following points again before you bring your workstation into operation.
•
Have the mechanical and electrical installations been performed correctly and com-
pletely?
•
Does the fuse for the device correspond to the available operating voltage?
(110 V: 10 AT or 230 V: 5 AT)?
•
Do the environmental conditions meet the requirements (temperature, air humidity)?
•
Are you familiar with the essential laser protection regulations? Have all the laser safety
measures been taken?
CAUTION
RISK OF PROPERTY DAMAGE.
Perform the following tests to avoid material damage.
!
Содержание CLASSIC Fibre
Страница 6: ...Table of Contents 6 ...
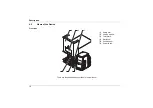
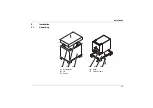
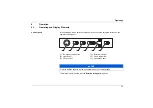
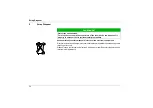
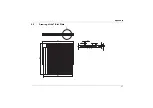
Страница 23: ...Installation 23 5 Installation 5 1 Unpacking 1 Workstation 2 Lid 3 Carton 4 Pallet 5 Fixing screws 1 2 3 1 4 5 ...
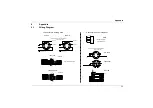
Страница 37: ...Appendix 37 9 2 Drawing of the T Slot Plate A 360 A 2 5 14 5 25 20 12 5 8 1 346 375 ...
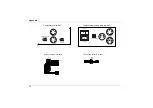
Страница 39: ...Appendix 39 70 101 70 79 450 22 430 938 760 918 730 1159 Ø 50 Workstation CLASSIC Fibre XL ...
Страница 41: ...Appendix 41 9 5 Illustration of the Rotary Module 100 92 ø 80 176 1 110 125 25 100 128 84 ...
Страница 44: ...Appendix 44 ...
Страница 49: ......


