background image

Windows CE Device Settings

18

All Content Copyright © 2012 Aceeca International Limited  All Rights Reserved

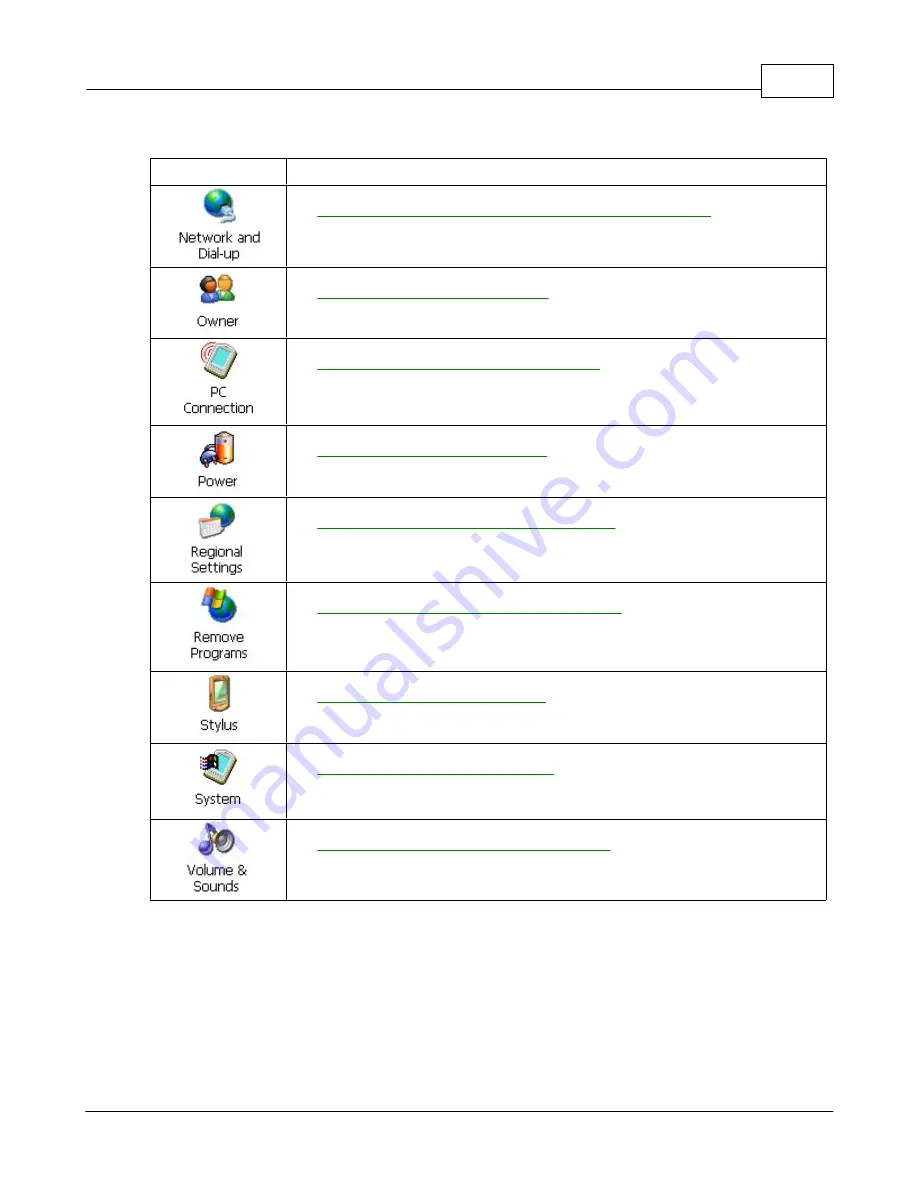
Table 3-1    

Windows Control Panel Menu Icons (Continued)

Icon

Description

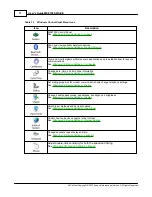
Connect to other computers, networks, and the Internet through a modem.
See 

Windows CE Device Settings > Network and Dial-up Connections

Change owner's personal profiles.
See 

Windows CE Device Settings > Owner

Change settings for connectivity of a host computer.
See 

Windows CE Device Settings > PC Connection

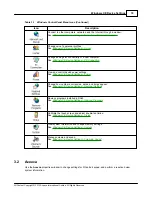
View and control device power settings.
See 

Windows CE Device Settings > Power

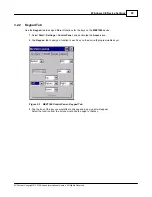
Change how numbers, currencies, dates, and times appear.
See 

Windows CE Device Settings > Regional Settings

Remove programs installed in RAM.
See 

Windows CE Device Settings > Remove Programs

Calibrate the touch screen and adjust double-tap timing.
See 

Windows CE Device Settings > Stylus

View system information and change memory settings.
See 

Windows CE Device Settings > System

Manage volume and sound.
See 

Windows CE Device Settings > Volume & Sound

3.2

Aceeca

Use the 

Aceeca

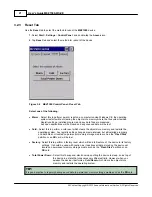
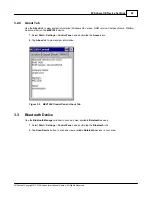
 properties window to change settings for I/O ports, keypad, and perform a reset and view

system information.

Содержание MEZ1500-WinCE

Страница 1: ...User s Guide MEZ1500 WinCE by Aceeca International Limited...

Страница 2: ...t prior written approval of Aceeca International Limited Trademarks Aceeca MEZ1500 and MEZ1500 WinCE are all trademarks of Aceeca International Limited Aceeca is a trademark of Aceeca Limited All othe...

Страница 3: ...11 6 Windows Explorer 12 Working with Files and Folders Chapter 3 Windows CE Device Settings 16 16 1 Windows Control Panel 18 2 Aceeca 19 I O Ports Tab 20 Keypad Tab 21 Reset Tab 22 About Tab 22 3 Bl...

Страница 4: ...48 Calibration Tab 49 19 System 49 General Tab 49 Memory Tab 50 Device Name Tab 51 Copyrights Tab 52 20 Volume Sound 52 Volume Tab 53 Sound Tab 54 21 Taskbar and Start Menu 54 General Tab 55 Advanced...

Страница 5: ...ing hazardous substances 75 3 Cleaning your MEZ1500 75 4 Caring for your MEZ1500 screen 76 5 Maintaining your Battery 77 6 Refurbishment Services III Contents III All Content Copyright 2012 Aceeca Int...

Страница 6: ...this manual All Content Copyright 2012 Aceeca International Limited All Rights Reserved NOTE TIP WARNING A Note box alerts you to important information A Tip box alerts you to advisory information A W...

Страница 7: ...Introduction to the MEZ1500 Windows CE 5 0 Chapter 1...

Страница 8: ...5 0 With your MEZ1500 WinCE you ll be able to use it at both work and home for a variety of tasks Start using the MEZ1500 WinCE become familiar with its physical buttons and controls and use ActiveSyn...

Страница 9: ...Introduction to the MEZ1500 Windows CE 5 0 4 All Content Copyright 2012 Aceeca International Limited All Rights Reserved 1 2 Back case components Back View Figure 1 2 MEZ1500 Back View...

Страница 10: ...de MEZ1500 WinCE 5 All Content Copyright 2012 Aceeca International Limited All Rights Reserved 1 3 Top and Bottom case components Top View Figure 1 3 MEZ1500 Top View Bottom View Figure 1 4 MEZ1500 Bo...

Страница 11: ...Getting Started with Windows CE Devices Chapter 2...

Страница 12: ...ent Copyright 2012 Aceeca International Limited All Rights Reserved 2 Getting Started with Windows CE Devices 2 1 Windows CE Desktop When turning on a Windows CE device use the desktop to navigate the...

Страница 13: ...ion Battery Backup battery is low Backup battery is very low Main battery is charging Main battery is low Main battery is very low Main battery is at 80 capacity 100 indicates a full battery External...

Страница 14: ...e characters appear as typed text on the screen See Windows CE Device Settings Input Panel to customize settings for input methods To show or hide the input panel 1 Tap the Input Panel button then sel...

Страница 15: ...crease the brightness of the screen 1 Press the Screen Brightness button on the MEZ1500 device Figure 2 5 MEZ1500 Keypad Screen Brightness Button 2 Using the Directional Arrow buttons to move the slid...

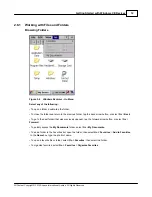
Страница 16: ...orer to perform the following Browse folders to locate a file by double tapping folders to open them or using the back arrow button to close folders To move a file tap and hold the file then select Cu...

Страница 17: ...to the previous folder tap the back arrow button or select Go Back To go to the next folder that was previously opened tap the forward arrow button or select Go Forward To quickly access the My Docume...

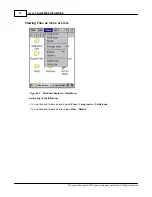
Страница 18: ...ernational Limited All Rights Reserved Viewing Files as Icons or Lists Figure 2 7 Windows Explorer View Menu Select any of the following To view files and folders as icons select View Large Icons or S...

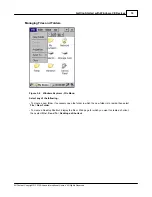
Страница 19: ...d Folders Figure 2 8 Windows Explorer File Menu Select any of the following To create a new folder if necessary open the folder in which the new folder is to reside then select File New Folder To crea...

Страница 20: ...Windows CE Device Settings Chapter 3...

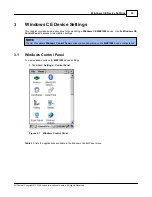
Страница 21: ...00 device Use the Windows CE Control Panel to access customization settings NOTE The list of available Windows Control Panel options varies depending on the MEZ1500 device configuration 3 1 Windows Co...

Страница 22: ...s Change date time and time zone information See Windows CE Device Settings Date Time Set dialing properties for modem communication and change telephony settings See Windows CE Device Settings Dialin...

Страница 23: ...gs PC Connection View and control device power settings See Windows CE Device Settings Power Change how numbers currencies dates and times appear See Windows CE Device Settings Regional Settings Remov...

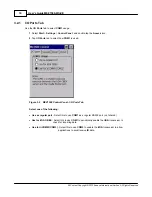
Страница 24: ...n 2 Tap I O Ports tab to select how COM1 is used Figure 3 2 MEZ1500 Control Panel I O Ports Tab Select one of the following Use as regular port Select this to use COM1 as a regular RS232 port not shar...

Страница 25: ...he keys on the MEZ1500 device 1 Select Start Settings Control Panel and double tap the Aceeca icon 2 Tap Keypad tab to assign a function to each key on the device 8 programmable keys Figure 3 3 MEZ150...

Страница 26: ...eset which clears the object store memory and restarts the operating system Any registry setting changes are maintained but all installed programs and data files not located on permanent memory storag...

Страница 27: ...r on the MEZ1500 device 1 Select Start Settings Control Panel and double tap the Aceeca icon 2 Tap About tab to view system information Figure 3 5 MEZ1500 Control Panel About Tab 3 3 Bluetooth Device...

Страница 28: ...oth 3 4 Certificates Some applications use certificates to establish trust and for secure communications Certificate authorities sign and issue certificates which are valid for a prescribed period of...

Страница 29: ...view more details of the selected certificate such as the expanded name or expiration date tap View 5 To delete a certificate select it in the list and tap Remove 6 Tap OK to apply the settings 3 5 D...

Страница 30: ...he Location drop down list select the location and tap Remove 3 Enter or edit the area code and country code as needed 4 Select Tone dialing or Pulse dialing most phone lines are tone 5 Select the Dis...

Страница 31: ...isted even though the device allows them in the dial string Table 3 2 Dialing Characters To Enter Dial country code specified by the dialing program E Dial area code specified by the dialing program F...

Страница 32: ...ngs Control Panel and double tap the Display icon 2 Tap the Background tab Figure 3 12 Display Properties Background Tab 3 From the Image drop down list select the desktop background image To locate a...

Страница 33: ...he preview box and tap Apply to apply the scheme To create a custom scheme 1 Select Start Settings Control Panel and double tap the Display icon 2 Tap the Appearance tab 3 From the Item drop down list...

Страница 34: ...vice is idle for more than check box to suspend the device when not used from a certain period of time when operating on battery power Select this period of time from the drop down list Available time...

Страница 35: ...ions 1 Select Start Settings Control Panel and double tap the Input Panel icon Figure 3 15 Input Panel Properties 2 From the Current input method drop down list select the input method 3 Tap Options t...

Страница 36: ...wing In the Start Page text box enter the URL for the page to appear upon accessing the Internet In the Search Page text box enter the URL for the page to use to perform searches In the User Agent dro...

Страница 37: ...ection to use from the Autodial name drop down list Select the Access the Internet using a proxy server check box to use a proxy server for Internet connection This provides additional security when c...

Страница 38: ...accept block or prompt for first party cookies which are associated with the site you are viewing and third party cookies associated with sites other than the one you are viewing 3 9 4 Advanced Tab T...

Страница 39: ...ndow to change the keyboard repeat rate and repeat delay 1 Select Start Settings Control Panel and double tap the Keyboard icon Figure 3 21 Keyboard Properties Repeat Tab 2 Tap the Enable character re...

Страница 40: ...l and double tap the Mouse icon Figure 3 22 Mouse Properties Window 2 Double tap the checkerboard grid at a comfortable speed 3 Double tap the clapboard to test the settings 4 Tap OK to apply changes...

Страница 41: ...an icon to select a connection type 3 Follow the connection type instructions 4 Tap OK to apply changes 3 13 Owner Use the Owner Properties window to enter owner information This information can appea...

Страница 42: ...3 Enter or edit the owner information 4 Select the Display owner identification check box to display this information when the device starts 3 13 2 Notes Tab 1 Tap the Notes tab and enter additional i...

Страница 43: ...networks select the Network ID tab and enter the user name password and domain name used to log on to the remote network Figure 3 26 Owner Properties Window Network ID Tab 3 14 PC Connection Use the P...

Страница 44: ...e Connection Window 4 Select the connection type from the drop down list 5 Tap OK 6 In the PC Connection Properties window tap OK to apply the changes 3 15 Power Use the Power Properties to view power...

Страница 45: ...user can use all the different peripherals and by consequence the current consumption is maximum User Idle this state is reach when user is not using the device after a time out the power consumption...

Страница 46: ...state to System Idle is set to After 5 minutes then the system will transition from the User Idle state to the System Idle state after 5 minutes of inactivity Even if a time of Never is selected the...

Страница 47: ...d able to wake up on request D3 Sleep the device is consuming as less power as possible and can be used to wake up the system D4 Off the device is off an do no consume any power Each power state of th...

Страница 48: ...gs Region Tab 2 From the Your locale drop down list select the appropriate location 3 To select number currency time and date settings tap Customize 3 16 2 Number Tab 1 Tap the Number tab Figure 3 34...

Страница 49: ...eserved 3 16 3 Currency Tab 1 Tap the Currency tab Figure 3 35 Regional and Language Settings Currency Tab 2 Select desired options Available options vary depending on the Your locale selection on the...

Страница 50: ...options vary depending on the Your locale selection on the Region tab 3 16 5 Date Tab 1 Tap the Date tab Figure 3 37 Regional and Language Settings Date Tab 2 Select desired options Available options...

Страница 51: ...ngs Language Tab 2 Select the language to use for menus windows and alerts from the drop down list 3 16 7 Input Tab 1 Tap the Input tab Figure 3 39 Regional and Language Settings Input Tab 2 Select th...

Страница 52: ...evice 1 Select Start Settings Control Panel and double tap the Remove Programs icon 2 Select the program to remove Figure 3 40 Remove Programs Window 3 Tap Remove 4 Tap OK or X 3 18 Stylus Use the Sty...

Страница 53: ...ights Reserved Figure 3 41 Stylus Properties Double Tap Tab 3 Double tap the checkerboard grid at a comfortable speed 4 Double tap the clapboard to test the setting 5 Tap OK 3 18 2 Calibration Tab 1 S...

Страница 54: ...system properties change memory settings enter a device name and view copyright information 3 19 1 General Tab The General tab displays general system settings 1 Select Start Settings Control Panel an...

Страница 55: ...the device is running slowly increase the amount of program memory NOTE Programs supplied with the device are located in ROM and remain after a cold boot User installed programs are located in RAM and...

Страница 56: ...vice Name Tab 3 Enter the device name in the Device name without spaces field 4 Enter a device description in the Device description field 3 19 4 Copyrights Tab The Copyrights tab displays copyright i...

Страница 57: ...Properties window to view or change volume settings change sound scheme 3 20 1 Volume Tab The Volume tab displays general system volume settings 1 Select Start Settings Control Panel and double tap t...

Страница 58: ...or change the sound settings Figure 3 48 Volume Sound Properties Sounds Tab Select any of the following From the Event name list select an event From the Event sound list select a sound To remove a s...

Страница 59: ...o view or change Taskbar settings clear contents of the Documents menu 1 Select Start Settings and tap Taskbar and Start Menu Figure 3 49 Windows CE Desktop Settings Menu 3 21 1 General Tab The Genera...

Страница 60: ...ar so it will be visible at all times Auto hide Check this box to hide the Taskbar when needed tap the screen where the Taskbar would normally be and it will appear Show Clock Check this box to have t...

Страница 61: ...ced Tab Select any of the following Clear Button Tap this button to clear all the contents in the Documents menu Expand Control Panel Check this box to set the Start menu to display a menu of all the...

Страница 62: ...Windows CE Applications Chapter 4...

Страница 63: ...oth your device and your PC If you make a change in one place the next time you synchronize the change is automatically made to the corresponding information on the other computer NOTE Microsoft Activ...

Страница 64: ...selecting Start Settings Control Panel and double tap the PC Connection icon 5 Check the Enable direct connections to the desktop computer checkbox to allow direct connections 6 If USB is not selecte...

Страница 65: ...s Reserved Once a connection is made the following screens will appear 8 Select Yes then select Next Figure 4 3 Microsoft ActiveSync Set Up a Partnership 9 Select Yes I want to synchronize with only t...

Страница 66: ...t 2012 Aceeca International Limited All Rights Reserved 10 Check the folders or files want to synchronize then select Next Figure 4 5 Microsoft ActiveSync Select Synchronization Settings 11 Select Fin...

Страница 67: ...because there are no cables or adapters to change NOTE For additional security disable network bridging on the PC specifically bridging to a Remote NDIS adapter before connecting to the PC to pass th...

Страница 68: ...COM port number must be no higher than 20 6 Click OK to close the Bluetooth Devices Control Panel Step 2 Set up ActiveSync to use the Bluetooth COM port 1 Double click the ActiveSync icon on your PC d...

Страница 69: ...Settings Control Panel and double tap the Bluetooth icon 2 Tap Scan Device button to scan and view available Buletooth devices in your area Figure 4 10 Bluetooth Manager Scan Device 3 Double tap the...

Страница 70: ...ernational Limited All Rights Reserved Figure 4 12 PC Screen Message 6 Enter your PIN number example 1234 and select Next Figure 4 13 Add Bluetooth Device Wizard Passkey 7 Uncheck Turn discovery off a...

Страница 71: ...esync icon indicating that it is active 9 Select OK and close Bluetooth Manager Figure 4 15 Bluetooth Manager Device Active 10 Select Start Settings Control Panel and double tap the PC Connection icon...

Страница 72: ...to the PC you will again need to set it up as a Guest device with the PC See Activesync for more information on how to setup a partnership 4 1 2 Copying Files Copying a file results in separate versi...

Страница 73: ...he WiFi module fitted to your Mobile device optional 1 To open select Start Programs WiFiCtrl 2 Tap the WiFiCtrl icon in the Taskbar at the bottom of the screen Figure 4 17 WiFiCtrl Icon 3 Tick the Wi...

Страница 74: ...ion 3 Double tap the Wireless Network you wish to connect to Figure 4 20 Wireless Properties If the Wireless Network you wish to connect to has the encryption disabled this means that no Network key P...

Страница 75: ...ernet connection To customize Internet Explorer options such as setting home and search pages see Windows CE Device Settings Internet Options 1 To open Internet Explorer double tap the Internet Explor...

Страница 76: ...iew tab Figure 4 3 Internet Explorer Window View Tab To fit the web page in the viewable area select View Fit to Screen To show images in a web page select View Show Images To load web pages faster un...

Страница 77: ...orites 2 Select Tools Favorites Add to Favorites 3 If necessary enter the name of the page to appear in the Favorites menu 4 To store the favorite in a different folder use the browser to locate the f...

Страница 78: ...All Rights Reserved 4 3 3 Copying a Page to a Document To copy a Web page to a document 1 Select all or part of the Web page to copy Figure 4 6 Internet Explorer Edit Menu 2 Select Tools Copy 3 Go to...

Страница 79: ...Maintaining Your MEZ1500 Chapter 5...

Страница 80: ...the MEZ1500 WinCE is made of a GE Plastic CYCOLOY C6600 noted for the following properties Bromine free Chlorine free Flame retardant Good impact resistance Hydrolytically stable At room temperature...

Страница 81: ...y directly Do not use a battery that is severely scarred or deformed Battery storage Unlike NiCad Nickel Cadium batteries or NiMH Nickel metal Hydride batteries change lithium ion batteries early and...

Страница 82: ...Call your local waste disposal agency or environmental agency for advice on disposing of the battery 5 6 Refurbishment Services Aceeca offers refurbishment services for your Handheld The types of ser...

Отзывы: