User Manual
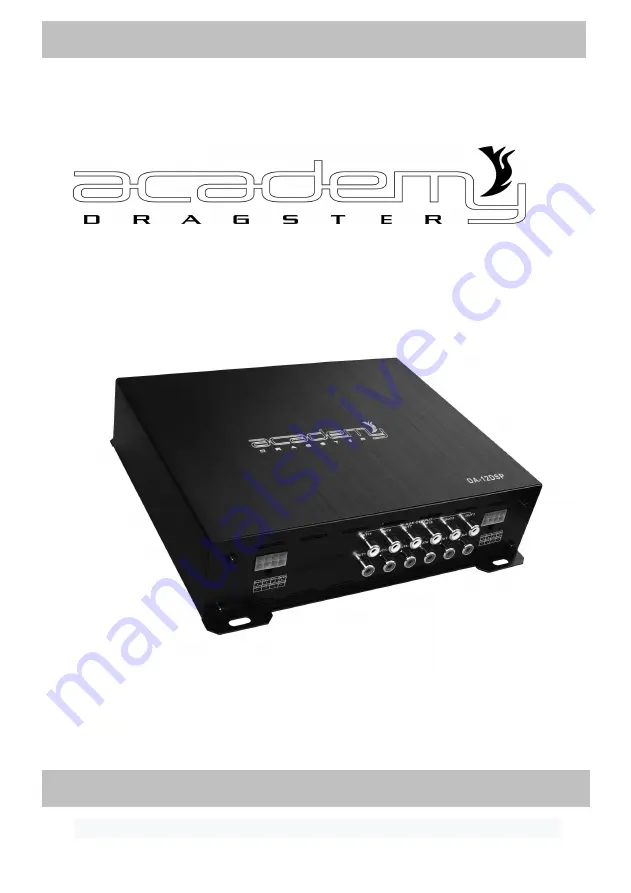
DA-12DSP
SPECIAL DSP AMPLIFIER
Please read this manual carefully before using this product and keep it for future reference
Страница 1: ...User Manual DA 12DSP SPECIAL DSP AMPLIFIER Please read this manual carefully before using this product and keep it for future reference...
Страница 2: ...turn off power immediately and do not open cover by yourself Please contact with professional engineer for checking to avoid accident happen Packing List For every package including below items Please...
Страница 3: ...allation 10 3 2 Run and turn off 10 3 3 Software interface 11 3 3 1 Input signal select 11 3 3 2 Output switch 12 3 3 3 Output voice delay type mute and phase setting 12 3 3 4 Output signal equalizer...
Страница 4: ...ght flash alternately Open the bluetooth of your andriod mobile searching DSP to pairing it to finish the connected 1 User Operation Instruction Main Interface Main volume adjustment The main volume c...
Страница 5: ...in menu is at the bottom of the interface Click EQ to enter EQ interface Setting EQ Output channel 1 EQ curve gain Q value and frequency 2 Output EQ gain setting A total of 31 EQ left and right slidin...
Страница 6: ...by sliding left and right 2 Click phase for every output channel In Phase or Out Phase 0 180 Crossover settings 1 Channel high low pass crossover setting with high low pass independent filtering 3 Fr...
Страница 7: ...direction of the dot to the left and right to set the delay for the CH1 to CH12 speakers Default Value MS can switch to CM or INCH Mixer settings Click Mixer to enter Mixer interface It can perform 6...
Страница 8: ...direction decreases The volume range is 0 66 In the total volume interface press the button briefly to perform the mute operation The mute interface is shown in Figure 2 2 Figure 2 1 Figure 2 2 C Inpu...
Страница 9: ...the button Short press the button to call call the interface as shown in the Figure 5 2 After the call is completed the interface is automatically exited and returned to the main interface of the con...
Страница 10: ...ble outpu t CH5 CH8 CH7 output volice Output volice Output volice Output volice CH10 CH11 CH12 Output volice Output volice Output volice Output volice Output volice Output volice Output volice Output...
Страница 11: ...connection 8 ACC HOST convertor 9 Head unit connecting port 10 Speaker output 11 Low level RCA output 1 3 Software Introduction DA 12DSP PC software control please check 3 Software Operation detail 1...
Страница 12: ...sound position and speaker type Output signal gain Gain range Mute 59 9dB to 0 0dB Output signal equalizer 1 12 Each output channel 31 band equalizer engine 1 Equalizer type 1st equalizer for Q and lo...
Страница 13: ...g method is for two units input please refer below 1 Please use Plug Play cable to connect original car unit and DA 12DSP for upgrade audio system effects Please use OUT11 and OUT12 RCA output when In...
Страница 14: ...wing table Direction 1 only for the original Plug Play cables or user using others directly 2 REM input when the toggle switch to ACC only ACC input When the toggle switch is switched to HOST the two...
Страница 15: ...car interface is the same but there is without power amplifier while the default output type of CH11 and CH12 is ultra low left and ultra low right usually external bass amplifier as bass strengthened...
Страница 16: ...d 3 2 Turn on and turn off Double click the DA 12DSP icon to open the software and the main interface before online is shown in figure 3 2 1 the upper right corner refers to the unconnected state Figu...
Страница 17: ...ting 5 as shown in figure 3 2 2 5 shows the setting of delay space 6 as shown in figure 3 2 2 6 output channel configuration and common parameter adjustment area 7 as shown in figure 3 2 2 7 shows the...
Страница 18: ...he output volume control volume control for each channel independently and the master volume pushing the volume fader below each channel label can be in OFF off adjust between 59dB to 6dB while on the...
Страница 19: ...ach output channel the specific methods of operation The first step Click on the right side of the Reset Output Configuration button in the dialog box select the Clear button return to the main interf...
Страница 20: ...left super low right super low and super low The third step after the user has configured all of the output signal path click on the right side of Figure 3 3 4 Lock Output Configuration to lock the co...
Страница 21: ...l red box press and drag left and right to adjust the equalizer Q All parameters are displayed simultaneously adjust the current real time equalizer is also updated value EQ parameters editing area 1...
Страница 22: ...re 3 3 4 click this button to make all current channel equalizer parameters return to the initial state uniform distribution of frequency Q value is 1 2 a gain of 0dB 2 the output channel divider edit...
Страница 23: ...output the positioning of the sound field in the locked state if the output channel sound field is empty you can not click to enter the editing interface only the output channel sound field is not emp...
Страница 24: ...s configured Save Output Configuration button Click this button to save the current output signal channel sound field configuration to the computer for future calls Mixer settings click mixer in the 7...
Страница 25: ...o load a previously saved scene computer files to the machine running Note the choice of input signal sources the output signal and the output channel type configuration for the computer stored a tota...
Страница 26: ...uch as 4 abc named in the point you want as shown in Input Scene name dialog box shown in 3 4 3 OK button to save and return as shown in Figure 3 4 4 Point Exit button to complete the save as preset s...
Страница 27: ...d a preset number as selected on the 3rd and then point below the Load button on the pop up shown 3 4 6 loading data transfer progress shown in the wait window Figure 3 4 6 Step 4 After data transfer...
Страница 28: ...ning data changes step 1 Click on the main interface to the top menu Memory button will pop up all the scenes action item see Figure 3 4 1 Step 2 Click the Delete machine preset after deleting the ite...
Страница 29: ...scene files on your computer 1 save as a scene file on the computer This function is to save the current machine working scene data to a computer in order to prepare the late call step 1 Click on the...
Страница 30: ...store the scene This function is to save all the data on the machine is now on line for a computer file data data file of the whole machine including the current job scenario six groups of all machin...
Страница 31: ...uction After click on the main interface to the top menu Options button in Figure 3 5 1 it will pop up option of each menu item Figure 3 5 1 3 5 1 Unit firmware update method In the Options menu click...
Страница 32: ...the file 3 5 3 Information about the inquiry In the Options menu use the mouse to click on the About option the system will pop up a message Query dialog box in which you can query to SEQ ID letter v...
Страница 33: ...er linking correct 2 pls check if REM IN if linking correct 2 No voice 1 pls check if turn on mute style 2 pls check if input channel is correct 3 cannot link USB 1 pls check if USB cable is setting c...
Страница 34: ......