4 Start MEMOplanner
11
4 Start MEMOplanner
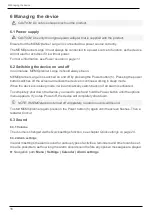
4.1 Power source
CAUTION: Use only the original power adapter that is supplied with the product.
MEMOplanner Large 3 must always be connected to the power adapter to operate. MEMOplanner
Large 3 will not alarm for activities if it has no power supply, see chapter
1.
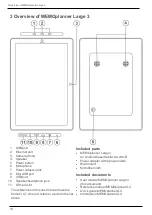
Connect the power adapter to the power adapter jack (7) on
MEMOplanner.
2.
Connect the power cable to the power adapter and connect it
to a wall socket.
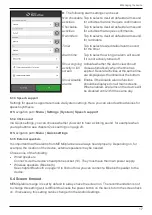
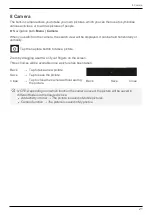
4.2 Start the device
1.
Start the device by pressing on the Power button (5) until the
screen blinks.
2.
Wait a moment while the device starts.
3.
A
Welcome
view will appear shortly with the first page of a
configuration wizard.
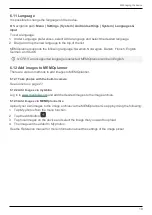
4.3 Configure the device
When the device is started, a configuration wizard opens where you make settings for the device.
4.3.1 Connect to the Internet
An Internet connection is required to log in. After that, no internet connection is required, provided
that remote assistance is not necessary.
Select which wireless network (Wi-Fi) to connect to the device. (If there is no Wi-Fi, you can set up a
temporary hotspot using your mobile phone.)
MEMOplanner Large 3 can also be connected to the Internet by connecting a network cable to the
Ethernet port (2).
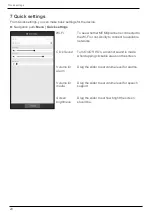
4.3.2 Select speech synthesis voices to install
Choose whether one or more speech synthesis voices should be installed. The voices can also be
downloaded at a later stage, see
If you choose to download the voices in this step, you do not have to wait for the voice download, it
is fine to continue in the start-up process.
4.4 Log in or create a user account
Enter the username and password for the user’s myAbilia account and click on Log in. You can also
create a new user account, see
Create a myAbilia user account via MEMOplanner on page 8
4.5 Add the starter set
If the user account is completely new, you can add a starter set containing an image archive,
activity templates, timer templates and checklists.
Содержание MEMOplanner Large 3
Страница 1: ...MEMOplanner Large 3 Art nr 462885 Software version 4 2 or later EN 4 0 User manual...
Страница 26: ......

