Removing the axis-6 gearbox
Use these procedures to remove the axis-6 gearbox.
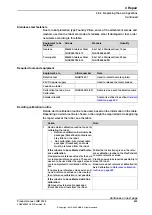
Preparations before removing the axis-6 gearbox
Note
Action
Decide which calibration routine to use,
and take actions accordingly prior to begin-
ning the repair procedure.
1
DANGER
Turn off all:
•
electric power supply
•
hydraulic pressure supply
to the robot, before entering the safe-
guarded space.
2
See
Draining the axis-6 gearbox on
Drain the gearbox.
3
Remove all equipment fitted on the turning
disc.
4
Jog the robot to:
•
Axis 1 = No significance (as long as
the robot is secured to the founda-
tion).
•
Axis 2 = +25°
•
Axis 3 = +20°
•
Axis 4 = 0°
•
Axis 5 = -55°
•
Axis 6 = -10°
5
DANGER
Turn off all:
•
electric power supply
•
hydraulic pressure supply
to the robot, before entering the safe-
guarded space.
6
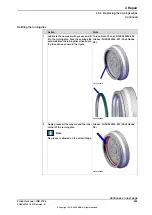
xx1300000825
Remove the synchronization plate axis-6.
7
Continues on next page
604
Product manual - IRB 6790
3HAC063331-001 Revision: B
© Copyright 2019 - 2020 ABB. All rights reserved.
4 Repair
4.8.4 Replacing the axis-6 gearbox
Continued
Содержание IRB 6790
Страница 1: ...ROBOTICS Product manual IRB 6790 ...
Страница 2: ...Trace back information Workspace 20A version a8 Checked in 2020 03 09 Skribenta version 5 3 033 ...
Страница 8: ...This page is intentionally left blank ...
Страница 16: ...This page is intentionally left blank ...
Страница 38: ...This page is intentionally left blank ...
Страница 164: ...This page is intentionally left blank ...
Страница 612: ...This page is intentionally left blank ...
Страница 638: ...This page is intentionally left blank ...
Страница 644: ...This page is intentionally left blank ...
Страница 658: ...This page is intentionally left blank ...
Страница 660: ...This page is intentionally left blank ...
Страница 667: ......


