NEED HELP? GIVE US A CALL
833.232.9711
NEED HELP? GIVE US A CALL
833.232.9711
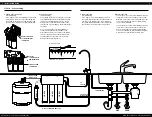
INSTALLATION GUIDE
4
5
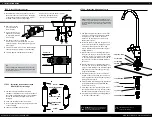
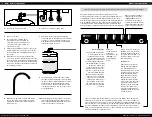
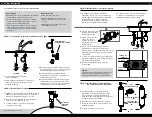
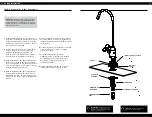
STEP 6 - Install the dispensing faucet
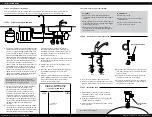
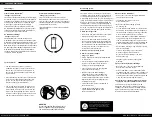
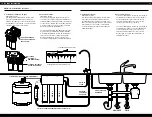
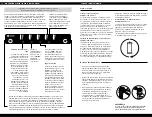
STEP 4 - Install drain connector
WARNING
Ensure that all electrical appliances
and outlets are turned off at the circuit breaker
before working in the cabinet area.
CAUTION
Wear safety glasses to
protect eyes when drilling.
1
The dispensing faucet requires a hole in the
counter or sink. The mounting hole should
be between 1" and 1-3/8" in diameter.
Either use an existing hole or drill one in
the desired location.
2
Install the faucet O-ring into the groove on
the bottom of the faucet. Applying a small
amount of silicone grease to the O-ring
before installation will help hold it in place
during assembly.
3
Measure the amount of tubing required to
run from the faucet to the drain connection
on the RO System. Cut a piece of 1/4" tubing
to the required length and push one end of
the tube onto the smaller barbed fitting on
the faucet.
4
Measure the amount of tubing required to
run from the faucet to the drain saddle. Cut
a piece of 3/8" tubing to the required length
and push one end of the tubing onto the
larger barbed fitting.
5
Assemble the faucet escutcheon onto the
bottom of the faucet. Slide the escutcheon
with its gasket over the drain tubing until it
seats against the faucet.
6
Feed the drain tubes through the installation
hole and insert the faucet, threaded side
down, into the hole.
7
From under the sink, slide the split washer,
spacer and lock washer onto the faucet base
threads and secure them with the lock nut.
8
Assemble the quick-connect tubing adapter
to the faucet base threads.
1
Identify drain outlet location. Do not install
the drain connector onto the same drainpipe
as the garbage disposal. If drain-line must be
installed on the same line as garbage
disposal, do not use the drain connector
included. A garbage disposal
connector is recommended.
2
Remove protective
cover from back of
foam seal (N).
3
Knock center hole out,
align holes, and attach
to front plate of drain
connector (L).
4
Use drain connector to mark the
drill location on drain-line. Drill a 1/4" hole
on the drain pipe. Do not penetrate opposite
side of pipe.
5
Position the drain connector on sink drain pipe
above drain trap, allowing room for drilling.
6
Securely tighten nuts (M) and screws (M).
DRAIN PIPE
BRACKET
NEW HOLE
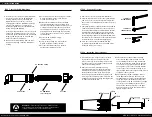
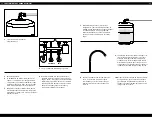
1
The Remineralizer with Microbial Filter
Cartridge is installed on the outlet line between
the system and dispensing faucet. The Cartridge
should be installed vertically with its outlet
facing up.
2
Screw the Cartridge holder to the wall.
3
Insert a reducing elbow into the inlet and outlet
of the Cartridge.
4
Snap the Cartridge into the holder.
STEP 5 - Install the Remineralizer with
Microbial Filter cartridge
M
N
L
M
MOUNTING BRACKET
REMINERALIZER
CARTRIDGE
ESCUTCHEON
ESCUTCHEON
GASKET
FAUCET O-RING
SPLIT WASHER
SPACER
LOCK WASHER
LOCK NUT
TUBE ADAPTER
NOTE:
In addition to dispensing treated water, the faucet
includes an air gap that prevents unsanitary water from the
household drain flowing back into the RO unit. The barbed
fittings on the faucet connect the air gap to the RO System
drain lines.
TIP
If there is leakage from the drain bracket, loosen the bolts
and slide the bracket up so the drilled hole is at the bottom
of the drain connector port.
MOUNTING SCREW
ELBOW
ELBOW
HOT COLD


