


Copyright 1010music LLC 2023
Page 34 of 123
Blackbox 3.0 User Manual
Loop Fading
Let’s talk a little more about loop fading. Loop Fading is a good way to smooth the
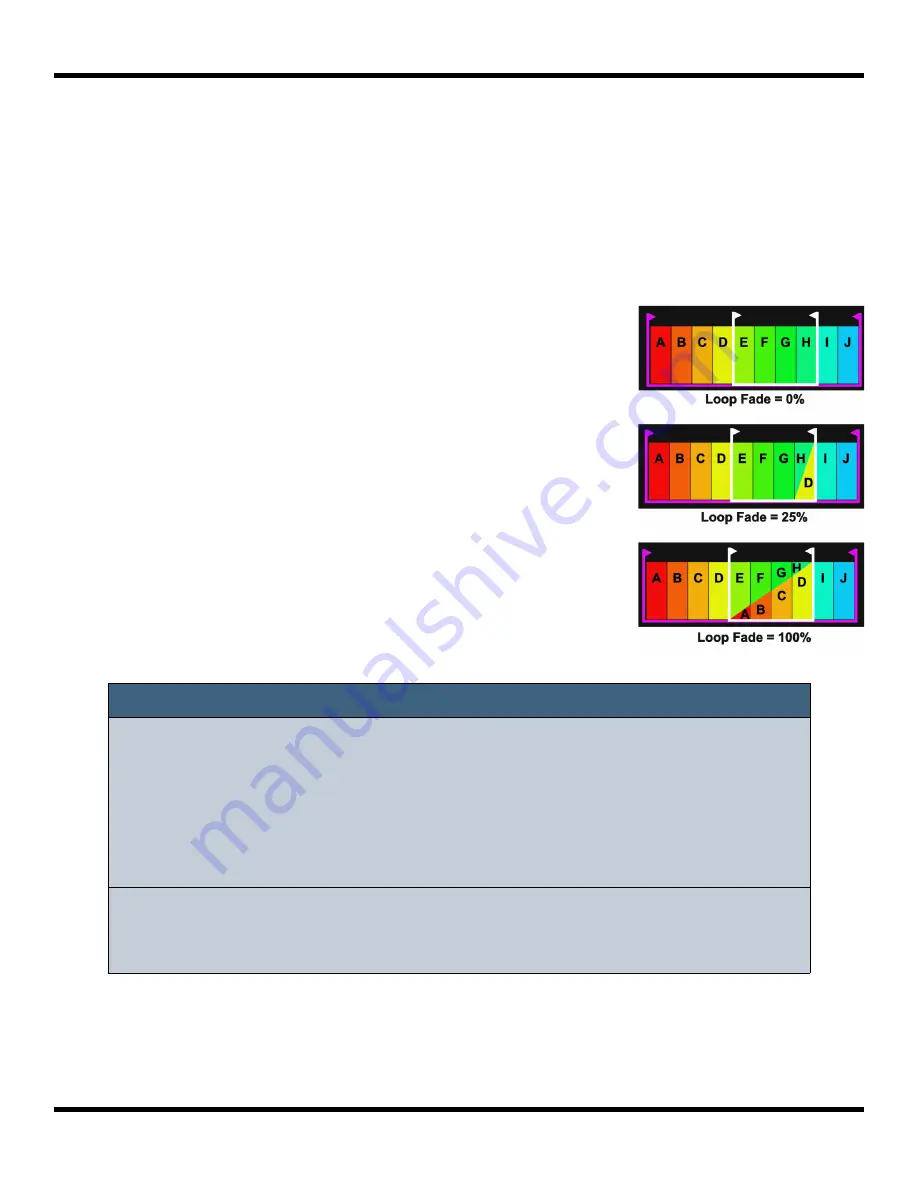
transition when looping a sample. The diagram to the right shows how the loop cross-
fading is applied at three different settings for the Loop Fade parameter. The colored bars
in the diagram represent different equal length sections of the WAV file. The loop points
for this example have been configured so that sections E, F, G and H of the WAV file are
looped.
When Loop Fade is zero, blackbox does not overlay any
extra content on top of the looped sections.
When Loop Fade is 25%, section D, which is a section of WAV
that is 25% of the length of the loop from immediately
before the loop start point, would be gradually faded in over
the last 25% of the looped section. So as section H starts,
section D fades in and section H is gradually faded out until
on D is left as we reach the loop point.
When Loop Fade is 100%, sections A, B, C and D are faded in
on top of sections E, F, G and H.
Note:
►
In order for the Loop Fade to work to the full extent, there must be
enough audio signal before the Loop Start point to draw from. For
example, if your WAV file is 1000 samples long, and your Loop Start is at
250 samples, you only have 250 samples, or 33% of the loop length,
before the Loop Start point to use for Loop Fading. You can set the
Loop Fade to a higher number, but it won’t be able to add additional
improvement because there’s no signal available to use.
►
To minimize the impact of Loop Fading on CPU usage, use the smallest
value for Loop Fade that gets the sound quality you need. This will vary
based on the sample.


