background image


BLACKBOX USER MANUAL v 1.5 

5/6/2020 8:54:00 PM


  Copyright 1010music LLC 2020 

Page 34 of 70 


To revert back to the parameter and slice values stored in the WAV file, simply reload the file into the pad. 

Note: 


If you use an existing file name when you use 

Save As

, the old file will be overwritten with the current 

WAV file and parameters. 

Trim WAV Files 

When recording new samples, you sometimes get some unwanted material at the start or the end of the WAV file.  

Here’s how to trim the file:


1.


Open a pad with a WAV file you want to trim.  

2.


Set the pad mode to 

Sample

3.


On the WAV screen, turn the top left knob to set the left side of the pink bracket to where you want the 
new file to begin. Turn the top right knob to set the length of the pink bracket to be where you want the 
desired end point for the WAV file.   

4.


Touch the name of the WAV file at the top of the screen to display the WAV selection screen.  

5.


Touch 

File

 and then 

Trim

. Blackbox will ask if you want to 

Trim and Save?

  Touch OK to overwrite the WAV file 

with the portions outside of the pink bracket trimmed off. Touch anywhere else on the screen to cancel.  

6.


Save your preset to save the change to the pad.  Otherwise, the length parameter for the pad will be 
wrong when you reload the preset. 

Note: 


You may want to use File -> Save As before you trim the file to give yourself a backup copy of the file.  

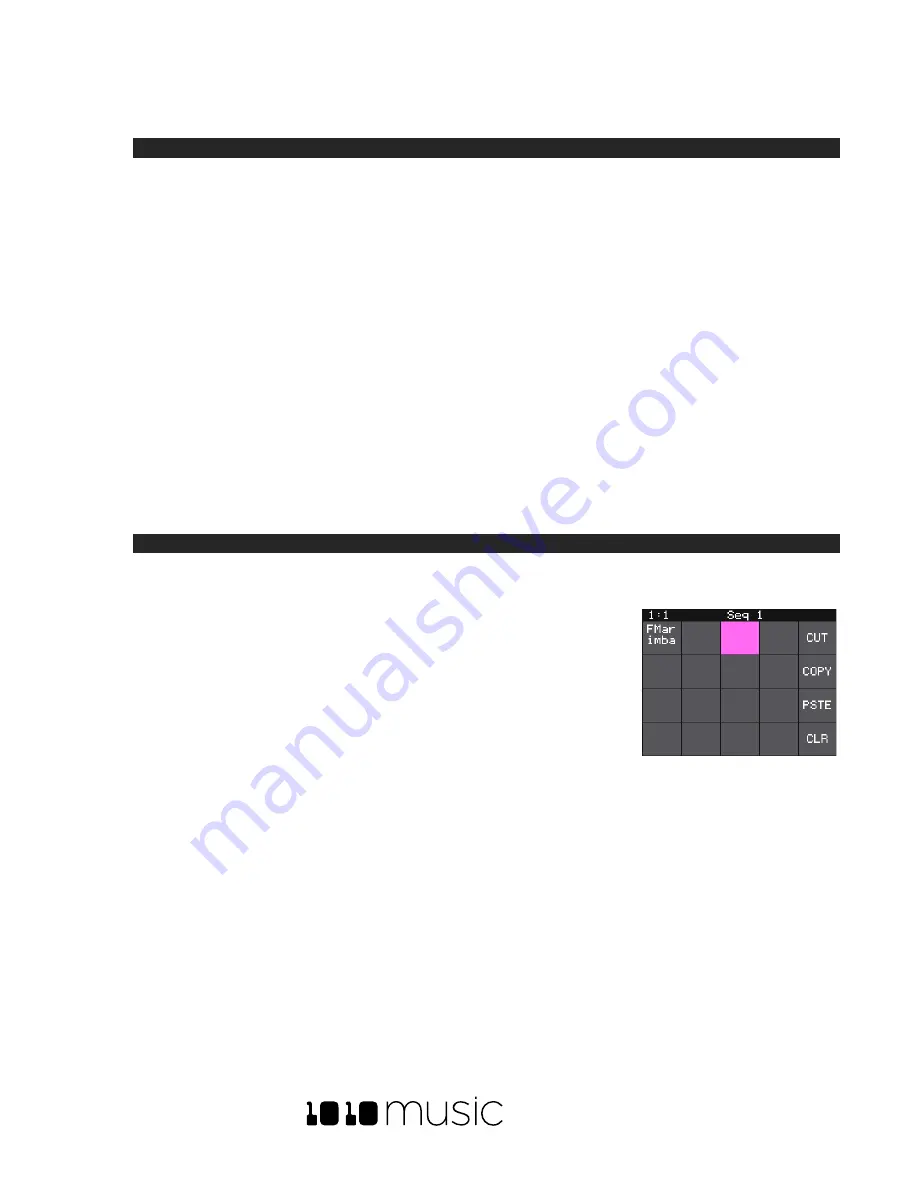
Use Clipboard Functions with Pads 

Blackbox has a slightly hidden set of clipboard buttons on the Pad screen. You can 
use these buttons to Cut, Copy and Paste between pads and to Clear a pad.  To 
access these functions, turn the lower right knob while on the Pads screen.  The 
blue Velocity bar on the right edge of the screen will be replaced with several 
clipboard buttons.  Select the pad you want to act on, then touch the button for 
the desired action.  Turn the lower right knob back the other way to go back to the 
Velocity bar.  

Manage WAV Files 

Blackbox comes with hundreds of WAV files bundled with the firmware. You can 
load WAV files into pads in order to add them to a preset.  We talked about how to configure pads previously in this 
document. Here we will discuss what tasks you can perform to manage the WAV files themselves. 

Working with WAV Files on the microSD Card 

You can use the microSD card with your computer to manage the WAV files on the card. You can load new WAV 
files onto the card or backup your existing WAV files for safekeeping.  Blackbox is compatible with all standard WAV 
files.  

You can use a microSD Adapter to insert your microSD card into your computer.  Then you may use standard file 
techniques to rename the WAV files, reorganize them into directories, delete them, copy them onto your computer 
or copy them onto other microSD cards. We recommend that you occasionally make backup copies of your WAV 
files, especially before upgrading to new firmware. 

Blackbox supports organizing WAV files into folders and subfolders. You can create your own folder structure on the 
microSD card.  

Pads Screen with Clipboard 

Side Panel


Содержание BLACKBOX 1.5

Страница 1: ...BLACKBOX 1 5 USER MANUAL ...

Страница 2: ...K START 10 Explore PADS 10 Explore KEYS 10 Explore Sequences 11 Explore Song Sections 11 Song Mode and REC STOP PLAY Buttons 11 To Save a Preset 12 CREATE A NEW PRESET 13 To Create and Name a Preset 13 WORK WITH PADS 14 To Select WAV Files and Assign Pad Modes 14 Set Up a Sample Pad 19 Single Sample Pads 19 Multi Sample Pads 21 Work with a Clip Pad 24 Work with Slicer Pads 26 To Manually Create or...

Страница 3: ...ard 34 To Delete Save As or Rename a WAV File 35 Packing Presets 36 To Pack a Preset 36 USE KEYS TO PLAY PADS CHROMATICALLY OR TO PLAY SLICED WAV FILES 37 To Play a Sample Clip or Granular Mode Pad With the Traditional Keyboard 37 To Play a Sample Clip or Granular Mode Pad With the Grid Keyboard 37 To Play Slicer Mode Pads With Keys 37 To Select a Scale on the Grid Keyboard 38 WORK WITH SEQUENCES ...

Страница 4: ...onvert them to the new file structure 52 When will my legacy WAV files get cleaned out of the root folder 52 USE TOOLS TO CUSTOMIZE YOUR BLACKBOX 53 USE MIDI DEVICES WITH BLACKBOX 55 Work with MIDI Inputs 55 To Trigger Pad Hits and Sequences with a MIDI Device 55 To Play Notes and Use Common MIDI Modulation Signals with a Specific Pad or Pads 56 To Play Notes and Use Common MIDI Modulation Signals...

Страница 5: ...e 63 To Add a WAV file to a Template Pad 63 REDUCE ALIASING WHEN PLAYING PADS CHROMATICALLY 64 PROCESSOR MANAGEMENT TIPS 65 UPDATE FIRMWARE AUDIO FILES AND PRESETS 66 Switch to a New MicroSD Card While Operating Blackbox 66 Backup Your Presets and WAV Files 66 Install New Firmware 66 Reset Blackbox Presets to Factory Settings 66 TECHNICAL SPECS 68 On Board Memory 68 Maximum Sample Length 68 Sample...

Страница 6: ...BLACKBOX USER MANUAL v 1 5 5 6 2020 8 54 00 PM Copyright 1010music LLC 2020 Page 5 of 70 Contact Us 69 APPENDIX A SUMMARY OF CHANGES 70 Changes in V 1 5 70 Changes in V 1 4 70 ...

Страница 7: ...d then record those sequences into sections which together can form a song Use blackbox to record complete compositions from the comfort of your studio or with the help of a USB power block from the seat of your train or the park bench You can also use blackbox to create materials to play in the background while you sing or perform with other instruments We can t wait to see what you create with i...

Страница 8: ...y and reverb effects 6 On the MIX screen adjust the volume and pan of each pad 7 On the PSET screen save your work and start a new creation The black bar along the top of the screen displays the blackbox playback state and recording context The number pair on the left displays the overall playback time in measures and beats The text in the middle displays the recording context In Song Mode this wi...

Страница 9: ...v files are streamed from the card Preset changes are only saved when you choose to save them Control the Volume If you are using the phones jack you will want to control the volume of the output 1 Press the TOOLS button 2 Turn the knob next to the Headphone parameter in the top right Test Your Setup Let s make sure you are getting some sound out of your blackbox before we go any deeper 1 Press th...

Страница 10: ...ANUAL v 1 5 5 6 2020 8 54 00 PM Copyright 1010music LLC 2020 Page 9 of 70 Some batteries may not be sufficient to support a USB MIDI device in addition to blackbox See Powering MIDI Devices below for more information ...

Страница 11: ...NFO to cycle between the WAV screen and the parameters screens for the selected pad Touch the page names at the bottom of the parameters screen to access additional parameter pages Touch the name of the WAV file at the top of the waveform screen to select a different WAV file for this pad Touch the grid icon in the top left corner to select a different pad to edit The colored square in the grid in...

Страница 12: ...sh PLAY to start recording a sequence After the 4 beat count down tap some pads to create a sequence By default the sequence is one bar long Blackbox will play the sequence in a loop as soon as you finish recording it If you tap some more pads you will add more pad triggers to the sequence Push REC to stop recording while the sequence still plays You can choose different sequences to record into w...

Страница 13: ...AY Play any active sequences and record any PADS or KEYS entries into the currently selected sequence This is recorded as an overlay so you can add to a sequence over time The sequences will play and record in a loop until you press STOP or deactivate them Disabled STOP Stop playing and recording all sequences To record a song section select the section you want to record into and then hold REC wh...

Страница 14: ...ll be used to store your creation Follow these steps to create and name your preset 1 Touch the PSET button below the screen to display the Preset Management screen This screen shows a list of the presets stored on the microSD card with a menu across the top The currently selected preset is highlighted in blue 2 Touch File then New in the top menu Use the onscreen keyboard to enter a name for the ...

Страница 15: ...ping Supports reverse playback along with forward and bidirectional looping 4 notes Sample multi sample mode Spread a folder full of wav files across the keyboard to get more realistic instrument pitch shifting or to map different sounds to each key on the keyboard 4 notes Clip Use for synchronized loops and quantized playback e g drum loops and guitar tracks between one and eight measures long 2 ...

Страница 16: ...d loud WAV files Once you have loaded a WAV file you will be on the Waveform screen There are a number of important features on the Waveform screen The grid icon in the top left of the screen immediately below the clock counter provides a graphical representation of which pad in the grid you are configuring You can touch it to bring up a pad selection grid Touch a square in the grid to change whic...

Страница 17: ...he output of this pad is sent to the left or right stereo channel of the selected output Note The PHONES output will always contain a mix of all of the outputs 4 Touch the desired output option to select it 5 The next menu item Mono in the example screenshot controls the polyphony of the pad Touch the menu option to select Polyphonic or Monophonic playback for this pad Sample pads support 4 note p...

Страница 18: ...back will stop No Attack The time it takes for the sound to reach its loudest level 0 0 to 100 0 The attack percentage is a logarithmic scale between 0 and 9 seconds No Decay How long it takes for the sound to go from the initial peak to the sustain level 0 0 to 100 0 The decay percentage is a logarithmic scale between 0 and 38 seconds No Sustain The volume level that the sound maintains when you ...

Страница 19: ...he root note defaults to Note 60 typically middle C If the pad mode is Slicer blackbox will play the slice that corresponds to the note played Slice 1 is played for note C2 and each subsequent slice is assigned to the next semitone If you want to use MIDI controls other than MIDI CC to modulate parameters for this pad you will need to specify the source MIDI channel here More than one pad can be a...

Страница 20: ...ny other pad in this group will stop whenever a pad in the group is triggered 9 To the right of the exclusive grouping option is the Playback quality option set to Normal in the screenshot For most WAV files the normal mode provides high quality playback with a moderate draw on the processor If you hear aliasing during playback of your WAV file touch this button and select HighQ mode HighQ mode ha...

Страница 21: ...e of the note If you have the Launch Mode set to Gate looping plays through the gate pulse and the release time If you have the Launch Mode set to Toggle looping starts to play when the initial pulse is received and continues until the terminating toggle pulse is received If Loop Mode is Bidirect and Rev is ON playback will start from the end of the sample and then loop as described but starting w...

Страница 22: ...be before or equal to LpEnd LpStr is read from the WAV file when sample is loaded and saved to the WAV file when the WAV is saved 0 to number of samples in the file Yes LpEnd Point where the looping will end when playing forwards or looping will begin when playing in reverse Expressed in samples Must be after or equal to LpStr LpEnd is read form the WAV file when a sample is loaded and saved to th...

Страница 23: ... in the current directory into this pad and map the files to notes across the keyboard based on the root notes defined in the WAV files Now use the KEYS screen or an external MIDI controller to play notes for that pad and blackbox will play the sample with the root note that is closest to the note played and pitch shift as needed to achieve the necessary tone You can also use multi sampling to map...

Страница 24: ...e of a multi sample pad to something other than sample it will load only the first sample in the folder and work with that You will need to reload the files to change back to multi sample mode Anytime you use File Load All to load a directory of samples into a pad the pad mode will automatically be changed to Sample ...

Страница 25: ...replaced with a white square until you push Play The following parameters are specific to Clip mode Parameter Description Range of Values Mod Target Loop Mode Controls whether the WAV file plays in a loop The whole WAV file will be played in the loop for clip pads Only forward looping is supported with clip pads On Off No Beat Count Enter the number of beats in the clip file to give blackbox more ...

Страница 26: ...he note is triggered But the beats in the WAV file might not be playing at the same tempo as the clock speed If you leave Sync set to None the WAV file will play in its entirety and will get out of sync with your clock If your WAV file tempo is faster than your clock tempo it will sound like the beats are running ahead of the rest of the music If your WAV file tempo is slower than your clock tempo...

Страница 27: ... The following parameters are specific to Slicer Mode Parameter Description Range of Values Mod Target Loop Mode Controls whether the slice playback is looped This does not work with Launch Mode of Trigger Use Launch Mode of Gate or Toggle if you want to loop slices ON OFF No Beat Count Enter the number of beats in the clip file to give blackbox more information to work with when synchronizing pla...

Страница 28: ...trols the order in which slice selection is advanced None This parameter will not be used to control the order of playback of slices Forward A trigger will cause the playback to move to the next slice Backwards A trigger will cause the playback to move to the previous slice Random A trigger will cause the playback to move to a randomly selected slice Stagger A trigger will cause the playback to mo...

Страница 29: ...nu item with the three dots This will display the Waveform Slicing menu 2 Touch Grid and then use a control knob to select the number of Slices to create Touch OK when you are ready to scan You can touch anyplace outside of the Slices field to cancel the scan Blackbox will automatically divide up the WAV file evenly into the number of slices you specified The slice points are shown as pink horizon...

Страница 30: ... grains advances through the source WAV file At 100 it will sound most like the original file At 50 it will be half speed At 200 it will progress through the WAV file at twice the original rate 0 to 200 Yes In granular mode the root note is used as a guide for randomizing the slice positions If the source file is a single tone make sure the root note is set correctly to achieve more musical sounds...

Страница 31: ... generated by blackbox through Out 1 5 Touch the menu item to the right of the input button to select the output for the pad This output will also be used for monitoring the input 6 Use the threshold recording option if you want to start recording when a sound level threshold is reached Touch the Thres button in the top menu to toggle threshold recording on and off The button is blue when enabled ...

Страница 32: ... a Clock below for more information about clocks and quantization 10 Touch Stop to end recording There may be a delay between when you touch Stop and when the recording ends due to quantization When the recording has stopped the main screen is displayed with the new WAV file loaded in the selected pad The clip name will be RC with a numeric suffix We will discuss changing file names and managing W...

Страница 33: ...recording The sequences or sections will continue to play If you have Rec To Play enabled the pad will also start to play Configure looping and other options as desired To Record a Multi sample pack onto blackbox 1 Create a preset for the multi sample pack Let s call it MyBank 2 Record the files into the new MyBank preset Delete any extra files that are not needed 3 Assign root notes to each of th...

Страница 34: ...back to the current song BPM Stored in the WAV acid tag Clip Slice Points The slice markers that are inserted into the file Some other software calls these Cue Points Stored in the WAV cue points Slicer Clip These parameters are saved in a format that is commonly used by other music products This means you can set these values in the other product and then use them in blackbox and the reverse When...

Страница 35: ...box has a slightly hidden set of clipboard buttons on the Pad screen You can use these buttons to Cut Copy and Paste between pads and to Clear a pad To access these functions turn the lower right knob while on the Pads screen The blue Velocity bar on the right edge of the screen will be replaced with several clipboard buttons Select the pad you want to act on then touch the button for the desired ...

Страница 36: ...ile will no longer be available for use by presets This means that any presets that previously used this WAV file will no longer include this WAV file To delete a WAV file 1 Touch a loaded pad on the Pads screen to display the Waveform Screen 2 Touch the name of the WAV file at the top of the screen to display the WAV Edit screen 3 Use the control knobs to scroll to the WAV file you want to delete...

Страница 37: ...rchive it on your computer The Pack feature was created to address these needs To Pack a Preset 1 Load the preset you want to pack 2 Push PSET and then touch File Pack Blackbox will find all of the WAV files that are assigned to pads and copy them into the folder for this preset Multi sample banks will be copied to a subfolder NOTE If you continue to add WAV files to your preset after you pack it ...

Страница 38: ...sh PADS to view the sample bank 2 Touch a pad or turn a knob to select the desired pad The pad will be pink when selected 3 Push KEYS once to display the Traditional Keyboard screen Touch the keys on the screen to play notes You can slide your finger across the screen to play adjacent notes 4 Touch the arrow buttons at the top of the screen or turn a knob to scroll left or right one note or one oc...

Страница 39: ... notes above the last slice Nothing will play for notes below C2 If you use the Grid based keyboard with a slicer pad the slices are mapped to the notes available in the selected scale The steps above show a simple example of using Keys alone to trigger different slices within one pad You can use this with Loop Mode ON with Launch Modes of Gate or Toggle to achieve different effects You could also...

Страница 40: ... Sequences Before we dive into the details of working with Sequences make sure Song Mode is disabled because you cannot record sequences when you are in Song Mode To Toggle Song Mode On and Off 1 Push the SONG button below the screen 2 Touch the on screen Song button if needed to disable Song Mode The Song button is blue when enabled and grey when disabled The context display at the top of the scr...

Страница 41: ... stop recording You can even switch which sequence you are recording into without pushing STOP To Edit and View the Notes and Pad Triggers in a Sequence You can use the INFO button with a selected sequence cell to view and edit the sequence 1 Touch a sequence cell to select it 2 Push the INFO button to drill into that cell Blackbox will display the sequence editor screen If you recorded the sequen...

Страница 42: ...d that corresponds to the sequence you want to edit 5 Push EDIT from the Piano Roll screen to access some basic editing features Edit Menu Option Action Cut Copy all of the notes and pad triggers and parameter settings in this sequence and clear the piano roll of this sequence The cut information is now in the clipboard for pasting into a sequence Copy Copy all of the notes and pad triggers and pa...

Страница 43: ...ed blackbox will wait until the start of the next Quant Size interval to start or stop the sequence 1 64 1 32T 1 32 1 16T 1 16 1 8T 1 8 1 4T 1 2T 1 bar 2 bars T Triplet Note If a value of a Note Sequencer parameter is changed during playback of the sequence the change will take effect at the start of the next loop through the sequence To Use Sequence Quick Action Buttons On the sequences screen th...

Страница 44: ...Enable Song Mode as described above 2 On the Song screen turn the top left knob to adjust the BPM of the song This number is displayed to the left of the Edit button 3 Select the song section you want to record into 4 Push INFO to display the section parameter screen Here you can set the length of the song section in bars The maximum length allowed is 32 bars 5 Push SEQS to display the sequences s...

Страница 45: ...n You can play pads and keys on top of song sections that are playing To Edit Song Sections The Edit menu on the Song screen allows you to perform basic clipboard operations and to rename the section 1 On the Song screen select the song section you want to edit 2 Touch the Edit button at the top of the screen The Edit menu will be displayed 3 Touch the menu item for the action you want to perform ...

Страница 46: ...mance The swing setting in blackbox controls the relative timing of even numbered 16th notes compared to the notes on either side of them When the swing setting is set to the default of 50 the even 16th notes occur in their metered place halfway between the notes on either side When the number is less than 50 the even 16th notes shift closer in time to the previous note When the number is above 50...

Страница 47: ... 2 Touch the FX1 or FX2 box in a lower corner of the screen to select it The currently selected effect is highlighted pink 3 Push INFO to display the effect parameters screen for the selected effect 4 Turn the knobs to adjust the effect parameters You will hear the impact of the parameter changes in real time Here are the available effect parameters Effect Parameter Settings Mod Target FX1 Delay D...

Страница 48: ...fault your pads will use the Normal mode algorithm You can configure a sample multi sample and granular pad to use the High Quality algorithm when needed Here s how to configure this option 1 Open the parameter pages for the pad that is experiencing aliasing 2 Touch ADSR to select that page 3 At the top of the screen to the right of the Exclusive grouping option is the interpolation algorithm opti...

Страница 49: ...een 2 Touch the cell you want to adjust 3 Turn one of the top two knobs to adjust the level of the currently selected pad 4 Turn one of the bottom two knobs to adjust the pan if available Note You can hear adjustments to pan and volume in real time when a sequence or pad is playing To Mute and Unmute Pads The mixer screen also allows you to mute individual pads 1 Push the INFO button on the Mix sc...

Страница 50: ...r with the name of the preset and a preset xml file within that subfolder E g the preset My Kickin Grooves will be stored as a file named preset xml in the Presets My Kickin Grooves folder When you first start working with the preset it will point to the WAV files in their source folders The Pack function will copy all of the used WAV files into the preset folder Blackbox 1 5 also changes where ne...

Страница 51: ...file or re organize your sample library You may also want to gather up all of the files used in a preset so you can move it to another microSD card or archive it on your computer The Pack feature was created to address these needs 1 Load the preset you want to pack 2 Push PSET and then touch File Pack Blackbox will copy all of the WAV files used by this preset into the preset s folder Any multi sa...

Страница 52: ...name Then use the onscreen keyboard to type in a new name Use the carat button to toggle between upper and lower case letters Touch the 123 button to display the numeric keyboard if needed When the name is complete touch enter to save the name and return to the Presets screen with the preset selected Note Renaming a preset does not load that preset To Save Current Changes as a New Preset Sometimes...

Страница 53: ...new sample recordings are managed It moves the preset files out of the root and into individual folders under the presets folder New WAV file recordings are now stored in the preset s folder But what if you have some legacy presets on your microSD card What will happen to my legacy presets How do I convert them to the new file structure When you load presets blackbox will display a single list wit...

Страница 54: ...g and Recording screen will apply to all empty pads When this is set to Per Pad these changes only change the current pad and do not change what is used for other empty pads Use Per Pad when you want to set up a Template preset with different recording configurations for each pad Lead In When this is ON blackbox will wait 4 beats before recording begins It will display the count down as a negative...

Страница 55: ...n other channels will be ignored Remember that blackbox does not automatically save changes This means that when you change presets you will lose any unsaved changes ClockSource This parameter allows you to select a source for the clock signal when you have one or more MIDI devices connected to blackbox Select MIDI Port to use the device connected via the TRS MIDI In port Choose USB Port to use th...

Страница 56: ...et You can combine these different MIDI input modes to use more than one at a time but there are some rules about how they interact First we will talk about how to use each of these MIDI play modes and then we will discuss how they interact with each other To Trigger Pad Hits and Sequences with a MIDI Device Blackbox has a MIDI Pads parameter that defines which MIDI channel can trigger pads and se...

Страница 57: ...e pad is a Slicer each MIDI note will play a slice of the file in the same way it works on the Keys screen If the pad is using multi sample the notes will trigger the appropriate sample based on root note or sample mapping Note You can have more than one pad mapped to a specific MIDI channel In this case blackbox will play all mapped pads when a note is received on that channel If you are using a ...

Страница 58: ...is received on the MIDI In channel for this pad Modulation is currently only available for pad and effect parameters Sequence and section parameters cannot be modulated To Use MIDI CC in Learn mode to Modulate Pad and Effect Parameters You can use a broad range of MIDI controls to modulate some of the pad parameters such as Filter and Pitch and some of the FX parameters such as Reverb Decay and De...

Страница 59: ...mni settings Any channel that is assigned to anything else will no longer be included in the list of channels responded to by a parameter with the Omni setting Here s another way to think about it If the MIDI In channel is assigned on a pad that pad will always respond to MIDI notes received on that channel The currently active pad will always respond to MIDI notes on a given MIDI channel if that ...

Страница 60: ...ay need to use the MIDI adapter that came with blackbox To Send MIDI Notes from a Sequence to an External MIDI Device 1 Connect your MIDI device to the blackbox MIDI TRS Output jack and configure it to use the desired MIDI channel 2 Create a sequence you want to use to drive the MIDI device You can use any WAV file in the pad used to play the sequence and then mute the pad on the Mix screen if you...

Страница 61: ...e Off We will turn off looping for this example Slice 3 This doesn t impact how the MIDI device or Keys screen plays the slices MIDI Choose a MIDI Channel not used by other pads or the GlobalMIDI setting We want to see the difference between the default MIDI behavior on the GlobalMIDI Channel and using MIDI to trigger slices so we need to use a separate channel MIDI notes received on the channel y...

Страница 62: ...to adjust the clock speed 3 You can control whether blackbox responds to the USB Device MIDI input the TRS MIDI Input or ignores MIDI clock on the TOOLS screen 1 Push TOOLS and then touch MIDI In at the bottom of the screen 2 Turn the knob next to the ClockSource parameter to select which MIDI clock source you want to use Select None to ignore the clock signal on both MIDI inputs Select All if you...

Страница 63: ...estart it Receive MIDI play and MIDI clock signal Powering MIDI Devices When you are using an external USB MIDI device with blackbox you will need to ensure you have an adequate power supply to drive both blackbox and the MIDI device Use the provided USB power cable with one of the following to ensure adequate power The power supply provided to plug blackbox into a standard power outlet A power ad...

Страница 64: ...he pad is loaded with a WAV file this will display the WAV screen In this case touch the pad mode icon on the top left of the screen and then select New Recording to remove the WAV file mapping You will now see the Load and Record screen 3 Push INFO again to see the Parameters screen for this pad 4 Choose the Pad Mode on the Main page of the Parameters screen 5 Use the buttons across the bottom of...

Страница 65: ...igure a sample multi sample and granular pad to use the High Quality algorithm when needed Here s how to configure this option 4 Open the parameter pages for the pad that is experiencing aliasing 5 Touch ADSR to select that page 6 At the top of the screen to the right of the Exclusive grouping option is the interpolation algorithm option which is set to Normal by default Touch this to display the ...

Страница 66: ... percussion sounds you won t hear the difference and this is an easy win Disable the reverb by making sure no pads have FX2 applied on the FX screen This is an expensive algorithm that can also be done off board Keep in mind that the reverb will continue to run for 60 seconds after you disable it so you won t get the benefit for a short while Use mono samples instead of stereo where appropriate St...

Страница 67: ...file Some browsers do this automatically for you 3 Prepare a microSD card with the FAT32 MSDOS Fat or ExFat format The card that comes with blackbox is formatted properly but you may need to reformat a card that came from somewhere else 4 If you want to replace the Presets with the factory image copy the full contents of the zip file onto a microSD card If you do not want to overwrite your presets...

Страница 68: ... 2020 8 54 00 PM Copyright 1010music LLC 2020 Page 67 of 70 4 Insert the microSD card into the MICRO SD slot of blackbox 5 Push the PSET button to display the Presets selection screen 6 Select any preset to load the updated presets ...

Страница 69: ... Voices Supported Blackbox supports 4 note polyphony for pads in Sample Mode 2 note polyphony in Clip and Slicer Modes and one note polyphony in Granular mode Nothing in blackbox will prevent you from trying to play 4 voices on all 16 pads at the same time However the CPU can be overloaded if you play too many notes at once while also using sequencing and fx You can reliably play 16 voices across ...

Страница 70: ... and the Quick Start Guide Connect with Other Blackbox Users There is a very active community of users of 1010music products at forum 1010music com If you have a question about blackbox that isn t answered in this manual this is your best source for help We actively monitor the wish list sub forums for ideas for future versions of our products Forum registration is free We hope to see you out ther...

Страница 71: ...t changes to where WAV files are stored when you record them and to talk about packing Packing Presets This new feature allows you to gather copies of all of the WAVs used in a preset into the preset s folder Manage Presets Updates to discuss the changes to where presets are stored and how legacy presets will be handled Work with Preset Files on the MicroSD Card Updated to reflect the change to wh...

Отзывы: