


To Use Slices to Synchronize Playback of Clip Pads:
You can use slices in a clip pad to synchronize playback of the beats in the clip. When
the value of the
Sync
parameter for a clip pad is set to
Slice
, bitbox micro will use the
location of the slices in the WAV file as the location of the “beats” for Sync purposes in
order to prevent timing drift.
But how do you get slices in a clip pad? First configure the pad in Slicer Mode, create
the slices, and then change the Pad Mode to Clip. The slices will still be visible on the
Waveform screen and can be used for synchronization.
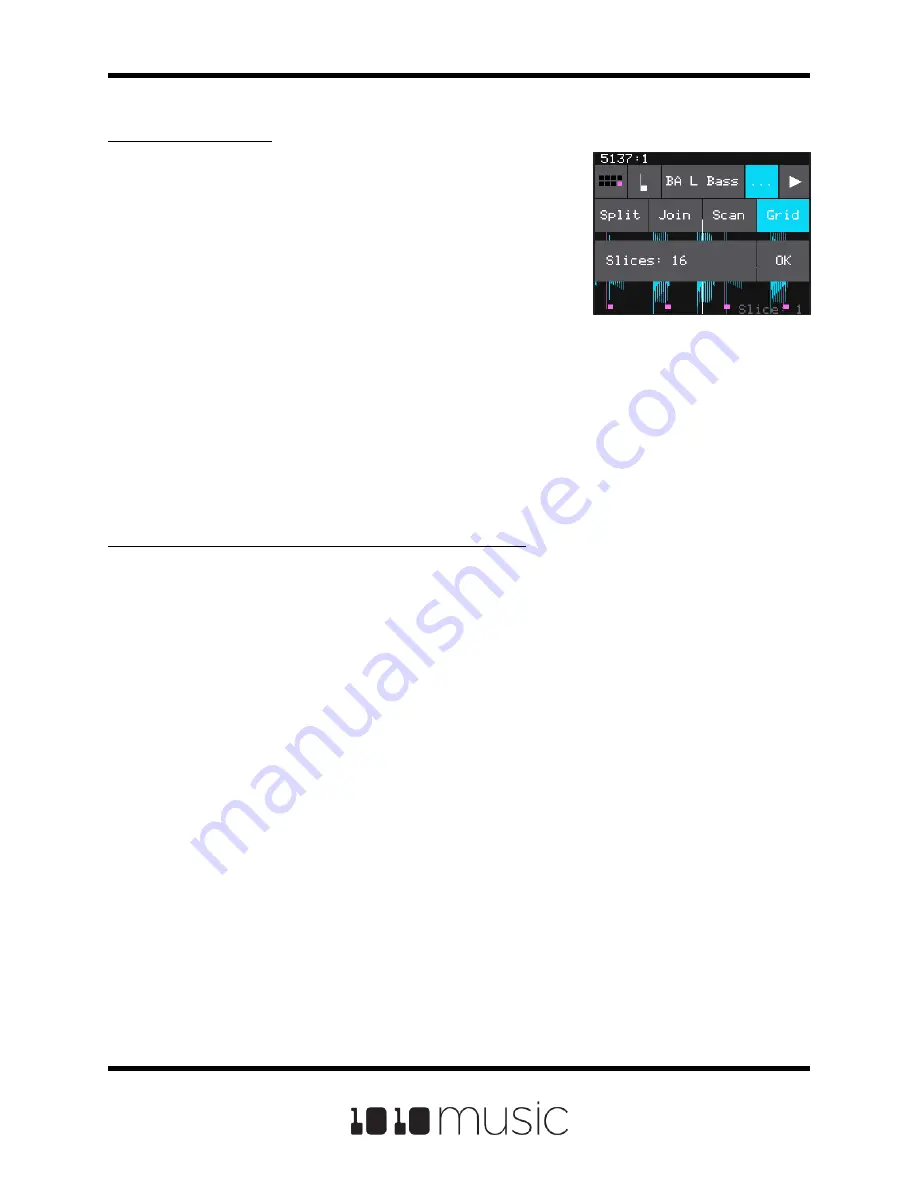
To Use Slice to Grid:
1.
From the Waveform screen for the slicer pad,
touch the menu item with the three dots “
. . .
”.
This will display the Waveform Slicing menu.
2.
Touch
Grid
and then use a control knob to
select the number of
Slices
to create. Touch
OK
when you are ready to scan. (You can
touch anyplace outside of the Slices field to
cancel the scan.) Bitbox micro will
automatically divide up the WAV file evenly into
the number of slices you specified. The slice
points are shown as pink horizontal lines with a
small pink square near the bottom.
You can adjust the results of the slice to grid or auto scan
by manually adding or removing slices to get the slices
that match your creative vision.
Copyright 1010music LLC 2020
Page 36 of 88
Bitbox Micro User Manual 1.0.7
Waveform Slicing Grid
Count


