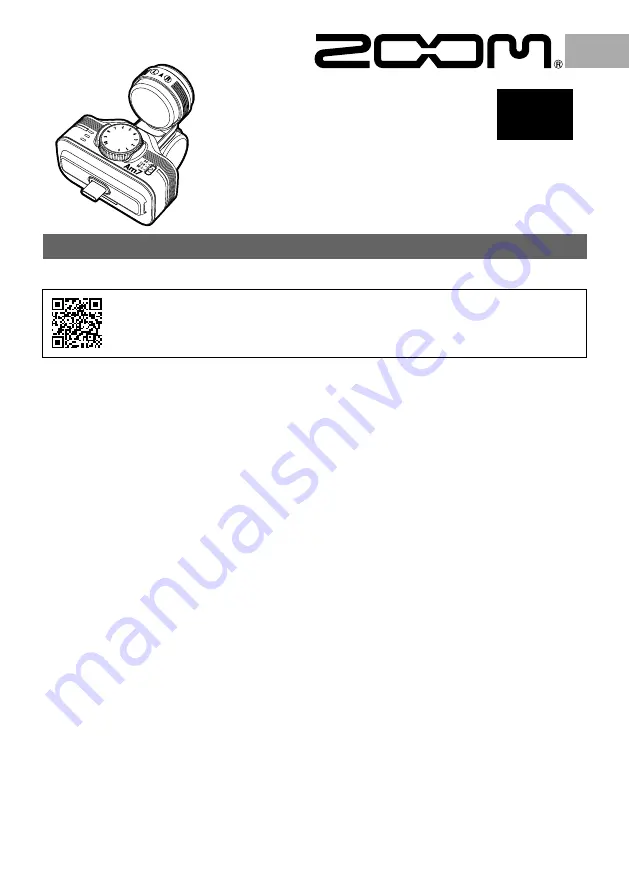
background image

OPERATION MANUAL

Mid-Side Stereo Microphone for Android

You must read the Usage and Safety Precautions before use.

The Operation Manual can be downloaded from the ZOOM website (www.zoom.jp/docs/am7). This page has 
files in PDF and ePub formats. The PDF file format is suitable for printing on paper and reading on a 
computer. The ePub format can be read with electronic document readers and is designed for reading on 
smartphones and tablets.

Thank you very much for purchasing the ZOOM Am7.
The Am7 has the following features.

•  High quality mic that connects with Android device

This stereo microphone can be connected to an Android device and used with an application that supports mic input to record 
high-quality audio.
Note: In this manual, we refer to all of these devices as “the connected device” or “the Android device.”

•  Stereo width control using mid-side mics

The mid-side (M-S) stereo mic design has a directional mid mic that covers the front and a bidirectional side mic that covers 
the sides. By adjusting the level of the side mic signal you can change the stereo width of the sound as you like.

•  Two modes: audio and video

Use the audio position when pointing the connected device like a mic toward the sound you are recording. Use the video 
position when recording with the connected device’s camera.

•  High-performance app for use with the mic

Download the free application from the Google Play and use it with the Am7 to, for example, set the recording format, edit 
audio files and apply various effects.

•  Audio monitoring without latency (only when using the ZOOM Handy Recorder app)

Using latency-free direct monitoring, the audio input through the Am7 can be output directly from the stereo mini jack without 
passing through the connected Android device.

•  Hardware controls for adjusting recording

Use the Am7 dial and switches to adjust the recording gain and stereo width.

•  Usable even with devices in cases

By removing the included case adjuster, you can connect this mic to a device even when it is in a case.

© 2020 ZOOM CORPORATION

Copying or reproduction of this document in whole or in part without permission is prohibited.

Product names, registered trademarks and company names in this document are the property of their respective companies.

Note: All trademarks and registered trademarks in this document are for identification purposes only and are not intended to infringe on the 

copyrights of their respective owners.

You might need this manual in the future. Always keep it in a place where you can access it easily.

The contents of this manual and the specifications of the product could be changed without notice. Android™ and Google Play are trademarks or 

registered trademarks of Google LLC.

Recording from copyrighted sources, including CDs, records, tapes, live performances, video works and broadcasts, without permission of the 

copyright holder for any purpose other than personal use is prohibited by law. Zoom Corporation will not assume any responsibility related to 

infringements of copyrights.

Am7

EN

Summary of Contents for Am7

Page 1: ...it with the Am7 to for example set the recording format edit audio files and apply various effects Audio monitoring without latency only when using the ZOOM Handy Recorder app Using latency free direct monitoring the audio input through the Am7 can be output directly from the stereo mini jack without passing through the connected Android device Hardware controls for adjusting recording Use the Am7...

Page 2: ...ly when connection with the device is normal The LEDs also light according to the level of the input signal Red Higher than 42 dB Higher than 12 dB Higher than 0 25 dB USBType C connector Connect to the USB Type C connector of the Android device Case adjuster Remove this if the case of the device prevents the USB Type C connector from connecting completely Connecting with the Device 1 Connect the ...

Page 3: ...nging the mic orientation 1 Turn the M S stereo mic to change its orientation Rotate the arrow on the top of the mid mic toward the subject of recording Audio position Use this position when pointing the connected device toward the sound source Video position Use this position when recording video with the built in camera Video position Audio position NOTE Hold the Am7 to the connected device tigh...

Page 4: ...en you are not using the Am7 disconnect it from the Android device and put it away If you use the Android device while the Am7 is still connected damage could occur if excessive force is applied to the connector If the connected device sends or receives data wirelessly while recording with the Am7 noise could occur in the recording Using the phone function of the Android device will also cause rec...

Page 5: ... pour par exemple régler le format d enregistrement éditer les fichiers audio et appliquer divers effets Monitoring audio sans latence seulement avec l app Handy Recorder de ZOOM Grâce au monitoring direct sans latence l audio entrant dans l Am7 peut sortir directement par le mini jack stéréo sans passer par l appareil Android connecté Commandes physiques pour régler l enregistrement Utilisez la m...

Page 6: ...eau d enregistrement Indicateur de niveau la DEL rouge s allume faiblement quand la connexion avec l appareil est normale Elle s allume aussi en fonction du niveau du signal entrant Rouge Supérieur à 42 dB Supérieur à 12 dB Supérieur à 0 25 dB Connecteur USBType C se branche au connecteur USB Type C de l appareil Android Entretoise de coque retirez la si la coque de l appareil empêche d enfoncer c...

Page 7: ...o stéréo M S pour changer son orientation Tournez la flèche située en haut du micro central Mid vers la source à enregistrer Position audio utilisez cette position si vous pointez l appareil connecté vers la source sonore Position vidéo utilisez cette position si vous enregistrez de la vidéo avec la caméra intégrée Position vidéo Position audio NOTE Quand vous utilisez les sélecteurs de l Am7 ou c...

Page 8: ...s l Am7 débranchez le de l appareil Android et rangez le Si vous utilisez l appareil Android en gardant l Am7 connecté des dommages peuvent résulter de l application d une force excessive sur le connecteur Si l appareil connecté envoie ou reçoit des données sans fil pendant l enregistrement avec l Am7 du bruit peut être enregistré L emploi de la fonction téléphone de l appareil Android entraînera ...

Page 9: ...ownload Software für das Am7 aus dem Google Play Hier können Sie etwa das Aufnahmeformat definieren Aufnahmen editieren und Effekte hinzufügen Audio Monitoring ohne Latenz nur in Verbindung mit der ZOOM Handy Recorder App Dank des latenzfreien Direkt Monitorings kann der Audioeingang des Am7 direkt über die Stereo Miniklinkenbuchse abgehört werden ohne dass das Signal das Android Gerät durchlaufen...

Page 10: ...fnahmepegel manuell Siehe Einstellen des Aufnahmepegels Pegel Anzeige Die rote LED leuchtet schwach wenn der Anschluss an das Gerät korrekt ist Die LEDs leuchten abhängig vom Eingangspegel auf Rot Über 42 dB Über 12 dB Über 0 25 dB USB Typ C Adapter Dient zum Anschluss an die USB Typ C Buchse des Android Geräts Case Adjuster Entfernen Sie ihn wenn er einen korrekten Anschluss des USB Typ C Adapter...

Page 11: ...srichtung zu ändern Richten Sie den Pfeil auf der Oberseite des Mitte Mikrofons auf die Aufnahmequelle aus Audio Position Wählen Sie diese Position wenn das angeschlossene Gerät in Richtung Schallquelle zeigt Video Position Wählen Sie diese Position wenn Sie eine Videoaufnahme mit der eingebauten Kamera machen Video Position Audio Position ANMERKUNG Pressen Sie das Am7 an das angeschlossene Gerät ...

Page 12: ...oid Gerät Beachten Sie dass der verbindende Anschluss bei anderen Anwendungen des Android Gerätes möglichweise belastet wird Lassen Sie stets Vorsicht walten solange das Am7 angeschlossen ist Wenn das angeschlossene Gerät während der Aufnahme mit dem Am7 drahtlos Daten empfängt oder sendet können Nebengeräusche in der Aufnahme auftreten Ein Einsatz derTelefonfunktion des Android Gerät sorgt zudem ...

Page 13: ...y e usatela con Am7 ad esempio per impostare il formato di registrazione editare file audio e applicare vari effetti Monitoraggio audio senza latenza solo usando la app Handy Recorder app di ZOOM Usando il monitoraggio diretto senza latenza il segnale in ingresso audio attraverso Am7 può essere inviato direttamente dal mini jack stereo senza farlo passare dall apparecchio Android collegato Control...

Page 14: ...l LED rosso si accende leggermente quando la connessione con l apparecchio è normale I LED si accendono anche in base al livello del segnale in ingresso Rosso Maggiore di 42 dB Maggiore di 12 dB Maggiore di 0 25 dB Connettore USBType C Collegate al connettore USB Type C dell apparecchio Android Case adjuster Rimuovere questo in caso la custodia dell apparecchio dovesse impedire al connettore USB T...

Page 15: ...rofono stereo M S per cambiarne l orientamento Ruotate la freccia posta sopra il microfono mid verso il soggetto della registrazione Posizione audio Usate questa posizione quando indirizzate l apparecchiatura collegata verso la fonte sonora Posizione video Usate questa posizione per registrare del video con la fotocamera incorporata Posizione video Posizione audio NOTE Tenete Am7 vicino all appare...

Page 16: ...elo dall apparecchio Android e riponetelo Se usate l apparecchio Android mentre Am7 è ancora collegato si possono verificare danni se esercitate troppa forza sul connettore Se l apparecchiatura collegata invia o riceve dati via wireless mentre registrate con Am7 si potrebbe verificare del rumore durante la registrazione Usare la funzione telefono dell apparecchio Android provocherà l arresto della...

Page 17: ...zación audio sin latencia solo cuando use la app Handy Recorder de ZOOM Por medio de la monitorización directa sin latencia la entrada audio recibida a través del Am7 puede ser emitida directamente desde la toma mini stereo sin pasar a través del dispositivo Android conectado Controles físicos para el ajuste de las grabaciones Use el dial y los interruptores del Am7 para ajustar la ganancia de la ...

Page 18: ...na cuando la conexión con el dispositivo es normal Los pilotos también se iluminan de acuerdo al nivel de la señal de entrada Rojo Superior a 42 dB Superior a 12 dB Superior a 0 25 dB Conector USBTipo C Conéctelo a la toma USB Tipo C del dispositivo Android Dispositivo de ajuste para funda protectora Extráigalo si la funda protectora del dispositivo evita que el conector USB Tipo C quede conectado...

Page 19: ...ire la flecha que está en la parte superior del micro central hacia la fuente a grabar Posición audio Use esta posición cuando oriente el dispositivo conectado hacia la fuente del sonido Posición video Use esta posición cuando vaya a grabar un video usando la cámara interna del dispositivo Posición video Posición audio NOTA Sujete firmemente el Am7 al dispositivo conectado para evitar una desconex...

Page 20: ... del dispositivo Android y guárdelo Tenga cuidado si utiliza el dispositivo Android con el Am7 conectado todavía ya que puede dañar alguna de las unidades si aplica una fuerza excesiva sobre el conector Si el dispositivo conectado envía o recibe datos de forma inalámbrica mientras está grabando con el Am7 es posible que se produzcan ruidos en la grabación El uso de la función de teléfono del dispo...

Page 21: ...の2モード 接続機器をマイクのように対象に向けて録音できる オーディオポジション とビデオ撮影に適した ビデオポジション の2通りの使い方が可能です 高機能専用アプリケーションとの連携 Am7 と連携することで 録音フォーマットの選択 音声ファイルの編集 各種エフェクトなどが使用できる専用アプリケーショ ン Handy Recorder を無料で Google Play からダウンロードできます 遅延のない音声モニターが可能 Handy Recorder 使用時のみ Am7 に入力された音声を 接続機器を経由せずにステレオミニジャックから直接出力する ダイレクトモニター 機能が使 用できます これにより遅延のないモニタリングが可能です Am7 本体スイッチで録音の調節が可能 Am7 本体のダイヤルとスイッチで録音ゲイン ステレオ幅などの調節が可能です ケースを装着したまま使用可能 付属のケ...

Page 22: ...広がりを設定します ステレオ幅の調 節 MIC GAIN ノブ 録音レベルを手動で調節し ます 録音レベルの調節 レベル LED 接続機器と正常に接続されると 赤の LED が暗く点灯します また 入力した音 の大きさに応じて各 LED が点灯します 赤 42dB以上 12dB以上 0 25dB以上 USB Type C コネクタ 接続機器の USB Type C コネクタに接続します ケースアジャスター 接続機器のケースが USB Type C コネクタの接続を妨げる場合は外します 接続方法 1 Am7 と接続機器の USB Type C コネクタを接続す る 接続機器から Am7 に電力が供給され 赤の LED が暗く 点灯します Handy Recorder など Am7 を使用するアプリケーショ ンを起動すると Am7 が使用できる状態になります 接続機器のケースが USB Typ...

Page 23: ...ケーションで Am7 を使用する 場合にも適用されます 使用方法 マイクの角度調節 1 M S ステレオマイクを回転して 角度を調節する Mid マイク上部の矢印の向きが録音対象に向くように回転します オーディオポジション 接続機器を音源に向けて録音する時に使用 します ビデオポジション 接続機器に内蔵のカメラを使ってビデオ撮影する時に使用します ビデオポジション オーディオポジション NOTE Am7 のスイッチやマイク角度を操作する場合には 接続が外れないように手で押さえながら 扱ってください 無理な力が加わると 接続が外れたり コネクタ部分が破損する場合があ ります ステレオ幅の調節 1 ステレオ幅調節スイッチを切り替える 90 120 M S 90 音の広がりが 90 度になる設定で録音します 120 音の広がりが 120 度になる設定で録音します M S Am7 本体ではステレオ...

Page 24: ...m7 と接続機器は確実に接続してください 接続が不完全だと 誤動作や故障の原因とな ります Am7 の使用後は 接続機器から取り外して保管してください 接続したまま使用している と コネクタ部に無理な力が加わり破損する場合があります Am7 で録音中に接続機器の無線通信が行われると 録音データにノイズが入ること があります また 接続機器の電話機能を使うと録音が停止します Am7 を使用す る際には 接続機器を機内モードに切り替えて使用してください 仕様 マイクロフォン 方式 M S ステレオマイク 90 120 M S 最大入力音圧 120 dBspl 入力ゲイン 3 43 dB 音質 44 1 kHz 16 bit 48 kHz 16 bit 電源 接続機器より給電 端子 USB Type C コネクタ ステレオミニジャック ライン出力 ヘッドフォン出力兼用 寸法 54 5 W 57 ...

Reviews: