


User Instructions
Model Name:
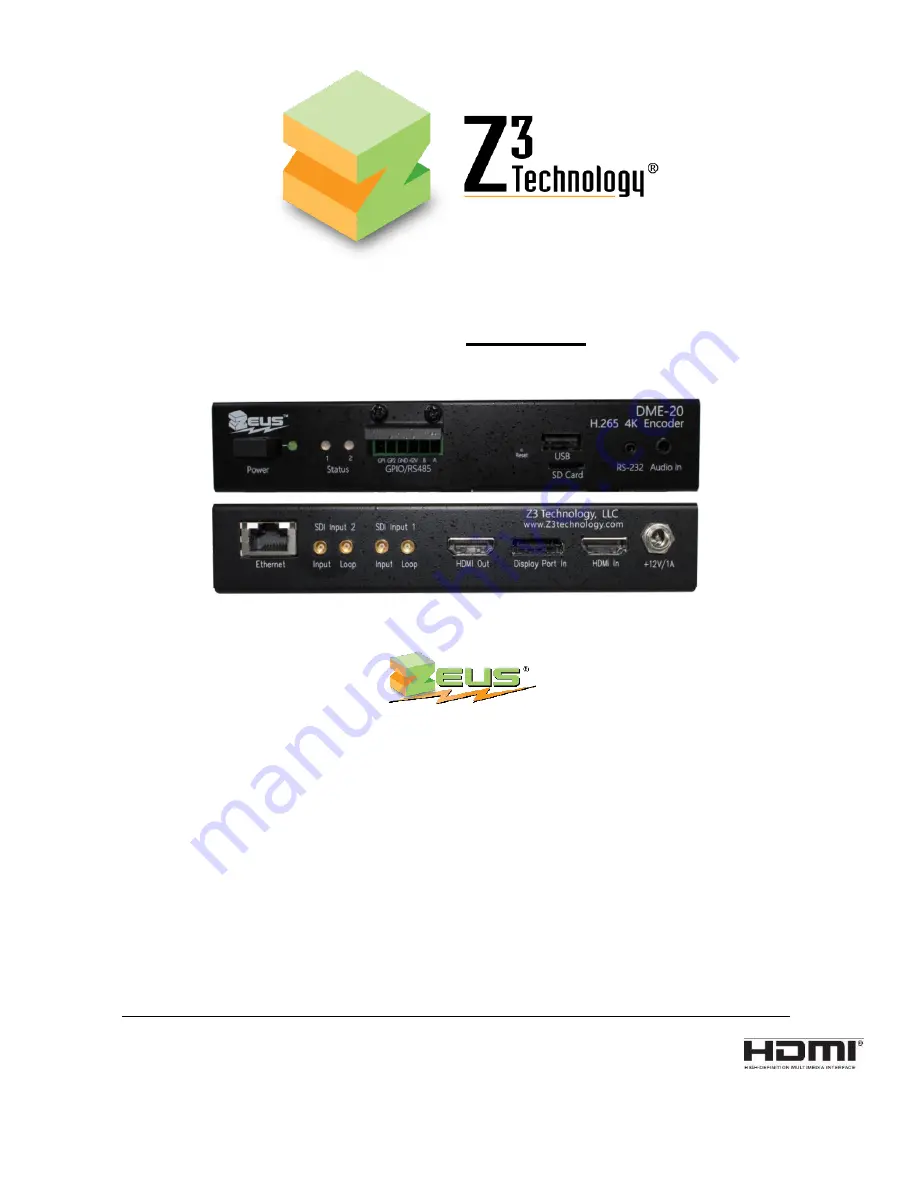
Z3-DME-20
DOC-USR-0180-05
Manual Version 1.4
Software Version 3.01
September 13, 2019
Before attempting to connect or operate this product, please read these instructions carefully and save this manual for future use.
Copyright © 2019 Z3 Technology, LLC. All rights reserved.
This document contains proprietary and confidential information of Z3 Technology, LLC ("Z3").
This document may not be used, reproduced,
disclosed, or disseminated to anyone without the prior written approval of an authorized representative of Z3.
Z3 reserves the right to change this
product at any time and without notice. All product names, trademarks, trade names, service marks, or service names mentioned in this document
are the property of their respective owners.
Z3 Technology, LLC incorporates HDMI® technology.
The terms of HDMI and HDMI High-Definition Multimedia Interface, and
the HDMI Logo are trademarks or registered trademarks of HDMI Licensing LLC in the United States and other countries.


