background image

The device can be used with the official PC player and get more features.
Please download it from our website (https://www.yeecore.biz/).
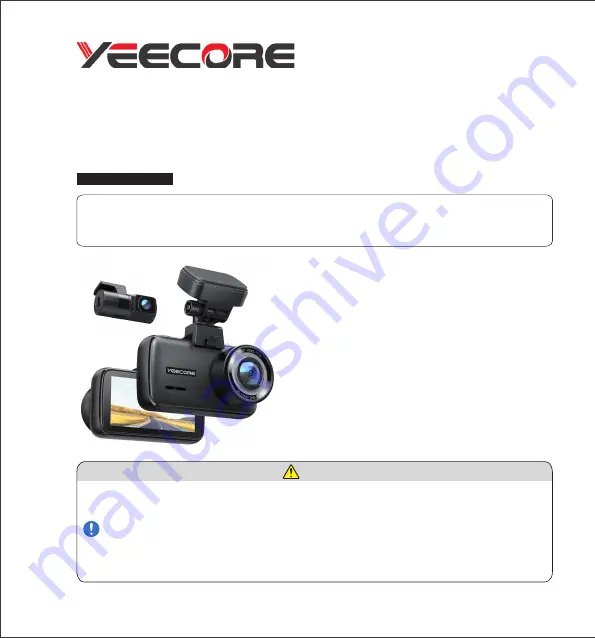
Integrated Dash Cam

User Manual

For 12v cars only

D12

Warnings

・In the accident, be sure to turn the power off and remove the SD card 

before storing it to avoid overwriting the recorded files.

・Please  don't  insert  or  remove  the  SD  card  while  the  power  is  on. 

Otherwise, this may cause damage to the SD card. Be sure to confirm that 

the power is turned off (power LED is off for at least 3 seconds) before 

inserting or removing the SD card.

Summary of Contents for D12

Page 1: ...y D12 Warnings In the accident be sure to turn the power off and remove the SD card before storing it to avoid overwriting the recorded files Please don t insert or remove the SD card while the power is on Otherwise this may cause damage to the SD card Be sure to confirm that the power is turned off power LED is off for at least 3 seconds before inserting or removing the SD card ...

Page 2: ...Twitter Contact Priority answers to questions Scan the QR code within 7 days of purchase Exclusive customer service ...

Page 3: ...https www questionpro com t AUY5NZsBB6 ...

Page 4: ...Content Note 1 Package Includes 2 Product Details 3 Installation 8 How to use dash cam 17 How to use App Wi Fi Connection 41 PC Tool 49 Frequent Q A 54 Specifications 56 Security Tips 57 ...

Page 5: ...on dash cam will turn on and work 5 If the GPS on the app can t be displayed please disconnect the WiFi first 6 Please ensure that the lens and the front rear glass is clean before use otherwise it will affect the picture quality 7 Don t disassemble or repair equipment and accessories except for maintenance personnel 8 This camera uses a wide angle lens so it may produce distortion and shadows in ...

Page 6: ...s Please make sure that the following items are included in the package Front Cam 1 Mount 1 Rear Cam 1 Crowbar 1 Electrostatic film 2 Clip 6 User Manual USB Cable 1 Rear Cable 1 Cigarette Charger Cable 1 Approx 11 5 ft ...

Page 7: ...t Please remove it when you are the first time to use it Speaker Where the sound of the recording file is output Power LED Blue Turn on wifi red long light Normal operation status slow flashing blue USB port DC 5V Plug in cigarette charger cable or rear cable Power button Turns the power on of 2 45 inch full color LCD Screen HD display of recorded ...

Page 8: ...none recording to display the File Management Video and Settings selection screens Switching screen Click button to switch front rear camera display Emergency recording Click to make an emergency recording the video will be locked Record button Press in recording to stop recording Press in none recording is to start recording Button Left Right WiFi button Turn on the WiFi Mic button ...

Page 9: ... battery directly from the vehicle s ACC line the dash cam can be in powered without using the car s cigarette charger port in parking monitoring function The hardwire kit A21 with 5V converter buy extra ASIN B09DSK58MW is necessary to activate the parking monitor Link to A21 ...

Page 10: ...let it pop out a little then pull it out After turning off the power make sure that the power LED is off for at least 3 seconds Please be careful not to lose the SD card when it pops out The SD card is so small that if dropped in the car it may get into the space between the seats After turning the power off make sure that the power indicator LED Red is off for at least 3 seconds before the next p...

Page 11: ... into the front cam Turn off the car s engine Insert the SD card After turning off the power make sure that the power LED is off for at least 3 seconds Push the card into the SD card slot until you hear a click sound 2 1 2 1 ...

Page 12: ... position for the main unit installation location Location of the Front Cam Different states have different laws regarding the installation of dash cams In general a dash cam is considered an obstruction if it occupies more than 5 inches on the driver s side or 7 inches on the passenger s side This can result in you being ticketed or worse having an accident 1 1 ...

Page 13: ...irt and grease with a commercially available cleaning cloth If there is dirt or dust on the windshield or if the electrostatic adh esive film is repeatedly removed the adsorption strength may decrease and the dash cam may fall while driving 2 1 Tear of paper from the electrostatic film s adsorption sheet side Attach the electrostatic film to the windshield at the position where you decided to inst...

Page 14: ... film s another side Tear off the paper from the adhesive tape on the mount 3 2 3 3 Attach the mount and front cam to the electrostatic film To strengthen the fixation leave the mount for at least 24 hours after attaching it and be careful not to pull or apply excessive force until the 3M adhesive tape is firmly attached 3 4 ...

Page 15: ...gle of mount so that the lens is level with the direction of vehicle travel Tighten the nut to fix the dash cam 3 5 4 Connect the front cam to the car Connect the cigarette charger cable to the mount s Type C port 4 1 ...

Page 16: ...t Turn on the car check the video and adjust the angle After connecting the front cam to the car turn on the car and adjust the mount s angle based on the video When installing the front cam adjust the angle so that the direction of the lens is horizontal to the direction of travel of the car 4 2 4 3 ...

Page 17: ...ble Cigarette Plug Adapter Connect it to your car s cigarette lighter If setting up the power cable is difficult secure the cable with the clip Hide the cigarette charger cable use a crowbar to hide the charger cable Use the crowbar to fix and hide the rear cable at the seam of the car and use the wire clip to fix the rear cable the rear windshield Overall wiring image 1 1 ...

Page 18: ...y of the radio Wipe the rear windshield clean Attach the electrostatic film Tear off the paper from the electrostatic film s adsorption sheet side Use a commercially available cleaning cloth to wipe the rear glass clean of dirt and grease Attach the electrostatic film to the rear windshield at the position where you decided to install the rear cam If there is dirt or dust on the windshield or the ...

Page 19: ...k out to make it stable Connect the rear cable to the rear cam Insert the rear cable into the rear cam Type C port Attention Adjust the YEECORE logo on the rear cam to face you and make sure the YEECORE logo is not upside down Otherwise the rear image will be upside For best results leave the rear cam in place for at least 24 hours and don t pull until the 3M adhesive tape is firmly attached Make ...

Page 20: ...de and you can view the installation video on Youtube Link https www youtube com watch v DYGMMla3J94 Connect the rear cable to the front cam Plug the other end of the rear cable into the Type C port of the front cam 3 2 ...

Page 21: ...cording Snapshots Manual recording Restart recording If the SD card used is inserted into this dash cam for the first time be sure to format it at first Failure to do so may result in poor recording or loss of recorded files After purchase if you want to use the product with the default settings follow the steps below Turn off the power make sure that the power LED is off for at least 3 seconds An...

Page 22: ...cate the device this icon will be displayed 1 2 The time to start recording GPS Tracking Depending on the condition of the dash cam it may take from a few seconds to up to 15 seconds to start recording Please check the status of the power LED before you start driving When using the dash cam for the first time after purchase leave it energized for about 1 to 2 minutes in a place without obstruction...

Page 23: ...ss the button Click the button Select System Settings Click Language Stop recording be displayed as When recording is stopped the recording icon be displayed as 2 1 Recording icon 3 1 Click the button Select System Settings and click Language ...

Page 24: ...20 Click Language Click the and buttons to select the Language click Save current selection 3 2 3 3 4 Time Setup Click the button and Select System Setup 4 1 Click the button Select System Setup ...

Page 25: ...me date click save current selection 4 2 4 3 Click to Select Time Date Click seeting the time date Click save current selection Click the button 5 Restart recording 5 1 Recording icon When recording is resumed the recording mark appears as Start recording button stop start recording ...

Page 26: ...nge the audio recording ON OFF You can also change the ON OFF setting in the Record Audio section of the The Warning will light up and a manual emergency recording file will be generated After the emergency recording file is accomplished the recording automatically returns to normal Each time you press button you can change the audio recording on off Audio recording icon Audio recording ON Audio r...

Page 27: ...off stop recording 8 1 9 1 Pressing the power button while the recording is on will take a snapshot This unit will stop recording with the car off Recording will stop and the power will be turned off Long press the power button to turn off the dash cam Short press power button ...

Page 28: ...ayed Rocrding is stopped Emergency recording In emergency recording is displayed GPS Tracking GPS status is displayed Video Time Display the duration of the current video recording Resolution Displays the resolution Audio Display the current recorded audio ON OFF Micro SD card Displays the status of the SD card as the icon Speed The driving speed ...

Page 29: ...d press the button will start recording WiFi 1 In recording press the WiFi button to start the WiFi 2 Wait 5 seconds after pressing the WiFi button Switching screen Each time you press the Mic button you can change the audio recording ON OFF Function of the buttons in video recording mode Switch Front Rear 2 Screens Front Rear 2 Screens Rear Front Mic Emergency recording During recording pressing ...

Page 30: ... recording Saved in a special folder named EVENT 1M 1M 1M 1M 1M 1M 1M 1M 1M 1M 1M 1M 1M 1M A 1 minute video will be saved mal Accident Happens or With the default settings when the SD card is full it will rewrite the oldest files that are not locked with the newest video If you operate a button immediately after the dash cam starts up or immediately after recording a recording file it may not be r...

Page 31: ...e 2 minutes 3 minutes Video Duration Video is saved in 1 minute When the G sensor detects a shock above a certain level it will lock the video and save in the EVENT folder of the SD card G Sensor Sensitivity This function allows you to set the sensitivity of the G sensor Pressing the MODE button in normal recording will lock the video and save it in the EVENTS folder on the SD card Detects shock a...

Page 32: ...on is performed for up to 3 minutes the screen will automatically go off Recording proceeds normally Exposure 0 0 Determines the amount of light that will be captured when shooting video Parking Monitor OFF When it detects a collision it will activate the emergency recording mode and in addition the recorded video will be automatically locked and saved System Beeps ON Operation sounds Auto shutdow...

Page 33: ... that the dash cam is turned on and if recording is in progress press the button to stop recording Press the Mode button Click to slide through the pages to select the video you want to play 1 Playback the video 2 Playing back videos on the dash cam 1 1 2 1 1 2 Displays the video selection screen The video selection screen Select All ...

Page 34: ...as 3 1 2 2 Select the video you want to play and press the button 3 Restart recording Playback the videos Videos are recorded in single 1 min files If the video has ended it will return to where it started Files that are protected will be displayed as Click the button in the lower right corner Click the button in the upper left corner Click the upper left corner the button ...

Page 35: ...deo Emergency video Files that are protected will be displayed as Video Duration Displays the length of the currently playing recording file Total number of files The number of the playing file Pause Start Displays the status of the operation as an icon Now Playing Paused Total Video Length Total duration of the video being played Timeline Indicates the playback progress of the video ...

Page 36: ...w window Back to Files window Playing window Faster playback X2 X4 X8 File Preview window Enter playback file directory Playing window Play Pasue the video Preview window Moves to the next video Playing window Delete Emergency files Press the button to stop recording then press the button 1 Find Emergency files 1 1 Back to Files window Enter playback file directory Playing Preview Press the Press ...

Page 37: ...pages to select the video you want to play Or click on the to find the video by filename 1 2 1 3 Click the button select the Unprotect to unlock the current locked file 2 Unlock and Delete 2 1 Select Playback and press the Event Click and Select the video then click the Image ...

Page 38: ...34 Set up Click the button 1 Display the setting menu 1 1 Click the button select the Delete File to delete the current file 2 2 ...

Reviews: