background image

YAMAHA ELECTRONICS CORPORATION, USA

 6660 ORANGETHORPE AVE., BUENA PARK, CALIF. 90620, U.S.A.

YAMAHA CANADA MUSIC LTD.

 135 MILNER AVE., SCARBOROUGH, ONTARIO M1S 3R1, CANADA

YAMAHA ELECTRONIK EUROPA G.m.b.H.

 SIEMENSSTR. 22-34, 25462 RELLINGEN BEI HAMBURG, GERMANY

YAMAHA ELECTRONIQUE FRANCE S.A.

 RUE AMBROISE CROIZAT BP70 CROISSY-BEAUBOURG 77312 MARNE-LA-VALLEE CEDEX02, FRANCE

YAMAHA ELECTRONICS (UK) LTD.

 YAMAHA HOUSE, 200 RICKMANSWORTH ROAD WATFORD, HERTS WD18 7GQ, ENGLAND

YAMAHA SCANDINAVIA A.B.

 J A WETTERGRENS GATA 1, BOX 30053, 400 43 VÄSTRA FRÖLUNDA, SWEDEN

YAMAHA MUSIC AUSTRALIA PTY, LTD.

 17-33 MARKET ST., SOUTH MELBOURNE, 3205 VIC., AUSTRALIA

© 2006                                   All rights reserved.

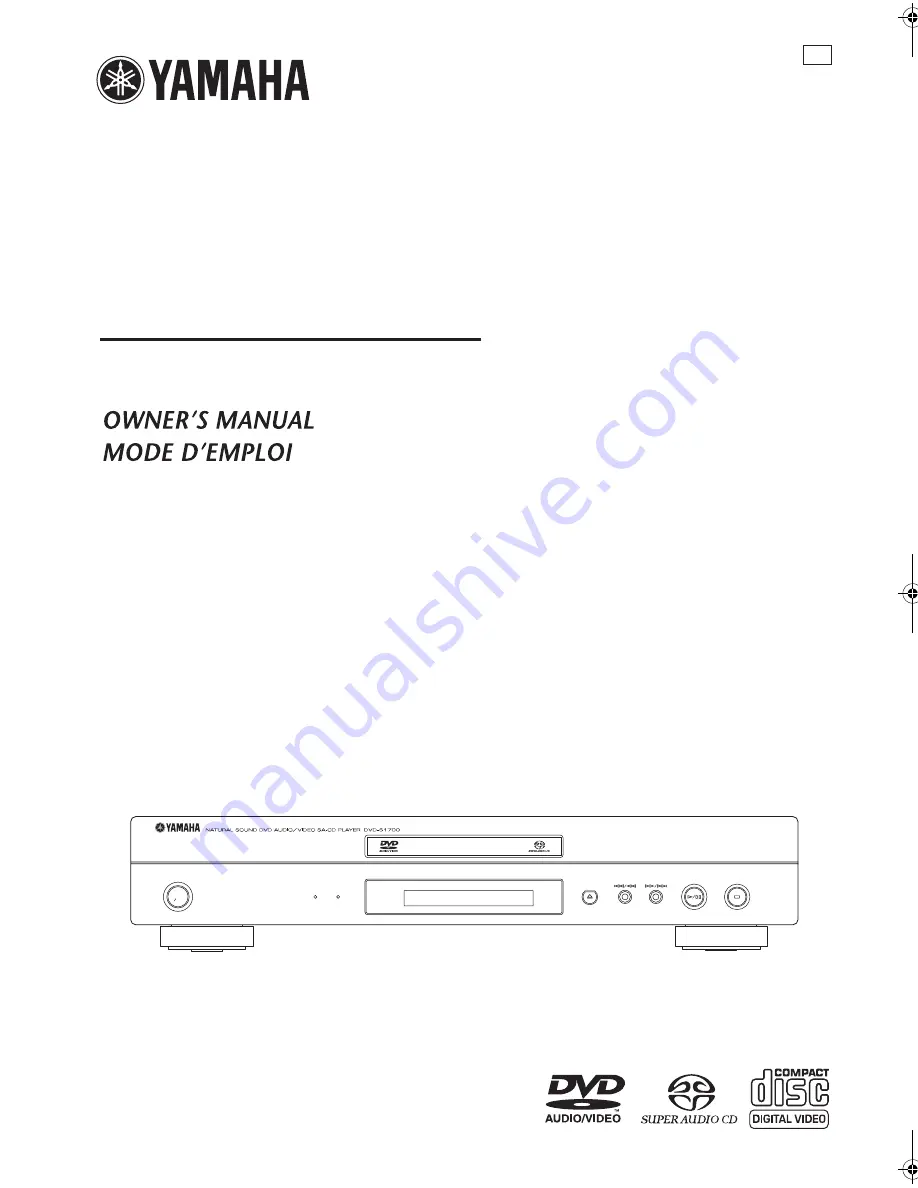
DVD AUDIO/VIDEO SA-CD PLAYER
LECTEUR DE DVD AUDIO/VIDEO SA-CD

DVD-S1700

U

HDMI

AUDIO DIRECT

STANDBY

   ON

Printed in China 

 CQX1A1126Z

00cv_DVD-S1700_U.fm  Page 1  Wednesday, June 28, 2006  4:24 PM

Summary of Contents for DVD-S1700

Page 1: ...DVD AUDIO VIDEO SA CD PLAYER LECTEUR DE DVD AUDIO VIDEO SA CD DVD S1700 U HDMI AUDIODIRECT STANDBY ON ...

Page 2: ...o replace your obsolete outlet Do not defeat the safety purpose of the polarized plug 13 Power Cord Protection Power supply cords should be routed so that they are not likely to be walked on or pinched by items placed upon or against them paying particular attention to cords at plugs convenience receptacles and the point where they exit from the product 14 Lightning For added protection for this p...

Page 3: ...ound to be the source of interference which can be determined by turning the product OFF and ON please try to eliminate the problem by using one of the following measures Relocate either this product or the device that is being affected by the interference Utilize power outlets that are on different branch circuit breaker or fuse circuits or install AC line filter s In the case of radio or TV inte...

Page 4: ... do not pull the cord 11 Do not clean this unit with chemical solvents this might damage the finish Use a clean dry cloth 12 Use only the voltage specified on this unit Using this unit with a higher voltage than specified is dangerous and may cause fire damage to this unit and or personal injury YAMAHA will not be held responsible for any damage resulting from use of this unit with a voltage other...

Page 5: ...cept DVD Audio MP3 WMA JPEG 17 Random playback except DVD DivX SA CD 17 Program playback CD 18 Disc menu operation DVD VCD SVCD 18 Using the DVD menu 18 Using the Video CD playback control PBC menu VCD SVCD 19 On screen display OSD menu DVD VCD SVCD SA CD 19 Using the OSD menu DVD VCD SVCD CD 19 Displaying text information SA CD 20 Zooming pictures DVD Video VCD SVCD DivX JPEG 20 Viewing angles DV...

Page 6: ...ng the SA CD configuration 30 Setting the cut off frequency SA CD only 30 Video setup menu 31 Setting the TV display 31 Setting the TV type 31 Selecting the black level U S A and Canada models only 31 Selecting the closed caption U S A and Canada models only 32 Setting the still mode 32 Selecting the progressive scan function 32 Switching the SCART video out U K and Europe models only 33 Adjusting...

Page 7: ...eo including DivX 6 with standard playback of DivX media files CD R W DVD R W and DVD R W cannot be played unless finalized Copyright protected WMA files cannot be played with this unit Some discs cannot be played depending on the recording conditions such as the PC environment and application software The characteristics and condition of some discs materials scratches curvature etc may result in ...

Page 8: ... antistatic spray intended for analog records Check your package to make sure it contains the following items Patent information This product incorporates copyright protection technology that is protected by method claims of certain U S patents and other intellectual property rights owned by Macrovision Corporation and other rights owners Use of this copyright protection technology must be authori...

Page 9: ...mode is set to on 4 AUDIO DIRECT indicator Lights up when you select the AUDIO DIRECT mode by pressing AUDIO DIRECT on the remote control 5 Front panel display Displays playback information or settings 6 Opens or closes the disc tray 7 b w Searches backward Moves to the previous chapter or track 8 f a Searches forward Moves to the next chapter or track 9 p e Starts or pauses playback 0 s Stops pla...

Page 10: ...ce 5 D MIX indicator DVD Audio only Lights up when playing the disc that allows down mixing of the multi channel audio source 6 Disc indicators Display the icon for the disc type 7 Information display Displays various information such as a title chapter track number or elapsed playing time y You can adjust the brightness of the front panel display using DIMMER on the remote control Front panel dis...

Page 11: ...GITAL OPTICAL jack Connect to the optical input jack of your AV receiver 0 HDMI jack Connect to the HDMI input jack of your HDMI component q VIDEO OUT S VIDEO jack Connect to the S video input jack of your AV receiver w VIDEO OUT COMPONENT jacks Connect to the component input jacks of your AV receiver Remote control connectors and RS 232C terminal The REMOTE CONTROL IN OUT connectors and the REMOT...

Page 12: ... mode or setting 7 SETUP Accesses or exits from the setup menu of this unit 8 STOP 7 Stops playback 9 PAUSE 8 Pauses playback temporarily Frame by frame playback 0 SKIP l22 33l Moves to the previous next chapter or track q TOP MENU Displays the top level disc menu w Cursors Selects an item in the currently displayed menu ENTER Confirms the menu selection Remote control HDMI POWER DIMMER MULTI 2CH ...

Page 13: ...lects a sound mode Stereo or Multi channel Changes the SA CD playback area p PROG Accesses the program setup menu to program disc tracks or exit from its menu a RANDOM Plays tracks in random order s REPEAT Repeats the chapter track title group or disc d A B Repeats a specific segment f ENTER Confirms the menu selection g SLOW SEARCH 22 33 Searches backward or forward h PLAY 3 Starts playback j ON ...

Page 14: ...to the corresponding input jacks of your audio component such as a stereo amplifier using the supplied audio pin cable You can connect a subwoofer to the SUBWOOFER jack Connecting an AV receiver with 5 1ch digital input jacks Analog connections If you want to reproduce multi channel Super Audio CD SA CD and DVD Audio connect AUDIO OUT 6ch discrete jacks of this unit to the corresponding input jack...

Page 15: ...XIAL OPTICAL jacks If you want to enjoy Dolby Digital DTS and MPEG formats you must connect this unit to an AV receiver that supports these formats This unit has SCART composite video S video component video and HDMI output jacks If your AV receiver has video output jacks connect your receiver and then your TV so that you can use one TV for several different video sources LD VCR etc by simply swit...

Page 16: ...of this unit to S video input jack of your AV receiver and then to that of your TV using a commercially available S video cable Component video jacks D Component video connections achieve higher fidelity color reproduction than S video connections by transmitting video signals on separate wires for luminance Y green and chrominance PB blue PR red Connect VIDEO OUT COMPONENT jacks of this unit to t...

Page 17: ...or Dispose of the batteries correctly in accordance with your local regulations Using the remote control Use the remote control within 6 m 20 ft approx of this unit and point it toward the remote control sensor Do not spill water or other liquids on the remote control Do not drop the remote control Do not leave or store the remote control in the following types of conditions places of high humidit...

Page 18: ...cs and output them in PAL format NTSC Select this if the connected TV is an NTSC system TV It will change video signals of PAL discs and output them in NTSC format Step 3 Setting a TV type Notes 1 2 SETUP GENERAL AUDIO SPEAKER VIDEO HDMI DISC DVD Audio mode SA CD mode OSD Language Parental Rating Parental Password Screen Saver Auto Power Off Sleep Timer Select Enter Move Return 1 1 VIDEO TV Displa...

Page 19: ...1 Press SETUP The setup menu appears 2 Press repeatedly to highlight DISC and then press ENTER DISC menu appears 3 Press repeatedly to highlight AUDIO Language or Subtitle Language or DVD Menu Language 4 Press to select a language To select the language not in the list 1 Select Others under AUDIO Language or Subtitle Language or DVD Menu Language 2 Press ENTER 3 Use the numeric buttons 0 9 to ente...

Page 20: ...ront panel display 5 To resume playback press PLAY 3 The disc is played back from the last stopping point y As long as you do not eject a disc you can resume playback even if you turn off this unit 6 To cancel resume mode press STOP 7 twice It may not be possible to play certain MP3 JPEG DivX discs due to the configuration and characteristics of the disc or the recording conditions When you play a...

Page 21: ...D MP3 WMA JPEG DivX Chapter repeats the current chapter Title repeats the current title Track repeats the current track Group repeats the current group Folder repeats the current folder All repeats the entire disc OFF exits from repeat mode This feature may not be available with some discs For VCD and SVCD repeat playback is not available when the PBC mode is selected Repeating a section except DV...

Page 22: ...am play content is cleared Many DVD and Video CD version 2 0 only discs include original navigational menus called DVD menus and Video CD playback control menus These menus provide a convenient way to operate the disc Using the DVD menu 1 Press MENU The DVD menu appears on the TV screen Depending on the disc the DVD menu may appear once you load the disc 2 Use or the numeric buttons 0 9 to select ...

Page 23: ...eo DVD Audio VCD SVCD CD 1 Current title or group number Total number of titles or groups 2 Current chapter or track number Total number of chapters or tracks 3 Elapsed time 4 Time remaining 5 Elapsed time You can input numbers for time search 6 Audio information 7 Current angle number Total number of available angles 8 Current subtitle number Total number of available subtitle languages 9 Data tr...

Page 24: ...unction is not available on the disc you are playing To select a page DVD Audio 1 Press repeatedly to highlight q and then enter a page number using the numeric buttons 0 9 2 Press ENTER To select a category of time VCD SVCD CD Press repeatedly to highlight w and then press ENTER to toggle between the category of time To exit from the OSD menu Press ON SCREEN Displaying text information SA CD Some...

Page 25: ... Breton Bulgarian Byelorussian Catalan Croatian Czech Danish Dutch English Faroese Finnish French German Hungarian Icelandic Irish Italian Kurdish Latin Macedonian Greek Hebrew Moldavian Norwegian Polish Portuguese Romanian Russian Serbian Slovak Slovenian Spanish Swedish Turkish Ukrainian Some discs cannot be played depending on disc characteristics or recording conditions Some external subtitle ...

Page 26: ...en press ENTER 3 Enter a four digit password using the numeric buttons 0 9 and then press ENTER 4 Press to select a track and then press ENTER There are three types of SA CD discs single layer dual layer and hybrid Each type may contain up to two areas of recorded information a High Quality Stereo area and a High Quality Multi channel area You can switch between the SA CD multi channel and SA CD s...

Page 27: ...om the selected file automatically Displaying the thumbnail screen JPEG 1 Press MENU during playback The thumbnail pictures appear on the TV screen 2 Press SKIP l22 33l to display the other pictures on the previous next page 3 Press to highlight one of the pictures and then press ENTER to start playback 4 Press STOP 7 to return to the data disc menu Rotating pictures JPEG During playback press to ...

Page 28: ...Surround L R 1ft to 40ft 0 3m to 12 0m Initialize On Off Level Front L Center Front R Surround L Surround R Subwoofer 0dB to 12dB Test Tone Off Manual Auto Initialize On Off SA CD Config Config 1 Config 2 Config 3 CUT OFF Frequency 60 80 100 120 VIDEO TV Display 16 9 4 3 Pan Scan 4 3 Letter Box TV Type NTSC PAL Black Level U S A and Canada models only On Off Closed Caption U S A and Canada models ...

Page 29: ...e setting item If the selected menu item has submenus only a right arrow is displayed on the side of the setting item In this case press and then repeat step 3 4 Press to toggle the setting items or to adjust the parameter Setup menu operation REPEAT SUBTITLE SETUP AUDIO ZOOM ANGLE PAUSE STOP SKIP PLAY A B SLOW SEARCH ENTER CLEAR ONSCREEN TOPMENU MENU RETURN ENTER SETUP RETURN ENTER 1 2 GENERAL AU...

Page 30: ...The rating levels are from 1 to 8 and are country dependent You can prohibit playback of certain discs that are not suitable for your children or play certain discs in alternative scenes 1 Select Parental Rating in GENERAL menu 2 Enter your four digit password using the numeric buttons 0 9 For details about the password see Changing the parental password below If the password is correct Parental R...

Page 31: ...the system You can reset all options and your personal settings to the initial factory settings except Parental Rating and Parental Password 1 Select Factory Default in GENERAL menu 2 Enter your four digit password using the numeric buttons 0 9 For details about the password see Changing the parental password on page 26 The confirmation screen appears 3 Press to select Yes to reset the system and ...

Page 32: ...ital terminal such as the coaxial or optical terminals Discs are recorded at a certain sampling rate The higher the sampling rate the better the sound quality Select LPCM Output in AUDIO menu 48KHz Select this to play back discs recorded at the sampling rate of 48 kHz All 96 kHz PCM data streams if available are converted to the sampling rate of 48 kHz 96KHz Select this to play back discs recorded...

Page 33: ...ess The confirmation screen appears 3 Select Yes to reset the setting and then press ENTER Size settings are reset to the initial factory settings Setting speaker distances You can set the distances for individual speakers Placing all speakers except for the subwoofer at equal distances from the listener is the most ideal way of the speaker positioning in 5 1 channel system Select Distance in SPEA...

Page 34: ... under Level in SPEAKER menu 2 Press to select Off Manual or Auto Off Select this to output no test tone Manual Select this to output the test tone manually Auto Select this to output the test tone from each speaker automatically 3 For Auto press ENTER to output the test tone For Manual press to select each speaker and then press ENTER to output the test tone Initialize You can reset Level setting...

Page 35: ...tterbox Setting the TV type This menu contains the options for selecting the color system that matches your TV For details see Step 3 Setting a TV type on page 14 Selecting the black level U S A and Canada models only If you set the TV Type to NTSC see Step 3 Setting a TV type on page 14 set this setting shift to On to improve the color contrast during playback Select Black Level in VIDEO menu On ...

Page 36: ...V through the component video jacks see Component video jacks D on page 12 This function is enable you to enjoy accurate color reproduction and high quality images This unit features DCDi circuit Select Progressive Scan in VIDEO menu On Select this to enable the progressive scan function The confirmation screen appears if you select this In this case select Yes to set to On and then press ENTER Of...

Page 37: ...s to reduce video noise Control range 0 to 6 Gamma Set this to adjust the intensity of the picture non linearly Control range 6 to 6 Chroma level Set this to adjust the density of the color Control range 6 to 6 Chroma delay Set this to adjust the advance delay of the chroma signal for a perfectly clear picture Control range 2 to 2 True Life Set this to produce more dynamic picture by increasing th...

Page 38: ...icture quality may decrease y Refer to the manual supplied with your monitor to select the appropriate aspect ratio Selecting the wide screen format Set the aspect ratio of the projected images on the screen This function is only available for progressive scan and HDMI output Select Wide Screen Format in HDMI menu NL Stretch Select this to display of 4 3 image on the 16 9 screen with non linear st...

Page 39: ...an switch an angle mark display on or off when sequences recorded from different camera angles are played back Select Angle Mark in DISC menu On Select this if you want to display an angle mark An angle mark is displayed continuously Off Select this if you do not want to display an angle mark An angle mark appears for five seconds and then disappears Selecting the PBC playback control function You...

Page 40: ...indi 1819 Norwegian 2425 Thai 3018 Bihari 1218 Hungarian 1831 Oriya 2528 Tibetan 1225 Breton 1228 Icelandic 1929 Panjabi 2611 Tigrinya 3019 Bulgarian 1217 Indonesian 1924 Pashto Pushto 2629 Tonga 3025 Burmese 2335 Interlingua 1911 Persian 1611 Turkish 3028 Byelorussian 1215 Irish 1711 Polish 2622 Turkmen 3021 Cambodian 2123 Italian 1930 Portuguese 2630 Twi 3033 Catalan 6765 Japanese 2011 Quechua 2...

Page 41: ... check that the resolution is supported by the HDMI compatible monitor you have connected Otherwise follow the steps below to change the setting to Auto 1 Press s twice on the front panel or STOP 7 twice on the remote control to stop playback 2 Press and hold s and p e on the front panel at the same time for three seconds 33 If the HDMI indicator flashes orange check that you have connected this u...

Page 42: ...that the disc is defective by trying another disc If you have recorded a JPEG MP3 or WMA disc yourself check that your disc contains at least ten JPEG picture files or five MP3 WMA music tracks Check the region code 3 Picture freezes momentarily during playback Check the disc for fingerprints scratches and clean it with a soft cloth wiping from the center to the edge 4 This unit does not respond t...

Page 43: ...our personal content and easy to use tools from DivX com Dolby Digital Digital surround sound system which is developed by Dolby Laboratories provides completely independent multi channel audio With 3 front channels left center and right and 2 surround stereo channels Dolby Digital provides five full range audio channels With an additional channel especially for bass effects called LFE or low freq...

Page 44: ...han the user set level Playback control PBC An on screen menu recorded on a Video CD or SVCD that enables interactive playback and searching Progressive Scan A method of displaying all scanning lines in a frame at once reducing flicker noticeable on a larger screen and creating a sharp and smooth image Region code Many DVD discs include a region code so that the copyright owner can control DVD sof...

Page 45: ...audio output is automatically changed to 48 kHz 16 bits signals or less Audio format Analog output setting HDMI Audio Auto 1 PCM Off DVD Video Dolby Digital Multi channel Dolby Digital PCM multi 2 Off Stereo PCM 2ch DTS Multi channel DTS PCM multi 2 Stereo PCM 2ch MPEG Multi channel MPEG PCM multi 2 Stereo PCM 2ch PCM 2ch 4 Multi channel Stereo PCM 2ch PCM 2ch DVD Audio Multi Multi channel PCM PPC...

Page 46: ...kHz 2 Hz 20 kHz Distortion and Noise 1 kHz 0 002 TV STANDARD Number of lines PAL 625 NTSC 525 Vertical frequency PAL 50 Hz NTSC 60Hz Playback Multistandard PAL NTSC CONNECTIONS Video output 1 Cinch yellow S video output 1 Mini DIN 4 pins Component video output Y output 1 Cinch green PB CB output 1 Cinch blue PR CR output 1 Cinch red SCART U K and Europe models 1 Euroconnector Digital output Coaxia...

Page 47: ...RG GERMANY YAMAHA ELECTRONIQUE FRANCE S A RUE AMBROISE CROIZAT BP70 CROISSY BEAUBOURG 77312 MARNE LA VALLEE CEDEX02 FRANCE YAMAHA ELECTRONICS UK LTD YAMAHA HOUSE 200 RICKMANSWORTH ROAD WATFORD HERTS WD18 7GQ ENGLAND YAMAHA SCANDINAVIA A B J A WETTERGRENS GATA 1 BOX 30053 400 43 VÄSTRA FRÖLUNDA SWEDEN YAMAHA MUSIC AUSTRALIA PTY LTD 17 33 MARKET ST SOUTH MELBOURNE 3205 VIC AUSTRALIA 2006 All rights ...

Reviews: