YAKUMO DVD RW RECORDER, Manual
The YAKUMO DVD RW Recorder is a powerful device that allows you to effortlessly record, edit, and store your favorite multimedia content. With its user-friendly interface and extensive functionality, this product ensures exceptional performance. Enhance your experience by downloading the free user manual from manualshive.com, providing detailed instructions for optimal use.
Share
Download


Reviews:
No comments
Related manuals for DVD RW RECORDER

DR-22WL
Brand: Tascam Pages: 21

VOICE & MUSIC DM-10
Brand: Olympus Pages: 101
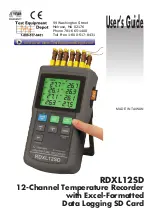
RDXL12SD
Brand: Omega Pages: 20

VoiceTracer DVT2050
Brand: Philips Pages: 2

VoiceTracer VTR9100
Brand: Philips Pages: 36

VoiceTracer VTR5166
Brand: Philips Pages: 38

VTR6900
Brand: Philips Pages: 51

VTR6600
Brand: Philips Pages: 51

VTR5160
Brand: Philips Pages: 44

VTR5100
Brand: Philips Pages: 45

VoiceTracer VTR5110
Brand: Philips Pages: 52

VTR8060
Brand: Philips Pages: 70

VoiceTracer VTR5102
Brand: Philips Pages: 58

VoiceTracer DVT4010
Brand: Philips Pages: 58

VTR7610
Brand: Philips Pages: 70

VTR8010
Brand: Philips Pages: 71

VTR7300
Brand: Philips Pages: 72

VTR5102Pro
Brand: Philips Pages: 64


