Xtream HW2765HAD, Operation Manual
The Xtream HW2765HAD Operation Manual is a comprehensive user guide that provides detailed instructions on operating and optimizing your HW2765HAD device. Easily downloadable for free from our website, this manual ensures a seamless user experience, allowing you to explore and maximize the potential of your product.
Share
Download


Reviews:
No comments
Related manuals for HW2765HAD

MAV5257
Brand: Maytag Pages: 24

Lavadora EMW580E3
Brand: EAS Electric Pages: 69

EMW7440GW
Brand: EAS Electric Pages: 138

SXPW2621
Brand: Stanley Pages: 24

LNC6766
Brand: Admiral Pages: 6

BANDEAU HP F2
Brand: SOGEDIS Pages: 23

S0S60
Brand: Acorn Safety Pages: 4

7330362
Brand: Clarke Pages: 28

10026453
Brand: oneConcept Pages: 36

14 WHIRL-A-WAY
Brand: BE Pages: 32

WIXL 163
Brand: Indesit Pages: 16

220-118
Brand: Hamron Pages: 23

CTF50
Brand: ZANKER Pages: 20
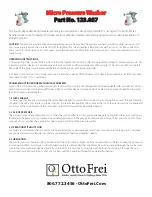
123.087
Brand: Otto Frei Pages: 2

JW-MD1080A
Brand: Haier Pages: 52

JW-PK90A
Brand: Haier Pages: 45

EMW1056GW
Brand: EAS Electric Pages: 150
HBF600T
Brand: Haier Pages: 10


