8 Katom St., Misgav Industrial Park, 2017400, Israel
Tel: +972-4-9951999; Fax: +972-4-9990287
PM0622.10 – Blue Steel CXT3000/CXT4000 CompletePBX Getting Started Guide (electronic version)
Page
1
of
7
Blue Steel CXT3000/CXT4000 CompletePBX:
Getting Started Guide
Package Contents
Blue Steel CXT3000/CXT4000
(2U 19'' width unit)
Power cord
Support hardware for 19'' cabinet
CompletePBX 5 software preinstalled
on the hardware
4 x Astribank power cables
Key for hard disk drive bays
Prerequisites
You need a computer equipped with an Internet browser. Firefox is recommended.
Step 1: Earthing the Unit
1)
For safety and performance reasons, it is essential to ground the unit.
Note: Not properly grounding this device will void your warranty!
2)
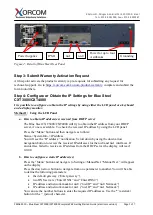
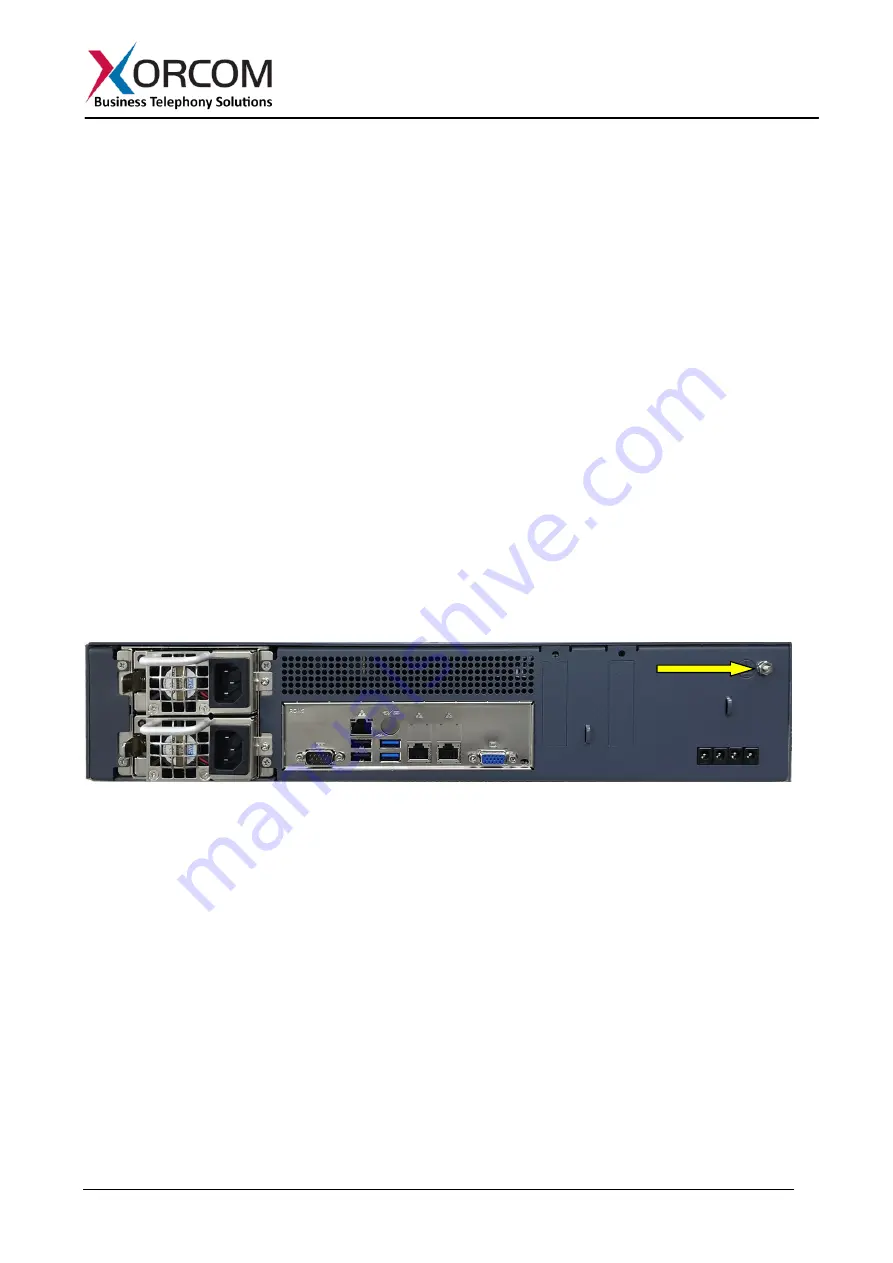
Use a star washer to securely connect a grounding tab to the grounding screw on the rear
panel.
3)
Using 12-16 gauge wire, connect the grounding tab to a reliable ground.
4)
All Xorcom hardware should be connected to a common grounding point.
Figure 1: Grounding Screw on Blue Steel Rear Panel
Step 2: Powering Up the Unit
1.
Connect the unit to the LAN.
2.
Connect the power cord to the device and turn on the power using the power button on the
front panel.
3.
The device startup process takes about 2 minutes.
4.
The startup time depends on the number of telephony ports installed in your Blue Steel
CXT3000/CXT4000 unit.
5.
You will see the “Loading...” notification on the Liquid Crystal Display (LCD) panel.
6.
When the booting process is near completion, “XORCOM” will appear on the LCD panel.


