
INSTALLATION/OWNER’S MANUAL
DVD Multimedia Receiver with 7” Touch Screen Display
XM-DTSB914
-4-
-5-
-6-
-7-
-8-
Theunit can play the following discs only
Note: The unit is compatible with DVD, DVD+/-R, VCD 1.0/2.0/3.0, SVCD, CD, CD-R, CD-RW and JPEG
CLASS 1 LASER PRODUCT
Laser porDuct symbol: located on the rear panl of the unit, indicate this player is a class laser product, only
use weak laser and on hazardous radiatian outside of the unit.
● Read through this instruction manual before installation and use.
● Do not touch the power plug with wet hand.
● Switch off the main power when the unit is not in use. (Disconnect the power pulg from the power outlet
when you do not intend to use the unit for a prolonged period of time). Before moving the unit, remove the
disc from the unit/tray first.
● Do not open the cover or touch any of the components exposed out of the unit, only for qualified
technicians.
● Do not expose the unit under direct sunlight oe nearby objects that radiate heat to avoid damaging the unit.
● Do not place the unit in moist and humdi conditions.
● Place the unit on a flat surface and ventilative condition, place ensure the ventilation holes are not covered
to avoid overheating acd malfunciton.
● Clear the panel and case with soft dry cloth only, do notaooly any kind of thinner, alcohol or sprays.
● The apparatus shall not exposed to dripping or splashing and that no objects filled with liquids, such as
vases shall be placed on the apparatus.
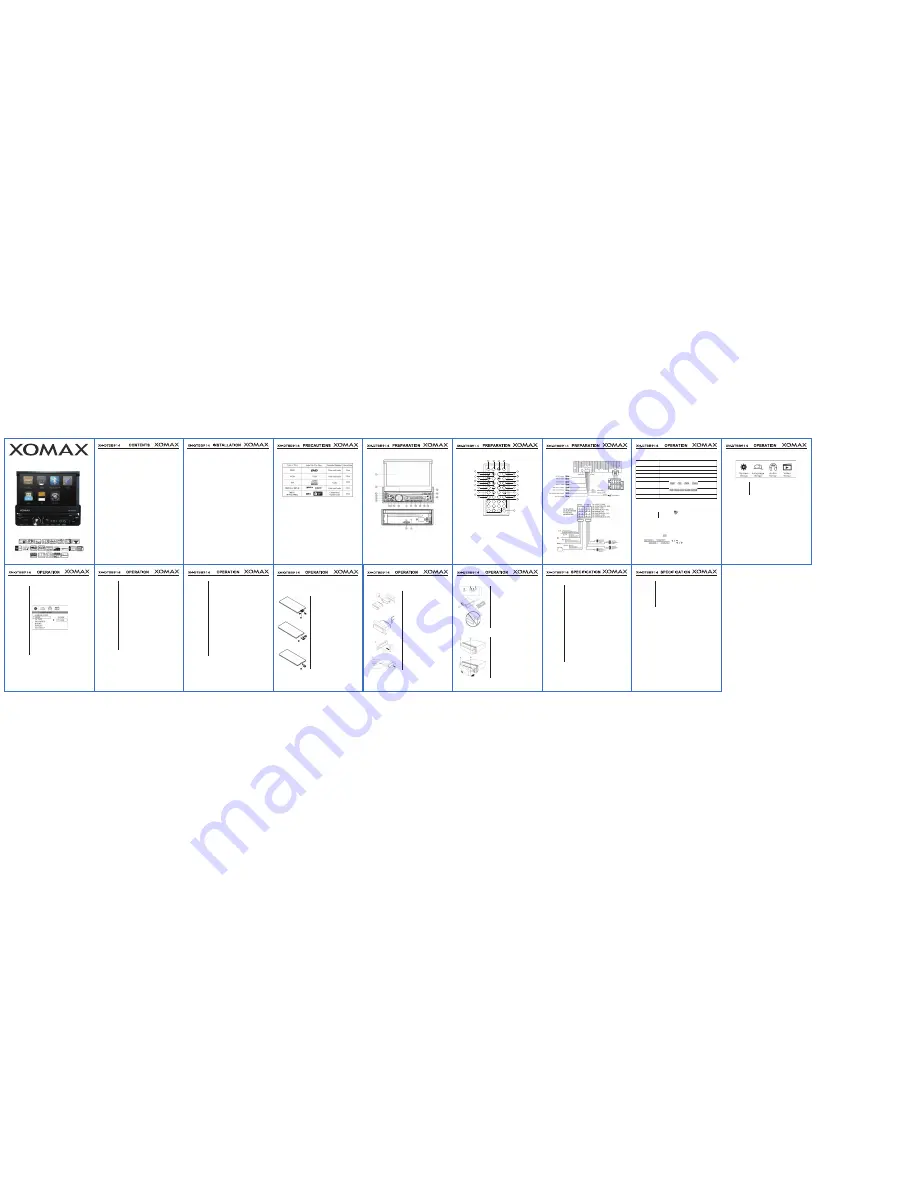
1. TFT-LCD Display
2. Disc Slot
3. AV IN Insterface
4. 2/OSC Button
5. 1/PAUSE Button
6. 3/MENU Button
7. 4/REPEAT Button
8. Fast Forward Button/Previous Track
9. Fast Reverse Button/Next Track
10. 6/+10 Button (CD MP3 VCD) Manual Tuning
11. Disc Lamp
12. 5/-10 Button (CD MP3 VCD) Manual Tuning
13. Audio Volume/SEL Button
14. BAND (OFF Phone) Button
15. LCD Display
16. Release Key
17. OPEN Button
18. EJECT Button
19. Power/TFT ON/OFF (OFF) Phone Button
20. USB Socket
21. SD Card Slot
Precautions
Replace the Battery
When the operational range of the remote control becomes short or non-functional, replave battery with a
new CR2025 battery. Check the battery polarity before replavement.
Replace the Battery of IR Handset
Notes on installation
Contents
-3-
Control Panel Layout
Remote Control Layout
Wiring Diagram
Basic Operation
AUX&IPOD Operation
-9-
Multimedia Playing Setup
(system setup menu)
Multimedia Playing Setup
(system setup mode)
-10-
-11-
Initial System Starts Up
Turning the Unit ON/OFF
Volume Control
Mute Function
Menu Function
Display Setup
Audio Setup
IR Sensor
Press RESET button with a pointed object to set the unit to its initial
procedure
Short press Power to turn on. Long press to turn off
Press /-
Press MUTE
Press Menu
Click icon to access the System
Default setup
Click icon to access the EQ
setup
Reveiver for wireless IR remote control
Radio Operation
1. Touch the radio icon in the main menu display screen to select radio mode.
2. Touch the icon “BAND” repeatedly to select bands.
3. Touch the icon “APS” or press key in IR handsct shortly to activatc automatic memory storing
function.
4. Press or or icon shortly to manually seek the radio station.
5. Long press or or icon to automatically seek the radio station.
6. Touch the frequency bar in the display screen to select preset memory station.
7. Long press icon “APS” to scan each preset memory station for 10Seconds.
8. Touch the icon “ST” or Press ST key in IR handset to set stereo or mono receiving mode.
-12-
-14-
Install the unit (DIN front mount)
-15-
-16-
DIN FRONT-MOUNT (method A)
Specification
DIN REAR MOUNT(method B)
-17-
Install and Remove the Front Panel
-13-
-2-
Note on installation -------------------------------------------------------- 3
Precautions ------------------------------------------------------------------ 4
Control Panel Layout ------------------------------------------------------ 5
Remote Control Layout --------------------------------------------------- 6
Wiring Diagram ------------------------------------------------------------- 7
Basic Operation ------------------------------------------------------------ 8
Multimedia Playing Setup ----------------------------------------------- 9
Replace the Battery of IR Handset ----------------------------------- 13
Install the unit -------------------------------------------------------------- 14
Specification ---------------------------------------------------------------- 16
The unit is designed for 12V DC, negative ground operation systems only. Before installing the unit, make
sure your vehicle is connected to 12V DC negative grounded electrical system.
The negative battery terminal must be disconnected befor making connections which can prevent damage to
the unit from short circuiting.
Be sure to connect the correct speaker to the correct terminal. Never connect the left and right channel
speaker cables to each other or to the vehicle body. Do not blovk vents or radiator panels. Doing so will
cause heat to build up and may result in fire.
After completion of installation and replacement of battery, press the reset button on the front panel with a
pointed object (such as a ball point pen) to set the unit to its initial status.
1. Press SETUP key in IR handset in the stop mode when playing
multimedia.
2. The main page of setup menu is displayed.
3. Select the preferred item by using the arrow keys.
4. Press ENTER key to confirm setting.
Enter Setup Model
Selet restore to restore initial factory settings.
This setuo page includes OSD language. Audio language and Menu
Language features.
This setuo page includes all the items for AUDIO.
SPDIFOFF:
Analog or optical outout port has no output signalatall.
SPDIF RAW:
When the player is connected with the power amplifier by the analog or
potical oore, please select this item when the playing disc is recoreded in
Dolby Digital, DTS or MPEG.The analog or optical output signal of the
unit will be the same as the digital signal(RAW format) of the playing
disc. The power amplifier function must be set as Dolby Digital, DTS or
MPEG.
SPDIF PCM:
Select this when the player is connected whit the 2 channels, digital
seereo amplifier. If the disc is recorede in Dolby Digital or MPEG, the
analog optical output will be modulated to 2 channels.
This is to select Treble or Bass according to yourNeeds.
This is for the user to set Brightness, Contrast, Hue and Saturation of the
picture by pressing the left right arrow buttons.
This setup page includes all the items for VIDEO.
Default Setup
Menu
Language Setup
AUDIO Setup
Audio Out Setup
Key Setup Menu
Video Setup
Operating Current: 600MA
Operating Voltage: DC: 10V-15.7V
Max. Power Output: 45W*4CH
Rated Power: 1W
Dimensions: Approx. 182*160*53mm (D*W*H)
Mounting Dimensions: Approx. 160*180*50mm (D*W*H)
Signal Amplitude: 1V
Remote Contro: IR/IR Receiver
POWER IC: TDA7388
Decoding IC: SHE8202TQ
Screen drive IC: MST-703
Colour: Black Front Panel/White Text Pringting Button/Yellow Text Prining
Disc played: Multi Media
Video System: Auto/PAL/NTSC
Mounting Angle: 0-30 degree
Viewing Angle: 60/60/40/60 (TYP)
Operating Temperature: +50-20°
Storage Temperature: +80-40°
Screen Size: 164.9MM(W)*100(H)*5.7MM(D) 7″Colour Screen
Viewing Angle: 60/60/40/60(TYP)
Screen Resolution: 480(W)*3 (RGB)*234(H)
Screen Brightness: 350cd/m2
RCA Maximum Output: 520MV
Frequency Response: 20Hz-20K Hz
Signal to Noiseration: 85dB
Separation: 80dB
AUX Input: 750MV
General
Multi Media
Deek Section
Video Section
Audio Section
Tuning Range: 87.5-107.9MHz
IF Range: 10.7MHz
Usable Sensitivity (-30dB): 12dBu
Signal to Noiseratio: 60dB
Stereo Separation: 30dB (1KHz)
Frequency Response: 30-15KHz
Frequency Range: 530-1710KHz
IF Range: 450KHz
Usable Sensitiveity (-20dB): 25dBu
FM Tuner Section
AM Tuner Section
1. Press the icon to enter main menu display screen.
2. You can touch icon”AV-IN” to switch to your desirde av-in mode.
AV-IN Operation
Rating 1 :[KID SAFE]
Select this for kid-safe viewing programs.
Rating 2:[G]
Select this to allow admission to persons of all ages.
Rating 3:[PG]
Select following when children under 13 are forbidden to view.
Rating 4:[PG13]
Select following when children under 13 are forbidden to view.
Rating 5:[PG-R]
Select this when PG-R is printed on the DVD disc.
Rating 6:[R]
Select this when children under 17 are forbidden to view.
Rating 7:[NC 17]
Select this when children under 17 are forbidden to view.
Rating 8:[ADULT]
Select this ti only allow admission to all adults.
Rating Setup
Menu
The setup page includes TV system, screen saver, TV type, password,
rating&default features.
This player can play discs recorded in either PAL or NTSC format. Select
NTSC format when you are connected to NTSC TV. Select PAL format
when you are connected to PAL TV. If you select AUTO, according to
your disc content.
1. 4:3 PS
Playback in the PAN&SCAN style. (If connected to widc-screen TV, the
left and right edges are cut off).
2. 4:3 LB
Playback in LETER BOX style. (If connected to wide-screen TV, black
bands appear at top and botton of the screen).
3. 16:9
Select when a wide-screen TV set is connected.
System Setup
TV System Menu
Video System Menu
TV Type
Setup Menu
Installing the Unit
1. Dashboard
2. Holder
After inserting the holder into the dasrwhboard, select
the appropriate tab according to the thickness of the
dashboard material and bend them inwards to secure
the holder in place.
3. Screw
1. Dashboard
2. Nut (5mm)
3. Plan washer
4. Screw (5*25mm)
5. Screw
6. Starp be sure to use the starp to secure the back of
the unit in place.The starp can be bent by hand to the
desired angle.
7. Plain Washer
Remove the Unit
1. Frame
2. Insert fingers into the groove in the front of frame and
pull out to remove the frame. (When reattaching the
frame,point the side with a groove downwards and
attach it).
3. Lever
Insert the levers supplied with the unit into the grooves
at both sides of the unit as shown in figure until they
click. Pulling the levers makes it possible to remove the
unit from the dashboard.
Installation using the screw holes on the sides of the
Unit.
Fastening the unit to the factory radio mounting
bracket.
1. Select a position where the screw holes of the bracket
and the screw holes of the main unit become aligned
(are fitted) and tighten the screw at 2 places on each
side.Use either truss screws (5*5 mm) or flush surface
screw (4*5 mm).
2. Screw(“T”Position).
3. Dashboard or Console.
Note: The mounting box,outer trim ring,and half-sleeve
are not used for method B installation.
Pull out the battery holder while pressing the stopper 1.
Place battery whth (+) mark facing up into the battery
holder.
Insert the battery holder into the remote controller.
Remove the front panel
Press”PWR”button in the upper left corner.
Please see picture 1
Press “REL”button in the and the pull it out.
Please see picture 2
Install the front panel
Put notch A (shown as picture) onto buckle B, and then
slightly press into the right side.
Note: Please don’t insert finger in control panel.If
connector is dirty.use a clean soft cloth to wipe it clean.
1. Power on/off
2. MODE
3. PLAY/PAUSE
4. MUTE
5. TITLE
6. SUB-T
7. RIGHT
8. SETUP
9. ANGLE
10. SLOW
11. VOL+
12. ZOOM
13. SEL
14. SEEK+/
15. VOL-
16. AUDIO
17. Number keys
18. GOTO
19. PBC
20. OSD
21. LOC RDM
22. SEEK-/
23. AMS PRT
24. ST/PROG
25. STOP/BACK
26. DOWN
27. LEFT
28. ENTER
29. BAN/SYS
30. UP
BAN
SYS
ST
PROG
AMS
PRT
LOC
RDM
TITLE
MODE
POW
MUTE
SUB-T
ENTER
SEEK-
SEEK+
SEL
PBC
1
2
3
4
5
6
7
8
9
10
10+
GOTO
VOL-
AUDIO
OSD
SETUP
VOL+
ZOOM
SLOW
ANGLE
1
2
3
4
9
10
11
12
13
14
15
16
18
5
6
7
8
17
17
19
20
21
22
23
24
25
26
27
28
29
30


