

www.wolfvision.com
Printed in Austria - August 2016
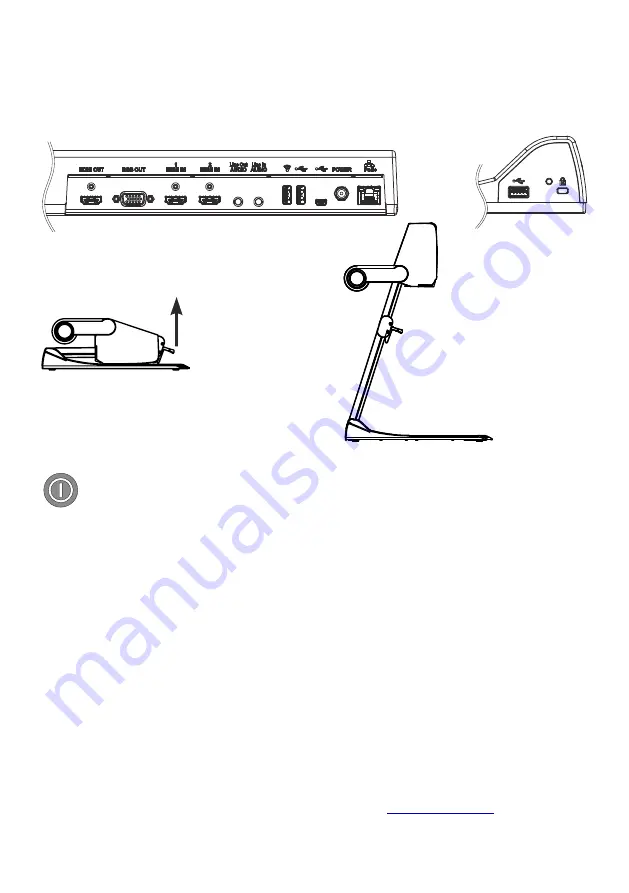
Connect the power supply and establish all needed cable connections.
The Visualizer will start automatically.
Raise the arm up to turn the camera to working position.
Before Starting
Quick Setup Guide - First Steps
When the Visualizer is switched on the first time, the Quick Setup Guide will be started automatically on-
screen (visible on built-in display HDMI and RGB output). Use the arrow keys to navigate through the menu.
Basic Menu Settings
Language
Select the desired language for the on-screen menu.
Ethernet Settings
Setup the network interface according your infrastructure.
Time Settings
Set time and date.
Audio
Select the desired audio inputs and outputs
Power Key
F
The Visualizer will be switched on and off by raising the arm up and down.
Additionally, the Visualizer can be switched on and off by using the POWER key quickly.
Manuals, Firmware, Apps, Software, Dimension Drawings,... @
/SUPPORT
www.wolfvision.com
Feature Pack
The Visualizer offers the possibility to upgrade using an optional Feature Pack which adds additional
functionality. This upgrade will be activated by loading a valid Feature Pack code.
Depending on your order, the Feature Pack license code will be delivered together with the unit.
The Feature Pack is not pre-installed and user activation is required!
Consult the user manual to get the Feature Pack activated.


