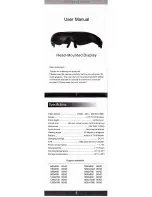
I. Product Overview
1. Camera Lens
2. Microphone
3. Micro SD Card Slot
4. Red/Blue Indicator Light
5. Power Input/USB Port
6. Reset Button
7. Power Button
8. Mode Button
II. What’sin the Box
-1× Glasses Camera
-1× USB Cable
-1×Cleaning Cloth
-1× Glasses Case
-1× 8GB Micro SD Card (fitted into the Micro SD card slot already)
-1×AC110-240V to DC5V Power Adapter
GL1600
User Guide
III. Operation
>> Please make sure your camera is fully charged before using.
>> Please make sure the Micro SD card has been formatted already and is securely
fitted into the camera’s SD card slot, or it will not work. We recommend you use a
SDHC Class 10 Micro SD card.
[Note]:
If no Micro SD card is fitted into the camera, the red indicator light will be on for 3 seconds and
turn off, then the blue one will be illuminated for 3 minutes and turn off. The camera will shut down auto-
matically.
3.1. POWER ON/OFF
3.1.1. Power on the camera by pressing the Power Button for 2 seconds. The red
indicator light will be on for 3 seconds then the blue one will keep flashing. The
camera will start video recording automatically. Note that sometimes the red indica-
tor light will remain illuminated longer than 3 seconds if the Micro SD card has not
been recognized by the camera.
3.1.2. Power off the camera by pressing the Power Button for 2 seconds again. The
blue indicator light will turn off.
[Note]:
The camera will shut down automatically if it is in standby mode without any operation more
than 2 minutes.
3.2. VIDEO RECORDING
3.2.1. Power on the camera by pressing the Power Button for 2 seconds. The red
indicator light will be on for 3 seconds then the blue one will keep flashing. The
camera will start video recording automatically. Note that sometimes the red indica-
tor light will remain illuminated longer than 3 seconds if the Micro SD card has not
been recognized by the camera.
3.2.2. Press the Power Button once to stop video recording. The blue indicator light
will stop flashing and stay illuminated, indicating the camera has entered into stand-
by mode.
3.2.3. Press the Power Button once again to resume video recording. The blue indi-
cator light will keep flashing.
[Note]:
1). A video clip will be generated and saved every 20 minutes automatically.
2). The camera can record video for 120 minutes continuously on a full charge.
3). Video Resolution: 1920 x 1080P, 1280x720P Optional Video Format: AVI
4). If the camera is in low battery, it will save all video files and then shut down automatically. The blue
indicator light will keep flashing quickly for 5 seconds and turn off.
3.3. CAMERA/STILL PHOTOGRAPHY
3.3.1. Power on the camera by pressing the Power Button for 2 seconds. The red
indicator light will be on for 3 seconds then the blue one will keep flashing. The
camera will start video recording automatically. Note that sometimes the red indica-
tor light will remain illuminated longer than 3 seconds if the Micro SD card has not
been recognized by the camera.
3.3.2. Press the Power Button once to stop video recording. The blue indicator light
will stop flashing and stay illuminated, indicating the camera has entered into stand-
by mode.
3.3.3. Press the Mode Button once to make the camera enter into still photograph
mode. The red indicator light will stay illuminated.
3.3.4. Press the Power Button once to take a photo.The red indicator light will flash
once every time you take a photo.
3.4. AUDIO RECORDING
3.4.1. Power on the camera by pressing the Power Button for 2 seconds. The red
indicator light will be on for 3 seconds then the blue one will keep flashing. The
camera will start video recording automatically. Note that sometimes the red indica-
tor light will remain illuminated longer than 3 seconds if the Micro SD card has not
been recognized by the camera.
3.4.2. Press the Power Button once to stop video recording. The blue indicator light
will stop flashing and stay illuminated, indicating the camera has entered into stand-
by mode.
3.4.3. Press the Mode Button twice to make the camera enter into audio recording
mode. Both blue and red indicator lights will stay illuminated.
3.4.4. Press the Power Button once to start audio recording. The blue indicator light
will keep flashing while the red one will stay illuminated.
3.4.5. Press the Power Button once again to stop audio recording. The blue indicator
light will stop flashing and stay illuminated.
[Note]:
1). Audio Format: WAV
2). In standby mode, you can switch to any mode by pressing the Mode Button once.
IV. Video/Image/Audio File Uploads
4.1. Power off the camera, remove the Micro SD card and insert it into a card reader.
4.2. Insert the card reader into a proper PC computer USB port.
4.3. The Micro SD card will be recognized as a removable disk drive.
4.4. All the files can be accessed in the"
DCIM
" folder.
V. Setting Time/Date Stamp
5.1. Power off the camera, remove the Micro SD card and insert it into a card reader.
5.2. Insert the card reader into a proper PC computer USB port.
5.3. Removable disk drive folder appears.
5.4. Click on the drive in the root directory and inside the root directory, create afile
named “SETCLK.txt”.
5.5. Write the current date and time in the“SETCLK.txt” file with the correct format:
YYYY,MM,DD,HH,MM,SS FT(For example: 2016,04,12,14,24,32 FT).
5.6. F stands for 1920x 1080P, H for 1280x720P and D for 720x480. If you want the
camera to record at a lower resolution, you can change “F” into “H” or “D” in the
“SETCLK.txt” file. If you don’t need time and date stamp on the video footage,
change“T” into “N” in the “SETCLK.txt” file(For example: 2016,04,12,14,24,32
HN).Save this file.
5.7. Restart the camera and the system will upgrade the program automatically.
VI. Charging
6.1. Power off the camera, connect it to an outlet AC power supply using the USB
cable and DC5V power adapter provided.
6.2. The red indicator light will keep flashing during the charging process.
6.3. It will take about 2 hours to obtain a full charge.
6.4. The blue indicator light will be illuminated when the camera is fully charged.
VII. Resetting
If for any reason, the camera stops responding or isn’t working properly, a quick
reset will restore it back to normal operation.
Operation:
When the camera is powered on, use a pin to press the Reset Button
once, the camera will shut down automatically. Then you can restart the camera to
the factory default settings and try it again.