Whirlpool WED5500BW0, Installation Instructions Manual
The Whirlpool WED5500BW0 dryer is a must-have appliance for any household. Ensure a hassle-free setup with our comprehensive Installation Instructions Manual, available for free download at manualshive.com. This user-friendly manual provides clear guidance for a seamless installation process, optimizing your experience with this exceptional product.
Share
Download


Reviews:
No comments
Related manuals for WED5500BW0

HDY6-1
Brand: Haier Pages: 10

HDY5-1
Brand: Haier Pages: 7

Lincoln BR517R
Brand: Wonderfire Pages: 32

GF461B
Brand: inventum Pages: 32
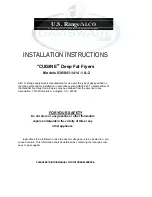
836-1414-1
Brand: U.S. Range Pages: 20

Classic FP5910
Brand: Sunbeam Pages: 44

CellTec JAX-0300-00A
Brand: CellPath Pages: 20

SM-AF8
Brand: SCOTT MILLER Pages: 13

Biolite BJ09W
Brand: Biodrier Pages: 6

BF 30E OU
Brand: Bartscher Pages: 25

OXE-100
Brand: Kroger Pages: 2

Digital Sensor 6500FRE
Brand: BaByliss Pages: 37

HBFDR3206
Brand: Hamilton Beach Pages: 40

HA-AF50D
Brand: Haier Pages: 11

642202
Brand: Kenmore Pages: 2

62932
Brand: Kenmore Pages: 6

62842
Brand: Kenmore Pages: 2

62992
Brand: Kenmore Pages: 2


