Whirlpool RF367BXW, Use & Care Manual
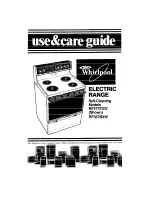
The Whirlpool RF367BXW electric range is a versatile and efficient appliance designed to meet your cooking needs. To ensure you make the most of its features, don't forget to download the free Use & Care Manual from our website. With easy access, user-friendly instructions are just a click away!
Share
Download


Reviews:
No comments
Related manuals for RF367BXW

CK 236
Brand: Gaggenau Pages: 13

JB640MNBS
Brand: GE Pages: 2

RGB501
Brand: Hotpoint Pages: 44

LSRE307ST
Brand: LG Pages: 2

RF367LXSB1
Brand: Whirlpool Pages: 7

RF367LXS
Brand: Whirlpool Pages: 7

RF367LXSB0
Brand: Whirlpool Pages: 7

RF362LXTB0
Brand: Whirlpool Pages: 7

RF368LXKQ0
Brand: Whirlpool Pages: 20

RF367BXV
Brand: Whirlpool Pages: 24

RF36OBXv
Brand: Whirlpool Pages: 28

RF365EXP
Brand: Whirlpool Pages: 24

RF365BXP
Brand: Whirlpool Pages: 24

RF3620XP
Brand: Whirlpool Pages: 24

RF360EXP
Brand: Whirlpool Pages: 24

RF365PXW
Brand: Whirlpool Pages: 28

RF365BXW
Brand: Whirlpool Pages: 28

RF36OOXY
Brand: Whirlpool Pages: 32


