

Quick Install Guide
5.25” SATA to USB2.0 / eSATA Portable Enclosure
Page
1
1. Getting Started
Kit Contents
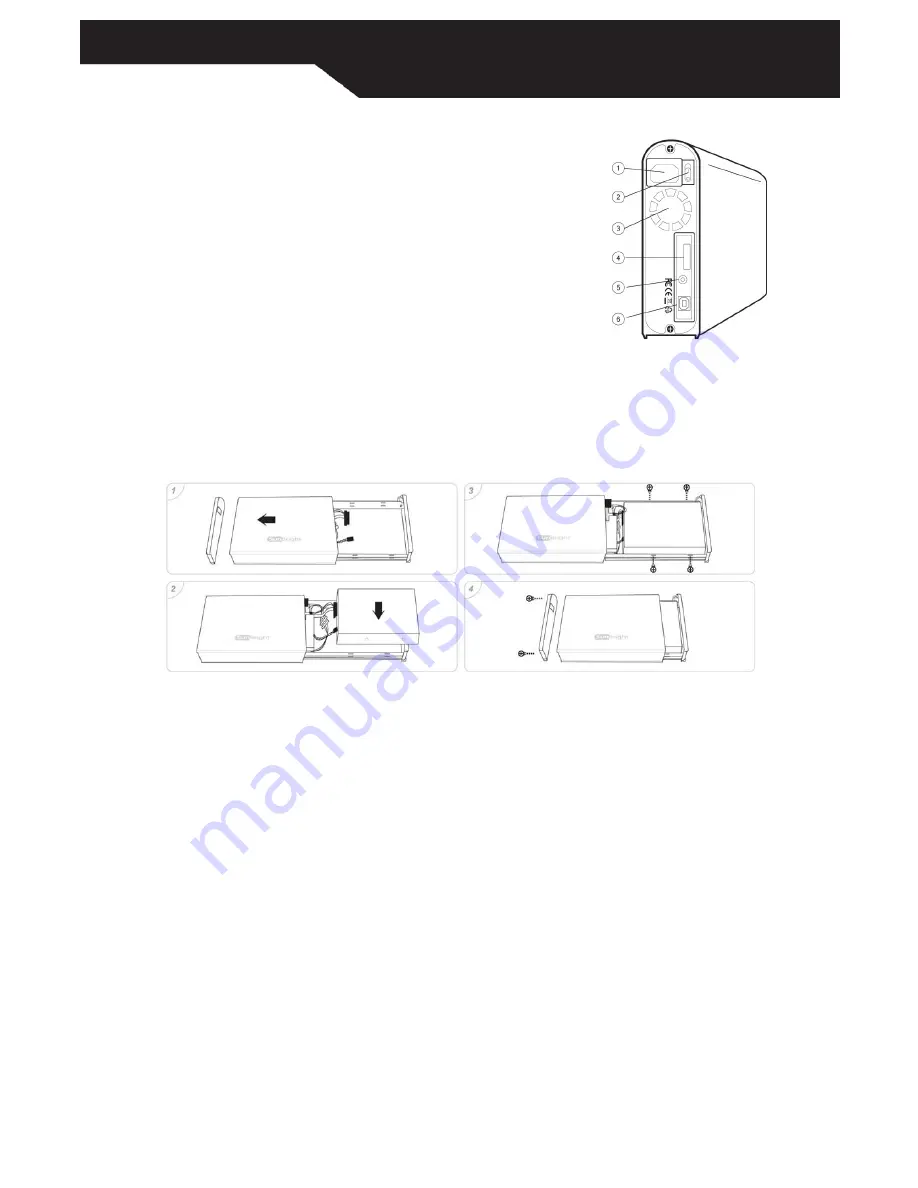
Product Overview
1. AC Power
2. Power Switch
3. FAN
4. eSATA Port
5. Audio Jack
6. USB Port
●
5.25" SATA Enclosure
●
USB Cable
●
eSATA cable
●
iSATA to eSATA bracket Cable
●
Power Cord
●
Installation CD
●
Screw Pack
●
QIG
Minimum System Requirements
●
Intel Pentium II 350MHz-compatible or Apple G3 processor and above
●
Windows 2000/XP/VISTA or MAC OS 8.6 and above
●
Available OHCI-compliant USB port
Note : eSATA mode isn’t compliant with Windows 98SE
、
Windows ME and Mac OS.
2. Assembling the 5.25" SATA Optical Drive
Step 1 : Take of the rear panel and slide the top of enclosure to the right.
Step 2 : Insert 5.25” optical drive and connect to the SATA 7P + 15P connector , also connect Audio cable to the drive if any.
Step 3 : Put on the screws and tighten them to both side of the 5.25” enclosure.
Step 4 : Slide the top of enclosure to the left and put on rear panel with screws and tighten them.
3. Connecting the Drive
Note : If using Windows 98SE , you must install the device driver on your system before connecting the drive.
Do not connect the USB cable and the eSATA cable at the same time.
USB connection
1. Connect one end (USB A Type) of the USB Cable to your PC.
2. Connect the other end (USB B Type) of the USB Cable to the USB port on the back of the enclosure.
3. Connect the power cord to the AC power socket of the enclosure and switch on the power.
4. The front power indication LED will illuminate and the drive will be mounted and assign a drive letter , if the device does not mount , you may need
to install drivers of 5.25” optical drive from the drive’s CD ROM or other resource.
eSATA connection
Note : If using PC without eSATA interface , please install the iSATA to eSATA bracket cable in your PC. (Please make sure your PC or motherboard supports
iSATA before installation) If using a laptop, please make sure there is a built-in eSATA or eSATA interface on your laptop.
1. Connect one end of the eSATA cable to your PC.
2. Connect the other end of the eSATA cable to your external enclosure.
3. Connect the power cord to the AC power socket of the enclosure and switch on the power.
4
. Disconnecting the Drive
Caution : To prevent data loss always be sure to close all active applications before shutting down the drive.
Windows
1.
Make sure all operations using the drive within the optical enclosure has ceased.
2.
Close any windows and programs pertaining to the optical drive.
3.
If connected by USB , double click the green “Unplug or Eject Hardware” icon in the system tray and select “Safely Remove Hardware”. Select
the device you would like to remove and click on “Stop”.
4.
Turn off the power switch of the optical enclosure.


