WindMate
®
350 Weather Monitor
User Manual
(Version 11/09)
You now own a sophisticated, precise,
and comprehensive weather monitor. Please
study the manual to understand all of the unit’s
features and to maximize its benefits.
Getting Started
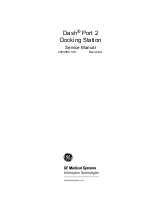
Open your
WindMate
®
to 180° as
shown on the right. If using a tripod,
open it to a 90
o
angle as shown above
to access the tripod fitting at the bottom
of the unit.
Press and hold
Mode
Key to turn on.
Press and hold
Mode
for 3-4 secs. to
turn off. You can turn off the unit in any
function. If the unit is idle for 5 minutes,
it will auto shut down to preserve
battery life.
►Your unit can be customized to:
deactivate auto shut down or any other functions
you do not need, choose memory settings or
adjust display contrast. See
Customizing your
WindMate
®
350
.
Operating the WindMate
®
350
When the unit is turned on for the first time, the
default mode is
Time
. Each time the unit is
reactivated, it returns to the last function used.
Press the
Mode
Key to move to other functions.
For Backlight, press
SET/EL
.
Mode Sequence
•
Time
•
Wind Speed
•
Compass (reads vertically)
•
Temperature
•
Wind Chill
•
Humidity
•
Wet Bulb
•
Dew point
•
Comfort Index
•
Delta Temperature
•
Barometric
•
Altitude
•
Density Altitude
Choosing Measurement Units
Pressing and holding the
Set/EL
Key at any
mode, (except time, compass and humidity),
chooses your preferred measurement unit.
Press the
View
Key to select, then press
Set/EL
to save and exit Units Setting. Below is the
sequence of measurement units for each mode.
Wind Speed
MPH---->KMPH---->MPS---->FPM---->KNT---->BF
Temp. / Wind Chill/ Wet Bulb/ Dew Point/ Comfort
Index/ Delta T
0
F---->
0
C
Barometer mbar---->inHg
Altitude / Density Altitude ft---->m
Bar Graph Display
For best results with any bar graph display, set
the low and high limits of the instrument
to
reflect the range of actual conditions the unit will
experience. In all modes except Time and
Compass, press and hold the
Set/EL
key until
the current unit of measure is flashing. Press
the
Mode
key to see the “Low Limit” of measure
the instrument will graph. Press the
View
key to
increase the value of the “Low Limit.” Holding
down the
View
key will cause the increase to
take place much faster. If you go past the value
you desire, continue to increase the value until it
scrolls around back to the number you need.
When you have reached the value you need,
press the
Mode
key and you will then be able to
set the “High Limit” that the instrument will graph
in exactly the same way. When you have
reached the value you need, press the
Mode
key again and screen will go back to the current
unit of measure flashing. Press the
Set/EL
key
to save and exit. Changing the “Low Limit” and
“High Limit” values of the WM-350 only changes
the representation of the history graph. It does
not change any of the previously recorded data
or have any impact on the data yet to be
recorded.
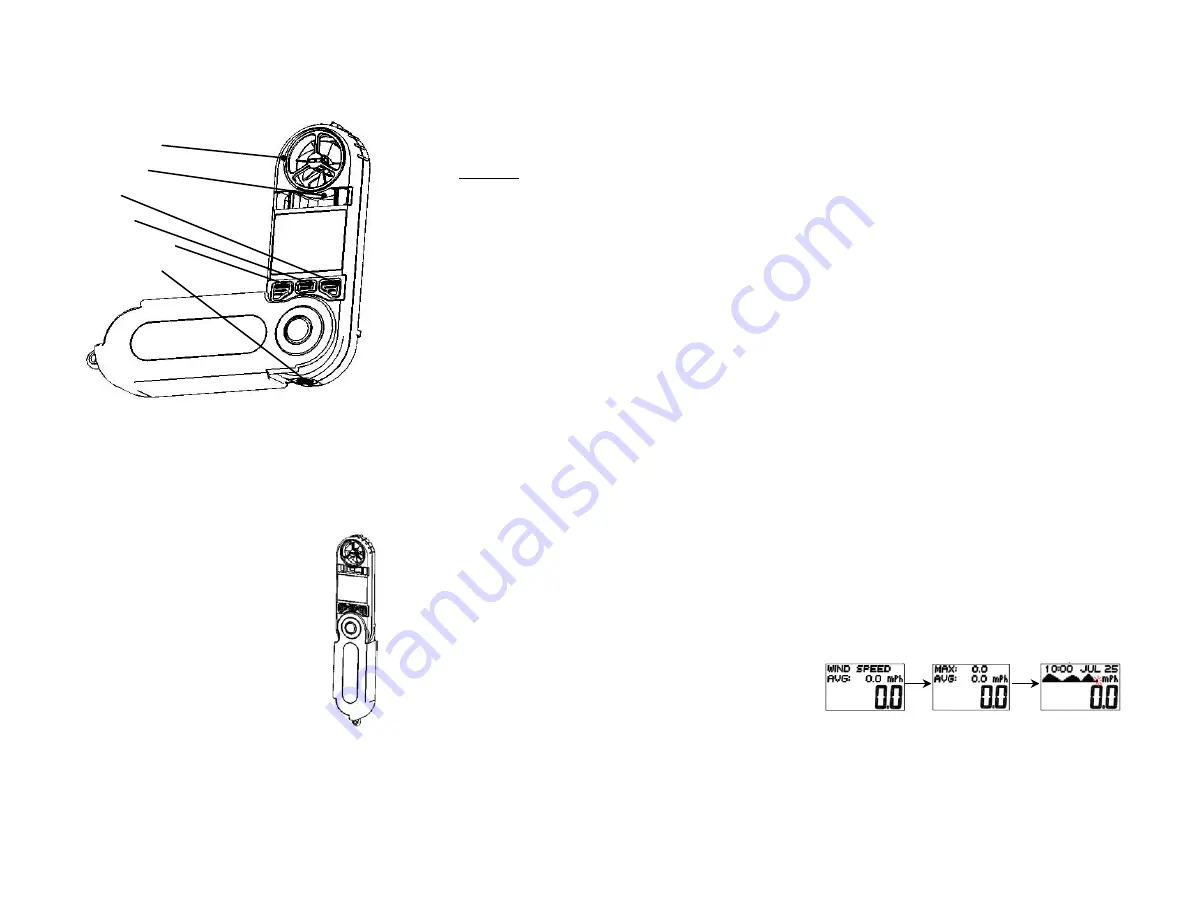
History and Min/Max Feature
All modes, except Time and Compass, have a
Min-Max and a History display option. Your unit
is preset for 1-hr increments and 48-hr bar
graph. (See
Customizing your WindMate
®
350
to change the storage interval.) To change the
display option from the normal view press the
View
Key. The diagram below will show you the
sequence.
The current view shown in the History is the
recorded data of the previous hour. To view the
recorded data history previous 2 hours, 3 hours
and etc. press the
Set/EL
Key. The recorded
data will be displayed in numerical format and at
the same time will be indicated in the graph.
Wind Impeller
Wind Vane
VIEW
SET/ EL
MODE/On/Off
Tripod Fitting