VTech ErisTerminal VSP601A, User Manual
The VTech ErisTerminal VSP601A offers seamless communication with its advanced features and user-friendly interface. Ensure convenience and efficiency by downloading the free user manual from our website manualshive.com. This comprehensive manual provides step-by-step instructions, allowing you to maximize your experience with this exceptional product.
Share
Download


Reviews:
No comments
Related manuals for ErisTerminal VSP601A
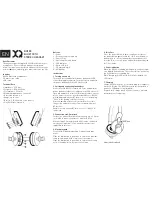
BH100
Brand: Xqisit Pages: 16

SF40
Brand: ideus Pages: 2

CUE HS80
Brand: Corsair Pages: 24

SE-2RPTT
Brand: Sigtronics Pages: 2

GSM-R
Brand: Funkwerk Pages: 28

The EPAK
Brand: Porta Phone Pages: 2

WB130
Brand: Wise & Blue Pages: 12

Pivot 87 Series
Brand: SpectraLink Pages: 7

HS 2700 BT
Brand: Silvercrest Pages: 9

367103 2101
Brand: Silvercrest Pages: 61

KH 2356
Brand: Silvercrest Pages: 68

BTST-9300
Brand: Silvercrest Pages: 86

281659
Brand: Silvercrest Pages: 212

Strata CIX DP-5000 series
Brand: Toshiba Pages: 4
IP5131F-SDL
Brand: Toshiba Pages: 2

DP5018F-S
Brand: Toshiba Pages: 2

Strata AirLink
Brand: Toshiba Pages: 48

Strata AirLink
Brand: Toshiba Pages: 117


