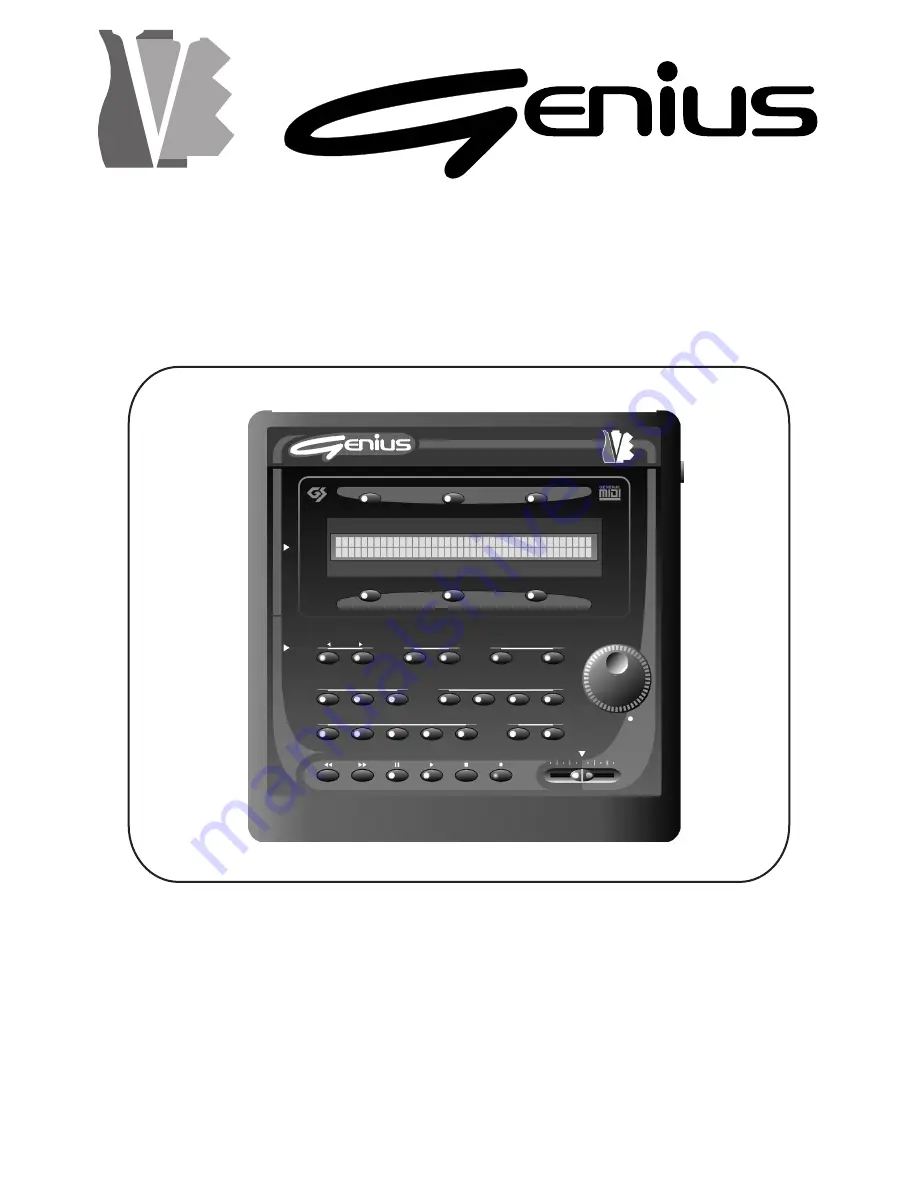
background image

V O I C E

SYSTEMS

D ATA F I L E R

Manuale Operativo

Operating Manual

PAGE

SOURCE

CONFIRM

REAL TIME ADJ.

REAL TIME ADJ.

EDIT

TOOLS

MODE

VOLUME

REC

STOP

PLAY

PAUSE

FF

REW

CONTROLS

FUNCTION

KEYS

FUNCTION

KEYS

F4

F5

F6

F3

F2

F1

PREV.

NEXT

DISK MEMORY

ESC

ENTER

TEMPO

TRANSP

MUTE

LYRICS

SONG

TRACK

LIST

DISK

FILES

MIDI

SYSTEM T. INFO

SONG

LIST

DATA FILER

D

AT

A

E N

T RY

D

AT

A

E N

T RY

VOICE SYSTEMS

Summary of Contents for genius

Page 1: ...ADJ REAL TIME ADJ EDIT TOOLS MODE VOLUME REC STOP PLA Y PAUSE FF REW CONTROLS FUNCTION KEYS FUNCTION KEYS F4 F5 F6 F3 F2 F1 PREV NEXT DISK MEMORY ESC ENTER TEMPO TRANSP MUTE L YRICS SONG TRACK LIST DISK FILES MIDI SYSTEM T INFO SONG LIST DA T A FILER D A T A E N T R Y D A T A E N T R Y VOICE SYSTEMS ...

Page 2: ...a batnub washbowl kitchen sink in a wet basement or near a swimming pool or the like 4 This product either alone or in combination with an amplifier and headphones or speakers may be capable of producing sound levels that could cause permanent hearing loss Do not operate for a long period of time in high volume level or at a level that is unconfortable If you experience any hearing loss or ringing...

Page 3: ...ltitask Song Selection Song Next field 110 5 4 Directory function 111 5 5 Displaying the lyrics of the song 112 6 REAL TIME FUNCTIONS 114 6 1 Lyrics 114 6 2 Track muting 115 6 2 1 Mute Setup 115 6 3 Trasposing the key 116 6 3 1 Transpose Setup 116 6 4 Setting the metronome tempo 117 6 4 1 Tempo Setup 117 7 RECORDING SONG 118 7 1 Foreword 118 7 2 Starting recording 118 7 3 Saving the recording 119 ...

Page 4: ... Song Track Mute 160 9 1 5 Edit Song Temporary play 161 9 1 6 Edit Song Saving the modifications 161 9 2 Edit Track 163 9 2 1 Edit Track Program Change Bank Select 164 9 2 2 Edit Track Volume Pan 165 9 2 3 Edit Track Expression 167 9 2 4 Edit Track Velocity 167 9 2 5 Edit Track Reverb 168 9 2 6 Edit Track Chorus 169 9 2 7 Edit Track Temporary play 169 9 2 8 Edit Track Saving the modifications 170 ...

Page 5: ...o not expose the instrument to direct sunlight Always use good quality screened cables In addition when disconnecting the cables from the sockets ensure you take hold of the connector and not the cable itself when winding cables do not allow knots or twists to form Before making the connections make sure that the other units especially amplification and diffusion systems you are about to connect a...

Page 6: ...he direct to disk system causes greater wear of the disk s magnetic medium than other systems With regard to the type of files to be used bear in mind that The Genius only uses standard MIDI files extension MID resident on floppy disks formatted in accordance with the MS DOS standard Files with different extensions will not be processed The system supports up to 16 tracks If a format 1 MIDI file e...

Page 7: ...on 16 parts 16 different timbres can be played simultaneously each distributed on one track meaning one MIDI channel The maximum polyphony the number of notes which can be played simultaneously is 32 What s more the Sound Generator has a multieffects unit containing ambient effects reverb and echo and modulation effects chorus and flanger Another important feature of the Genius is that it has an i...

Page 8: ...ey is on the key is enabled 2 SOURCE section you can use these buttons to select the unit in which the files to be used for the play editing copy or deletion functions are saved O DISK selects the floppy disk inserted in the drive as currently active memory unit The key is not enabled if the drive is empty or the disk inserted is not acceptable o MEMORY enables the management of the data resident ...

Page 9: ...copy delete rename etc o MIDI management of the MIDI functions and ports o SYSTEM recalls the instrument s general set up functions o T INFO displays the main parameters of the tracks contained in the song being performed 6 CONFIRM section these buttons are used to confirm or abort the procedure when the system requests this o ESC abort o ENTER confirm 7 REAL TIME ADJ section the buttons in this s...

Page 10: ...orarily 13 PLAY button starts the performance 14 STOP button stops the performance 15 REC button enables the recording procedure 16 VOLUME slider regulation of the instrument s volume 3 2 THE FLOPPY DISK DRIVER 1 LED displaying reading writing status of the floppy disk Never extract the disk when the LED is on 2 button for extracting the floppy disk from the drive ...

Page 11: ...e functions can be set in the SYSTEM section of the instrument To avoid damage to the Genius s internal components it is important to use only pedals with normally open contact 4 MIDI OUT port output port for the MIDI data generated by the Genius 5 JOY PORT connector this connector can be used to connect the optional peripherals such as the video interface the additional graphic display etc to the...

Page 12: ...LER 4 CONNECTIONS 104 CAUTION ü The Joy Port to MIDI adapter must have internal optoisolator ü If the Joy Port has an additional parallel connector on the adapter this must not be used for connecting peripherals ...

Page 13: ...tion relating to activation of the software then the presentation video page which gives information about the total size of the internal memory and the software version currently installed on the instrument For further information about these data refer to point 8 1 6 After a few moments the main operating page called the MAIN PAGE will be displayed 105 ...

Page 14: ...ve the DIRECTORY field N B the information given with regard to the display of fields on the screen applies for any video page displayed You should therefore refer to it on all occasions CAUTION ü If there is no floppy disk in the drive or if it is not valid e g not formatted pressing the DISK button has no effect ü The song name displayed is the same as the name of the file without extension The ...

Page 15: ...me tempo in BPM Beats Per Minute of the song currently selected You can use key F5 to select the DIRECTORY function which allows display of the contents of the unit currently active on the screen see point 5 5 The two next fields display the bar Meas Field and a beat meter Beat field of the song being played Since both these fields are for display only the LEDs of the function keys associated to t...

Page 16: ...and the display will show the message Press ESC to return to song selection NO STANDARD MIDI FILE ERROR If the file selected for loading does not belong to the MIDI File Standard coding or is unusable for any reason e g part of the disk damaged the following message will be displayed 108 where you can see the message Paused indicating that the song being played has been interrupted When the PLAY o...

Page 17: ...he current bar and the number of the destination bar next to theMeas field 109 When the key is released the GENIUS will start the search for the bar number required the playback will be interrupted and the display will show Once the destination bar is reached playback of the song will restart automatically Note that the time taken to reach the required bar depends on the characteristics of the son...

Page 18: ...ESC to abort Once the operation has been confirmed the markers will again select the current song field To change the song booked simply press the F2 key and repeat the operations described above While this is not possible for the song currently being played in theSONGNEXT field the user can change the active unit When the encoder is moved on theSONGNEXT field the Genius will automatically activat...

Page 19: ... list From the familiar MAIN PAGE video press the F4 function key DIRECTORY field the display will show the contents of the current unit A unit almost always contains more than six files and so additional files will be displayed by means of pages after the current page To display further pages use the NEXT key to display pages after the one currently displayed and or the PREV key to select previou...

Page 20: ...any lyrics on the song identifying the copyright of the MIDI file producer It is therefore important to use the permitted types of Karaokewithout converting the format In addition do not usemore than one text coding mode within the same file If the song contains lyrics information recognised by the instrument when playback starts the Lyrics function is enabled automatically The LED of the LYRICS k...

Page 21: ...CS button to return to display of the lyrics Note that the Lyrics function will be automatically disabled if the system needs to display the MAIN PAGE pressing of one of the REAL TIME ADJ keys selection of a song etc In all cases this function will be deactivated at the end of the song For the setting of the LYRICS function see point 7 1 ...

Page 22: ...yrics function is disabled performance during loading is enhanced this is especially useful when the Genius is used with no need for display of the lyrics The function concerned is called the LYRICS MASTER SWITCH to display the settings of this function from the Stop condition keep the LYRICS key pressed for at least two seconds after which the display will show You can now use the encoder to enab...

Page 23: ...ond field selected using key F2 allows the user to choose whether to eliminate from the playback Muting YES or to retain Muting NO the track specified by means of the Track parameter The third field for display only shows the name of the timbre associated to the Program Change General MIDI table currently present in the selected track Since the Genius is a reader with Direct to Disk reading system...

Page 24: ...l key envisaged in the file 6 3 1 TRANSPOSE SETUP We have seen that the transposition can be activated by pressing the TRANSP button quickly The TRANSPOSE SETUP function allows the user to set the number of semitones by which the song will be transposed when this function is active When the TRANSP key of the REAL TIME ADJ section is kept pressed for about two seconds the display will show TheBIAS ...

Page 25: ... to regulate the variation not in the absolute metronome tempo but in a calculation percentage in order to guarantee a proportional variation even in case of rallentandos or accelerandos envisaged during performance of the song Note that the TEMPO CHANGE Ratio field represents the percentage calculation the instrument will make to establish the new bpm value In this case a ratio of 100 means that ...

Page 26: ...aking the connections correctly press the REC key the key LED will illuminate and the display will show the following video page 118 This video page contains the following fields o T Sig can be selected using the F2 function key allowing the encoder to be used to set the Time Signature of the song to be recorded The possible values are 3 8 6 8 9 8 12 8 2 4 3 4 4 4 5 4 6 4 7 4 and 9 4 o Tempo can b...

Page 27: ...l be acquired while if the user presses ESC all the recorded data will be deleted and the display will again show the MAIN PAGE If no data have been received during the recording the Finalize prompt will not be displayed and the system will return straight to the MAIN PAGE Pressing ENTER confirms the procedure and the system then prompts assignment of the name to the new song MID file name 119 NOT...

Page 28: ...ite protection Press ESC to return to the Finalize prompt then remove the protection and repeat the memorisation procedure N B do not remove the floppy disk if the drive LED is on 120 There is not enough space in the memory to save the song recorded Press ESC to return to the Finalize prompt then insert a disk or save the song on the floppy disk Then free space in the internal memory see sections ...

Page 29: ... functions Out Router MIDI filters synchronisation etc o SYSTEM accessory functions relating to the system display pedal control etc o PART INFO information about the status of the main data relating to the tracks being played 8 1 DISK When the DISK key in the TOOLS section is pressed the display will show The functions available are o FORMAT selected by pressing the F1 key starts the procedure fo...

Page 30: ...hat when a floppy disk or the internal memory is formatted all the data memorised will be lost irretrievably When the internal memory is formatted the data relating to the system software will not however be deleted We will now take a look at the formatting procedure From the DISK menu press the F1 function key the display will show Use the encoder to select the unit you wish to format chosen from...

Page 31: ...K FORMAT procedure allows rapid deletion of all the files on a floppy disk which is already formatted From the DISK menu use the F2 function key to select theQUICK F field the display will show If the ENTER key is pressed the Genius will proceed with the floppy disk quick formatting procedure if ESC is pressed the procedure will be aborted When the procedure is confirmed the display will show the ...

Page 32: ...ll return to the main video page of the Disk menu If the procedure is confirmed during performance of the Sorting procedure the display will show 124 pending completion of the operation If you have confirmed the floppy disk quick formatting procedure but there is no disk in the drive the display will signal that there is no disk present by displaying DISK NOT IN DRIVE The same error will be displa...

Page 33: ...unction comprises TheDISK LABEL field displays the name of the floppy disk currently present in the drive To change the label assigned to the floppy disk press the ENTER key Otherwise you can press the ESC key to abandon this function and return to display of the DISK menu If the floppy disk is not inserted in the drive theDISK LABEL field will be empty and the ENTER button will be deactivated If ...

Page 34: ...rom the DISK menu press the F5 function key the display will show the video page relating to this function The COPY FD TO field envisages the following copying procedures o Other Floppy copy from floppy disk to floppy disk of the same capacity o Memory copy from floppy disk to internal memory As always use the encoder for the selection procedure Pressing ENTER will start the procedure while if ESC...

Page 35: ...recognise it the disk is not formatted or not valid After checking the source disk the instrument will proceed to read the data When reading is complete the system will prompt you to remove the source disk Remove the disk andwait for the prompt to insert the destination disk Once the disk has been inserted the system will proceed to write the data 127 ...

Page 36: ...are over disk removal and insertion which must only be carried out when the instrument displays the relative prompt This is because it takes a short time for the drive heads to locate in a safe position If the floppy disk is inserted before the system prompt remove it again and wait for the prompt During reading and or writing ESC can be pressed to interrupt the copying operation The display will ...

Page 37: ...ain video page of the DISK COPY function use the encoder to set the COPY FD TO field in the Memory mode If ENTER is pressed the instrument will proceed with reading of the floppy disk inserted in the drive whose data are to be copied if no disk is inserted the display will prompt you to insert one in the drive N B if this video page continues to displayed even after a floppy disk has been inserted...

Page 38: ...show as a request whether to proceed with overwriting of the file press ENTER to confirm or ESC to ignore the file and continue with those which follow Note that no check on existence of the file is made in case of disk to disk copying In this case any files already present are overwritten When the operation is complete the messageCOMPLETED will appear on the display for a few moments 8 1 6 INFO T...

Page 39: ... The error occurs during formatting operations if the capacity of the disk inserted is not as selected The error is also displayed if the floppy disk contains serious errors in its magnetic medium IMPORTANT NOTE ü If there is no floppy disk in the drive or the disk inserted is not recognised the data relating to this peripheral will be set with the value 0K ü The data relating to the total capacit...

Page 40: ...BOOT ERROR The magnetic medium of the disk is seriously damaged in the system areas Replace the floppy disk DISK ERROR LOAD CLUSTER A reading error has occurred due to a damaged cluster on the disk The file is not legible DISK ERROR OPEN ERROR 132 ...

Page 41: ...allow the instrument to acquire the floppy disk and then retry the procedure Also try removing and re inserting the disk DISK WRITE PROTECTED The floppy inserted has write protection extract the disk and remove the protection FLASH ERROR FLASH FULL There is not enough room in the memory to save any more files Press ESC to return to the previous video page Then free space in the internal memory see...

Page 42: ...py a file or more than one saved in the internal memory onto a floppy disk or files resident in one floppy disk to another etc From the FILES menu press the F1 function key The Genius will enable the function concerned and display the DIRECTORY video page described in point 5 5 relating to the unit currently selected and or the unit selected by means of the keys of the front panel SOURCE section Y...

Page 43: ... drive if you opt for theMemory option you will direct the files concerned to the internal memory As the display states pressing the ENTER key will start the copying procedure while if the selected songs are not really the ones you require pressing the ESC key will abort the operation in progress and the display will return to the DIRECTORY video pages 135 To deselect the file press the relative f...

Page 44: ...s empty the display will prompt you to insert the disk N B if this video page continues to displayed even after a floppy disk has been inserted in the drive this means that the system does not recognise it the disk is not formatted or not valid After checking the source disk the instrument will proceed to read the data When reading is complete the system will prompt you to remove the source disk R...

Page 45: ...may require more than one SOURCE DESTINATION cycle to complete the operation Extract the destination disk and re insert the source disk whenever the instrument gives the relative prompt When the operation is complete the messageCOMPLETED will appear on the display for a few moments Press ESC to return to display of the FILES menu 137 ...

Page 46: ...tions the display will show Here again pressing the ESC key will abort the procedure The nn nn field displays the number of files copied in relation to the total number selected For greater convenience the Genius checks whether the file being copied is already present in the destination If this is the case the display will show CAUTION Users are urged to take special care over disk removal and ins...

Page 47: ...active if there is no floppy disk in the drive You can use the SONG and LIST keys of the MODE section to display the two types of files and the PREV and NEXT buttons to scroll through the pages containing the files saved in the selected memory unit You can now use the function keys associated to the files to select the ones you wish to copy When the file is selected it will be identified by the an...

Page 48: ... is complete the display will show theCOMPLETED message for a few moments Press ESC to return to display of the FILES menu 8 2 3 RENAME Another operation possible on individual files is RENAME which can be used to change the name of files saved on a floppy disk or in the internal memory From the FILES menu use the F3 function key to select the RENAME function The display will show the DIRECTORY vi...

Page 49: ... in mind that the name cannot contain blank spaces if necessary use the _ underscore symbol After building up the new name use the ENTER key to confirm the operation or press the ESC key to abort the current function When the operation is complete the display will show theCOMPLETED message for a few moments Press ESC to return to display of the FILES menu If a file in the internal memory is rename...

Page 50: ...1 function key displays the name of the file o Type displays the file type i e whether it is a song Type Song or a List Type List o Length indicates the size of the selected file in KBytes o SMF Type indicates about the format of the SMF whether type 0 or type 1 o Tracks displays the number of tracks the file contains o Karaoke indicates the type of Karaoke using the following codes TUNE TUNE 1000...

Page 51: ...rom the song or from the List video page the display will exit from the CHECK FILE function and return to the TOOLS video page FILES option 8 2 5 ERROR MESSAGES FILES SECTION DISK ERROR LOAD CLUSTER A reading error has occurred due to a damaged cluster on the disk The file is not legible DISK ERROR OPEN ERROR A serious error has occurred during reading writing on the disk Very probably the disk s ...

Page 52: ...E PROTECTED The floppy inserted has write protection extract the disk and remove the protection DISK ERROR DISK FULL There is not enough room on the disk to complete the operation in progress Replace it or free some space FLASH ERROR FLASH FULL There is not enough room in the memory to save any more files Press ESC to return to the previous video page Then free space in the internal memory see poi...

Page 53: ...g the instrument on the MIDI IN port connected to the JOY PORT o OUT FILTER F3 sets the MIDI filters for the data addressed to the internal sound generator and or the MIDI OUT port o KARAOKE OUT F4 defines whether or not the MIDI data relating to the Karaoke are to be sent to the MIDI OUT port o SYNC IN F5 defines which synchronisation messages received at the MIDI IN port are to be interpreted by...

Page 54: ... OF MIDI MESSAGES Note messages message relating to the note to be performed Program Change this message is used for selection of the timbres to be applied on each track Once you know the correspondence between the number assigned to the memory and the Program Change number you can select the type of sound you require Refer to the appendix to this manual for details of the Program Change ð Timbre ...

Page 55: ...ning that these messageswill be ignored by the system ü Filter OFF the type of message is not filtered so these messagesare interpreted by the instrument The types of message to which the filter can be applied are the following o Note selectable by means of the F2 function key enables disables the filter on the note incoming messages Note On and Note Off o PRG F3 enables disables the filter on the...

Page 56: ...hese messages therefore will not be transmitted ü Filter OFF the type of message is not filtered so these messagesare transmitted to the MIDI OUT port The types of message to which the filter can be applied are the following o Note selectable by means of the F2 function key enables disables the filter on the outgoing note messages Note On and Note Off o PRG F3 enables disables the filter on the ou...

Page 57: ...press the ESC key and the modifications made will be saved automatically 8 3 5 SYNC IN In point 8 3 2 we have seen that specific incoming MIDI messages can be filtered or ignored The IN FILTER function can be used in this way to apply a general filter to the Real Time messages The SYNC IN function allows you to select which of the Real Time messages relating to the synchronisation present on the M...

Page 58: ...elected song 8 3 6 SYNC OUT By a procedure similar to the SYNC IN function the SYNC OUT function allows you to enable the transmission of given synchronisation messages Pay special attention to the status of the output filters OUT FILTER for the Real Time messages Enabling the filter will prevent transmission of any synchronisation messages From the MIDI menu select theSYNC OUT field using the F6 ...

Page 59: ...s information about the main characteristics of the system such as the total size of the internal memory and the software release currently installed The Factory Settings procedure can also be carried out o PLAY MODE F5 allows definition of the Play mode i e the mode for playback of the Song Next o MEM COMPACT F6 allows compacting of the internal memory Depending on the software release installed ...

Page 60: ...he status of the LEDs on the PLAY and STOP keys o Pau Cnt whenever the pedal enabled for this function is pressed the instrument will activate in cyclic mode the PAUSE function momentary interruption of song playback and the CONTINUE function restart of the interrupted playback o SONG whenever the pedal is pressed the song after the one currently active will be selected o SONG whenever the pedal i...

Page 61: ... the SYSTEM menu use the F3 function key to select theSYSTEM INFO field the display will show containing the following fields o Release displays the release of the operating system currently installed on the system o Date displays the date of creation of the operating system o Data Memory indicates the amount of user memory installed in the system memory installed space occupied by the operating s...

Page 62: ...LAY MODE The PLAY MODE function allows you to set the procedures for automatic playback of the songs booked in the SONGNEXT field of the MAIN PAGE When thePLAY MODE field is selected from the SYSTEM menu the display will show You can use the encoder to set this parameter as o Continuous in this condition the songs booked will be played automatically At the end of the current song whether natural o...

Page 63: ...able but unused display the INFOS video page of the DISK section point 8 1 6 for the memory and subtract the Used and Free values from the Total value CARRYING OUT THE MEMORY COMPACT PROCEDURE Depending on the quantity of memory installed and the number of files present this operation might take several minutes You should therefore only carry out this operation in when really necessary Also note t...

Page 64: ...he track MIDI channel for which the information is to be displayed o Prg displays the number of the Program Change active and the number of the associated timbre in accordance with the General MIDI standard on the selected track o Volume displays the current value of the track volume o Pan displays the Pan Pot value o Rv displays the level of the reverb effect o Ch displays the level of the Chorus...

Page 65: ...y the overall parameters of a song He can therefore perform transpositions modify the metronome tempo or delete tracks Naturally these modifications can be saved Select the song you wish to modify and press the SONG key of the EDIT section on the front panel The display will show the menu of the EDIT SONG function containing the following procedures o TRANSPOSER selectable using the F1 function ke...

Page 66: ...ribes when the ENTER key its LED is flashing is pressed the modifications will be accepted and saved in the temporary memory area pending definitive memorisation when you exit from the EDIT SONG function see point 9 1 6 Pressing the ESC key will abort the operation in both cases the display will return to the EDIT SONG function menu You can also listen to the song with the modifications made befor...

Page 67: ...nge The possible bpm values cover a range from 50 to 250 To simplify the setting of the new bpm value theNEW TEMPO field will display the outcome of the calculation of the variation made As the display indicates when ENTER is pressed the modifications will be accepted and memorised in the temporary memory area Refer to point 9 1 6 for definitive saving of the modified song If the ESC key is presse...

Page 68: ...k specified by means of the Track parameter The third field for display only shows the name of the timbre associated to the Program Change General MIDI table currently present in the selected track Since the Genius is a reader with Direct to Disk reading system the value of the Program Change refers to the bar currently selected first line of the song when the instrument is in Stop condition The v...

Page 69: ...AIN PAGE As during normal playback of a song during the temporary play function you can use the REW and FF keys to locate a given bar number within the song To stop the playback for a moment use the PAUSE key Press the STOP key to abort the TEMPORARY PLAY function and return to the previous video page During the temporary Play the display will also show any lyric information the song contains pres...

Page 70: ... the file The encoder letter choice and the PAGE keys cursor movement can be used to assign a new name while you can use the SOURCE keys to specify the unit disk or internal memory where it will be saved If the same file name is retained the original file will be overwritten When the procedure is complete press the ENTER key and the instrument will recalculate the events contained in the song in a...

Page 71: ... bars chosen by the user AsfortheEDITSONGfunction theEDITTRACKfunctioncanonlyberecalledinStopcondition You should always first make all the modifications you require and then proceed to save the song point 9 2 8 because depending on the complexity of the file it might take a few minutes torecalculatethesongevents Ifyouwishtoevaluatethemodificationsmade usethetemporary Play function Starting from t...

Page 72: ...key allows the user to specify the track in which the Program Change is to be modified o StartMsr F3 identifies the number of the first bar from which the Program Change is to be modified o EndMsr F4 identifies the number of the last bar in which the modification is to be eliminated o PRG F4 sets the number of the Program Change which is to replace the one currently in use in the track concerned o...

Page 73: ...ting that no modification will be made to the messages concerned As for the previous video page which can be displayed by pressing the PREV key pressing the ENTER key confirms the modifications while if the ESC key is pressed they will be aborted In both cases the display will return to the EDIT TRACK menu Press the PLAY button to use the temporary play function 9 2 2 EDIT TRACK VOLUME PAN Another...

Page 74: ...s applies the rule of relative editing which involves a percentage rescaling of the data in the track Since the editing takes place in relation to the original value if the Ratio value is set at 100 then the new value will be equal to 100 of the existing value while a setting of 200 will double it If the permitted values are exceeded the maximum and minimum values will be forced Here again since t...

Page 75: ...original value if the Ratio value is set at 100 the new value will be equal to 100 of the existing value while if 50 is selected the new value will be halved When the procedure is complete the modifications made can be confirmed by pressing the ENTER key while if ESC is pressed they will be aborted In both cases when the user exits from the function just described the display will return to the ED...

Page 76: ...rcentage modification of the value 9 2 5 EDIT TRACK REVERB The REVERB function can be used to modify the value of Control Change 91 which sets the amount of the reverb effect in a specific track To activate the REVERB function press the F5 function key the display will show the following video page 168 As for all the other video pages relating to other functions for editing individual tracks the p...

Page 77: ...artMsr F3 identifies the number of the first bar from which the variation in the chorus effect level is to be made o EndMsr F4 identifies the number of the last bar in which the variation in the effect level is to be made o Var F5 sets the percentage modification of the value of the control relating to the chorus effect in the track in question and in the set range of bars Refer to the information...

Page 78: ...on and return to display of the function before the temporary Play operation 9 2 8 EDIT TRACK SAVING THE MODIFICATIONS After making the modifications you require in the EDIT TRACK section and checking and approving the results you can save the song either by overwriting the existing version or by creating a new song From the EDIT TRACK menu if the EDIT TRACK key is pressed the display will return ...

Page 79: ...the memory unit in which the new song will be saved Naturally if the name is left unchanged the file will be overwritten When the procedure is complete press the ENTER key and the instrument will recalculate the events in accordance with the modifications made A progress indicator will indicate the point reached N B in case of type 1 SMF the progress indicator will refer to the track being recalcu...

Page 80: ...h room for the new file to be written even if it is to be rewritten because temporary files are generated in the memory 9 2 9 ERROR MESSAGES EDIT SECTION DISK ERROR LOAD CLUSTER A reading error has occurred due to a damaged cluster on the disk The file is not legible DISK ERROR OPEN ERROR A serious error has occurred during reading writing on the disk Very probably the disk s magnetic medium is da...

Page 81: ...ite protection extract the disk remove the protection and repeat the editing operations DISK ERROR DISK FULL There is not enough room on the disk to complete the operation in progress Replace it or free some space FLASH ERROR FLASH FULL There is not enough room in the memory to save any more files Press ESC to return to the previous video page Then free space in the internal memory see point 8 2 2...

Page 82: ... the memory units Each list of songs can contain up to 64 steps meaning it can combine up to 64 songs 10 1 CREATING A LIST Make sure that the LED of the SONG button in the MODE section is on meaning that a song is selected From the Stop condition press the LIST key in the EDIT section The display will show 174 Then press ENTER to create a new LIST the system will then display the video page TheSte...

Page 83: ... the encoder and change them by activating the DIRECTORY function on the step to be modified If a step is inserted between two existing steps the Genius will create an empty step to which a song can then be associated after the one selected with the encoder All subsequent steps will be shifted one place TheDELETE function F6 function key deletes the selected step and shifts all subsequent steps on...

Page 84: ...splayed You can use the SOURCE buttons to select the unit which is to contain the list created Naturally for access to the DISK option the floppy disk must be inserted and recognised You can use the encoder to scroll through the characters and the PAGE buttons to position the cursor Blank spaces cannot be inserted between the characters Press ENTER to conclude the procedure For the error video pag...

Page 85: ...the selection field will display the messageEMPTY See point 5 1 1 for information about the error video pages relating to performance of the songs contained in Lists 10 3 1 ERROR MESSAGES PLAY LIST CHAIN EMPTY NOTES ü The List may be selected both in the field next to the F1 button and in the SONGNEXT field In this second case the List will be played automatically at the end of the current song ü ...

Page 86: ...nternal memory it will be placed at the end of the sequence of existing lists 10 5 LIST FILE MANAGEMENT This manual has shown us how to copy rename and delete song files MID files The same procedures are alsoidentical for the List files made available during this operation by pressing the LIST button in the MODE section Press SONG in the same section to return to management of the MID files 178 No...

Page 87: ...es is simple and immediate Switch off the instrument and insert the floppy disk containing the file with the new operating system then switch on the instrument and the display will show After this the instrument will proceed to load the new release The display will show the video page At this point a check on the loaded file for damage will follow 179 ...

Page 88: ...ly without an operating system It is therefore essential NOT TO SWITCH THE INSTRUMENT OFF during these phases When the procedure has been concluded correctly the display will show the video page NOTES ü The file containing the operating system is called Datafile sys Never rename it ü If the message SYSTEM FILE ERROR is displayed during the update the floppy disk medium is damaged or the update fil...

Page 89: ... s operating system is damaged or not present reinstall the operating system using the procedures described in the previous point If the operation is not concluded successfully contract an authorised Voice Systems service centre ADDING FLASH MEMORY EXPANSIONS To open the instrument remove the screws shown in the diagram 181 ...

Page 90: ...they are the correct way round Thecardsareprintedwithawhitecircle inserttheexpansionsothatthisreference coincides with the circle printed on the board ü Insert the expansions in sequence from left to right Never leave empty slots between two expansions 182 Then insert the expansions ...

Page 91: ...ato 77 Shakuhachi 109 Bag Pipe 14 Chimes 46 Harp 78 Wistle 110 Fiddle 15 Dulcimer 47 Timpani 79 Ocarina 111 Shanai 16 Drawbar Organ 48 String Ensamble 1 80 Square 1 112 Tinkle Bell 17 Jazz Organ1 49 String Ensamble 2 81 Sawtooth 1 113 Agogo 18 Rock Organ 1 50 Synth Strings 1 82 Calliope 114 Steel Drum 19 Church Organ 1 51 Synth Strings 2 83 Chiff 115 Woodblock 20 Reed Organ 52 Choir Aah 84 Charang...

Page 92: ...ordion italian 22 Harmonica 23 Tango Accordion 24 Nylon Guitar 8 Ukelele 16 Nylon Guitar o 32 Nylon Guitar 2 25 Steel Guitar 8 12 Strings Guitar 16 Mandolin 26 Jazz Guitar 8 Hawaiian Guitar 27 Clean Guitar 1 8 Chorus Guitar 28 Muted Guitar 8 Funk Guitar 16 Funk Guitar 2 29 Overdrive Guitar 30 Distort Guitar 8 Feedback Guitar 31 Guitar Harmonics 8 Guitar Feedback 32 Acoustic Bass 1 33 Finger Bass 8...

Page 93: ...oice 8 Lead Voice 2 86 Fifths 87 Bass Lead 1 88 Fantasy 1 89 Warm Pad 90 Polysynth 91 Choir 8 Pad Choir 92 Bowed 93 Metallic 94 Halo 95 Sweep 96 Rain 97 Soundtrack 98 Crystal 1 Syn Mallet 99 Atmosphere 1 100 Brightness 8 Brightness 2 101 Goblins 8 Goblins 2 102 Echoes 1 Echo Bell 2 Echo Pan 103 Sci fi 104 Sitar 1 Sitar 2 105 Banjo 106 Shamisen 107 Koto 1 8 Taisho Koto 108 Kalimba 109 Bag Pipe 110 ...

Page 94: ...HQ Power Low Tom1 HQ Power Low Tom1 Elec Low Tom1 44 G 2 Pedal Hi Hat EXC1 45 A2 HQ Low Tom HQ Power Mid Tom2 HQ Power Mid Tom2 Elec Mid Tom2 46 A 2 Open Hi Hat EXC1 47 B2 HQ Low Mid Tom HQ Power Mid Tom1 HQ Power Mid Tom1 Elec Mid Tom1 48 C3 HQ Hi Mid Tom HQ Power High Tom2 HQ Power High Tom2 Elec High Tom2 49 C 3 Crash Cymbal 1 50 D3 HQ High Tom HQ Power High Tom1 HQ Power High Tom1 elec High To...

Page 95: ... Mid Tom2 Elec Tom2 Timpani A Metronome Click 46 A 2 808 OHH EXC1 808 OHH EXC1 Timpani A Metronome Bell 47 B2 808 Mid Tom1 Elec Mid Tom1 Timpani B Guitar Slide 48 C3 808 Hi Tom2 Elec Hi Tom2 Timpani C Gt Cut Noise down 49 C 3 808 Cymbal Timpani C Gt Cut Noise up 50 D3 808 Hi Tom1 Elec Hi Tom1 Timpani D Double Bass Up 51 D 3 Timpani D Key Click 52 E3 Reverse Cymbal Timpani E Laughing 53 F3 Timpani ...

Page 96: ...XC1 808 CHH EXC1 47 B2 Low Mid Tom Room Mid Tom1 Room Mid Tom1 Elec Mid Tom1 808 Mid Tom1 48 C3 Hi Mid Tom Room Hi Tom2 Room Hi Tom2 Elec Hi Tom2 808 Hi Tom2 49 C 3 Crash Cymbal 1 808 Cymbal 50 D3 High Tom Room Hi Tom1 Room Hi Tom1 Elec Hi Tom1 808 Hi Tom1 51 D 3 Ride Cymbal1 52 E3 Chinese Cymbal Reverse Cymbal 53 F3 Ride Bell 54 F 3 Tambourine 55 G3 Splash Cymbal 56 G 3 Cowbell 808 Cowbell 57 A3 ...

Page 97: ...F X X O X AFTER Key s TOUCH Ch s X X O O PITCH BENDER X O CONTROL 0 1 CHANGE 5 7 10 11 64 67 80 81 91 93 99 101 120 121 123 126 127 X X X X X X X X X X X X O O O O O O O O O O O O PROGRAM CHANGE True X O 0 127 SYSTEM EXCLUSIVE O O SYSTEM Song Pos COMMON Song Sel Tune X X X X X X SYSTEM Clock REAL TIME Commands X X X X AUX Local On Off MESSAGES All note Off Active Sense Reset X X X X X O X O Mode 1...

Page 98: ...O O AFTER Key s TOUCH Ch s O O O O 1 PITCH BENDER O O CONTROL 0 127 CHANGE O O 1 PROGRAM CHANGE True O O 1 SYSTEM EXCLUSIVE O O 1 SYSTEM Song Pos COMMON Song Sel Tune O O O O 1 2 1 2 SYSTEM Clock REAL TIME Commands O O O O 1 2 1 2 AUX Local On Off MESSAGES All note Off Active Sense Reset O X X O X X NOTES 1 Can be switched ON or OFF See MIDI FILTER Section 2 If SYNC is enabled See MIDI SYNC Sectio...

Page 99: ... a particular installation If this equipment does cause harmful interference to radio or television reception which can be determinated by turning the equipment off and on the user is encuraged to try to correct the interference by one or more of the following measures Reorient or relocate the receiving antenna Increase the separation between the equipment and receiver Connect the equipment into a...

Page 100: ...1 869605 e mail viscount omniway sm Internet www viscount organs com www viscount it Distribution for Italy TITAN MUSIC S A Strada Genghe di Atto 80 47031 Acquaviva Repubblica di San Marino tel 0549 999164 fax 0549 999490 e mail viscount omniway sm Internet www viscount organs com www viscount it ...

Reviews: