Vizio E650i-A2, User Manual
The Vizio E650i-A2 is a high-definition television with a sleek design and crisp picture quality. To get the most out of your new TV, be sure to download the free User Manual from manualshive.com to learn about all its features and settings. Enjoy your viewing experience to the fullest.
Share
Download


Reviews:
No comments
Related manuals for E650i-A2
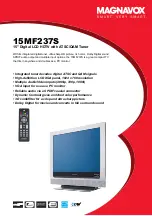
15MF237S - Hook Up Guide
Brand: Magnavox Pages: 3

537
Brand: Olevia Pages: 73

DECK22DR
Brand: RCA Pages: 17

D32hn-D0
Brand: Vizio Pages: 20

D32-D1
Brand: Vizio Pages: 28

D320-B1
Brand: Vizio Pages: 57

Envision L19W961
Brand: AOC Pages: 1

Envision LE19W037
Brand: AOC Pages: 52

55C2U-DVB
Brand: AOC Pages: 57


