Vizio E390VL, User Manual
The Vizio E390VL offers brilliant visuals with its high-definition display, remarkable audio quality, and user-friendly interface. Enhance your entertainment experience by downloading the free user manual from manualshive.com. This comprehensive manual provides detailed instructions and troubleshooting tips to maximize your enjoyment of this exceptional product.
Share
Download


Reviews:
No comments
Related manuals for E390VL

Z41 Pro
Brand: Zennio Pages: 2

373002
Brand: Bticino Pages: 2

ACT-408A-N270
Brand: IEI Technology Pages: 134

SP-7165
Brand: protech Pages: 180

ED-RUD-2 Series
Brand: Regin Pages: 6

LT-42E10
Brand: JVC Pages: 20

LT-42E478
Brand: JVC Pages: 2

LT-46FN97
Brand: JVC Pages: 2

PD-42DX6BJ
Brand: JVC Pages: 171

LT42X688 - 42" LCD TV
Brand: JVC Pages: 2

NSX-24GT1 (PDF)
Brand: Sony Pages: 2

LCD TV XBR-52LX900
Brand: Sony Pages: 2

KV-36HS420 - 36" Fd Trinitron Wega
Brand: Sony Pages: 1

KE-P42MRX1
Brand: Sony Pages: 2
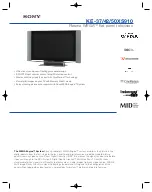
KE-42XS910 - 42" Flat Panel Color Tv
Brand: Sony Pages: 2

KE-42XBR900 - 42" Xbr Plasma Wega™ Integrated Television
Brand: Sony Pages: 2

KE-42TS2 - 42" Flat Panel Color Tv
Brand: Sony Pages: 1

NSX-24GT1 (PDF)
Brand: Sony Pages: 40


