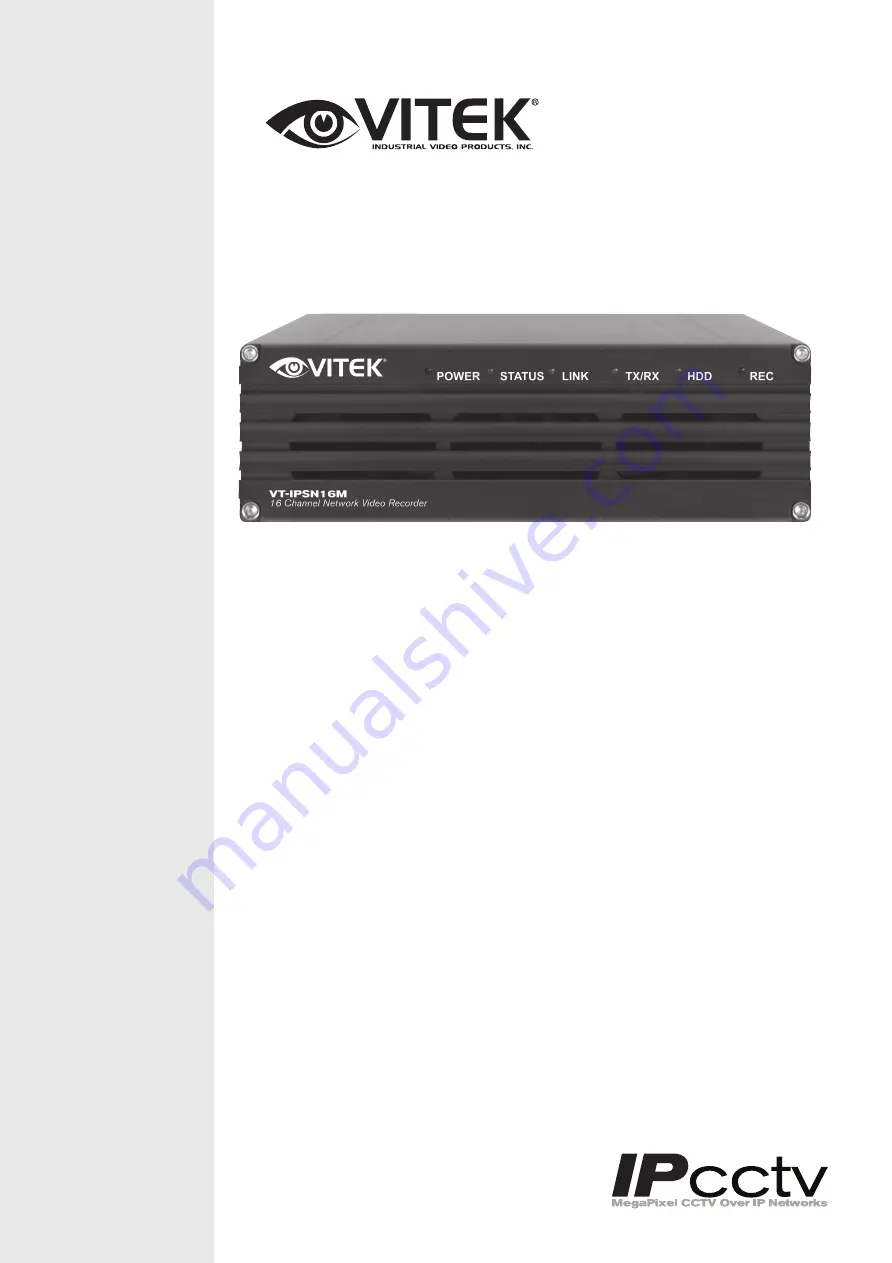
background image

VITEK

VT-IPSN16M

ENVI Series 16 Channel 

Network Video Recorder

• Supports up to 16 IP Cameras

• Supports 4 Mega pixel cameras at real-time / 8 Mega pixel at 15fps/

each / 16 Mega pixel cameras 7.5fps/each

• Audio recording & transmission

• Configuration and control through Web browsers

• Supports Hard Drives up to 2TB SATA

• Multi-Vendor camera support

• H.264 Compression

• RS-232 Serial port

• Gigabit Ethernet

• Built-in motion detection

• PTZ control

Summary of Contents for VT-IPSN16M

Page 1: ... cameras at real time 8 Mega pixel at 15fps each 16 Mega pixel cameras 7 5fps each Audio recording transmission Configuration and control through Web browsers Supports Hard Drives up to 2TB SATA Multi Vendor camera support H 264 Compression RS 232 Serial port Gigabit Ethernet Built in motion detection PTZ control ...

Page 2: ...Installation 13 5 IP Installer Introduction 16 6 Installing and Uninstalling 16 6 1 Installing IP Installer 16 6 2 Uninstalling IP Installer 19 7 Using IP Installer 22 7 1 Starting the Program 22 7 2 Search Product 23 7 3 Manual Network Setup 24 7 4 Automatic Network Setup 26 7 5 Using DHCP Server 29 7 6 Using PPPoE 29 7 7 Updating Firmware 31 7 8 Filter Configuration 33 7 9 Live View 34 8 ENVI Ad...

Page 3: ...6 View Network Status 45 11 7 Network Status Notify 46 11 8 IP CCTV DNS Setup 47 11 9 Port Forwarding UPnP 48 11 10 RTP RTSP Setup 49 12 Device Configuration 51 12 1 Privacy Zone 51 12 2 Camera Motion 53 12 2 1 Camera Configuration 55 13 Advanced Configuration 59 13 1 Advanced Services 60 13 1 1 E mail Service Configuration 61 13 1 2 FTP Buffered Service Configuration 64 13 1 3 FTP Periodic Servic...

Page 4: ...s Buttons 87 18 3 1 Saving as Image File 87 18 3 2 Saving as Video File 88 18 3 3 Manual Recording 88 18 3 4 Instant Playback 89 18 4 Extended Features 90 18 4 1 Pausing Live Video 90 18 4 2 FPS Control 90 18 4 3 Flip Control 91 19 EN V R Introduction 92 20 Requirements for Installation 93 20 1 EN V R Versions 93 20 2 System Requirement for PC 93 21 Installing EN V R 94 22 Uninstalling EN V R 96 2...

Page 5: ...eating a Group 127 29 Searching Video 129 29 1 Searching Video 129 29 2 Daily Search 129 29 2 1 Search Mode 130 29 2 2 GO to Time Position 130 29 3 Condition Search Mode 130 29 3 1 Advanced Search Mode 131 30 Video Playback Controls 132 31 Extra Features 133 31 1 Window Control 133 31 2 Recording Period 133 31 3 Backup 134 31 4 Snapshot 135 31 5 Print 136 31 6 Ratio Display 136 32 EN V R Configura...

Page 6: ...ality 155 34 5 3 Configure Camera Recording Condition 156 34 5 4 Alarm Event Configuration 159 34 6 User Management 160 34 6 1 User Registration 161 34 6 2 User Modification 162 34 6 3 User Deletion 162 34 7 Disk Setup 162 34 7 1 Disk Setup 162 34 7 2 Disk Quota Modification and Deletion 162 34 7 3 Disk Mode Change 163 34 8 Utilities 165 34 8 1 Email account Configuration 166 34 8 2 About Program ...

Page 7: ...upports other major brands of IP cameras and Video Servers including Axis Panasonic Mobotix Arecont Vision IQinvision and Vivotek Picture 1 VT IPSN16M 1 2 Key Features ENVI 16 Channel Network Video Recorder Supports up to 16 IP Cameras Supports 4 Mega pixel cameras at real time 8 Mega pixel at 15fps each 16 Mega pixel cameras 7 5fps each Audio recording transmission Configuration and control throu...

Page 8: ...formance 1000Base T LAN Trans 120fps NTSC 100fps PAL Rec 120fps NTSC 100fps PAL when Triplex Mode with all channels at HD LAN interface 10 100 1000 BaseT Ethernet auto sensing Serial Interface One serial ports for console modem PSTN GSM serial input output device COM Port is RS 232 Max Baud rate 115200 bit s Management Configurable by serial web or telnet Remote system update via telnet FTP or web...

Page 9: ... HTTP TCP IP FTP Telnet RARP PPPoE PAP CHAP DHCP NTP SMTP client Approvals KCC FCC Class A CE Class A RoHS Dimensions L x W x H Weight 8 82 x 5 51 x 1 73 224 x 140 x 44mm 2 09 lbs 0 95kg w o power supply or HDD All specifications are subject to change without prior notice Table 1 Specification for VT IPSN16M 1 4 VT IPSN16M Packing List VT IPSN16M includes the following items VT IPSN16M 1 EA Power ...

Page 10: ...ght blinks with data transmission over LAN E HDD LED Green light blinks when formatting or recording on HDD F RECORDING LED Red light blinks when recording to HDD Table 3 VT IPSN16M Front panel Beep Sound Description Name Description 1 POWER ON One short Beep when power is turned on 2 SYSTEM READY Two Beep s after boot up 3 POWER OFF Two short Beep s on power down 4 HDD ERROR Beep s continuously f...

Page 11: ...B port reserved for future use C Factory Default Switch To Factory Default System Push the switch for 7 secs after system booting D LAN LAN port E COM RS 232 F Power DC 12V 5A Do not cycle power until HDD and Fan have stopped G Power Switch Used to switch on off power Do not cycle power while formatting HDD may damage HDD Table 5 VT IPSN16M Rear panel ...

Page 12: ...age illustrates PIN No of COM Port Numbers are displayed in order from the left For RS 232 connection RXD TXD GND are used only in general RXD and TXD should be crossed to communicate properly in case it connects with PC one by one Picture 4 COM Port Description ...

Page 13: ...t IP address 10 20 30 40 Network mask 255 255 255 0 Gateway 10 20 30 1 Table 5 Factory Default 3 3 Installing VT IPSN16M For installation of VT IPSN16M please follow the steps below 1 install the VT IPSN16M in place with adequate ventilation 2 Connect the VT IPSN16M to the Network through the LAN port 3 Connect the power supply of VT IPSN16M Refer to the following sections for programming and view...

Page 14: ...main window of IP Installer program will appear on the screen as shown below 4 Search for the installed camera on the network by clicking the search product icon the camera should appear as the image below The default IP address is 10 20 30 40 5 To assign an automatic IP address to this camera within the network click the Automatic IP Setup icon 6 Verify the Automatic IP address provided enter the...

Page 15: ...nfigured by the program automatically you will be able to get access by a Right click over the camera information Go Product Homepage b Click over the icon Connect Product Homepage 8 From the Home Page you can Live View or administrate Admin the camera ...

Page 16: ...ENVI Series VT IPSN16M 15 On Live View you will be able to see live video from your camera NOTE For more information refer to Section 11 ENVI Admin Menu on page 36 ...

Page 17: ...rk Cameras Video Servers and Network Video Recorders Capable of firmware updating Support automatic and manual IP setup 6 Installing and Uninstalling It s recommended to install this program as an administrator 6 1 Installing IP Installer If the program is started from the CD supplied with Vitek products insert the CD in to CD DVD tray and check the installation file If it is download or copied fr...

Page 18: ...ay be prompted to continue running the installation program Click Yes button then the following window will be shown on the screen To continue the installation click Next The following window will be displayed for location to install ...

Page 19: ...lation is C Program Files IP Installer It is recommended to install in this folder if you want to change it to a different location click the Browse button to choose location Now click the Install button You will see the progress of the install as shown below ...

Page 20: ... window will be shown Click the Finish button to complete the installation 6 2 Uninstalling IP Installer If you want to remove the IP Installer program from your PC click Start All Programs IP Installer Uninstall You may be prompt to continue running the uninstall program ...

Page 21: ...n then the following window will be shown on the screen Click on the Next button and you will see the following window Click on the Uninstall button to start removing the IP Installer program from your computer The following window will be displayed ...

Page 22: ...ENVI Series VT IPSN16M 21 Click on the Finish button to close the window ...

Page 23: ...e no network devices shown as it is the first time running the program and nothing has been registered Search Product Scan the network and shows the list of all the Vitek products that IP Installer program found Clear Product List Clear the Vitek products list created by searching the network Automatic IP Setup Configure the network setting of selected IP device in Automatic mode Manual IP Setup C...

Page 24: ...o show the progress of the search Wait until it reaches 100 or you may press the Cancel button to stop the search at any given time and proceed with the results made until that moment After searching is completed 100 the IP Installer program will display the IP devices found If you want to clear the list of the IP Devices from the window click Clear Product List button from the Main Toolbar ...

Page 25: ...cking Manual IP Setup button on the main Toolbar When one IP device is selected the following screen will appear MAC Address MAC address of the selected device is shown Server Name Input desired name of camera i e Lunch Room HTTP Port Input port number to access IP devices homepage via web Default port is 80 IP Type Select the type of address Static DHCP PPPoE Use STATIC for manual IP setup ...

Page 26: ...t be saved in the Camera memory which means if the IP device is turned off the changes are lost and the previous setting will be applied back Click Set button to apply the changed values to IP device If you don t want it click Cancel button When two or more IP devices are selected You can select two or more IP devices at the same time by clicking one after another while CTRL key is pressed The res...

Page 27: ...the server name of NetCam and Apply to all button is pressed it will be automatically changed to NetCam1 and the next IP device will have NetCam2 and so on The same applies to the IP address field For Password field the entered information doesn t increment but will use the same data In using Apply to all you can choose which field is affected Put check marks only on the field you want to use this...

Page 28: ...sword Password for the IP device Default password for Vitek products is root Save Configuration Option Select whether the configured contents is to be saved in the Camera memory or not Save Configuration Changed values will be saved in the Camera memory of the device which means the changes are permanent Not Saving Changed values will not be saved in the Camera memory which means if the IP device ...

Page 29: ...ries VT IPSN16M 28 Note If your network has more than one IP address Zone at the same time the confirmation window will be displayed as below You need to choose the one you are going to use for your IP devices ...

Page 30: ...rk Setup on page 24 After filling the fields with appropriate values click Set button to apply the changed values to IP device If you don t want it click Cancel button to restore the previous values 7 6 Using PPPoE If your network environment is based on PPPoE connection you ll need to choose PPPoE on IP Type selection First open the Network Setup window either by Manual IP Setup or Automatic IP S...

Page 31: ...oducts is root unless already changed Save Configuration Option Select whether the configured contents is to be saved in the Camera memory or not Save Configuration Changed values will be saved in the Camera memory of the device which means the changes are permanent Not Saving Changed values will not be saved in the Camera memory which means if the IP device is turned off the changes are lost and ...

Page 32: ...e firmware first create a folder on your computer for the update firmware than download the latest firmware to that folder Then select the IP device to be updated on IP Installer window then click Update Firmware button from the toolbar The following window will be displayed You may find the Password field is empty on the window shown above If so click the Password field of the IP device and enter...

Page 33: ...ame time and have them start firmware updating in a single step Select the files to update by holding CTRL key and selecting which IP devices to update Click Start Update button You will see the update window brought up with multiple IP devices listed Note Do not CLOSE window until completed to avoid permanent damage to the camera ...

Page 34: ...lready filled in with 1C 7C 45 which is the MAC prefix for Vitek products Put a checkmark in MAC Address or IP Range to set the range for searching You can set the range of IP addresses to scan as shown below In this example all the IP devices having MAC address starting with 1C 7C 45 will be listed on the result window after scanning Or you can look for a single IP device having a specific IP add...

Page 35: ...s are done you should make sure that the IP devices are accessible with the new settings The best way to do it is by connecting to the homepage of each IP device s built in server and starting Live View feature Select Go Product Homepage when you click the right mouse button on the IP device to test If you select Go Product Homepage the homepage of that device s built in server will be opened on a...

Page 36: ... have not installed the ENVI Series Viewer program before it will ask for a confirmation to install it Allow it and you will be able to find out whether the configuration by IP Installer program is properly done Note Refer to Section 19 ENVI Series Viewer on page 79 for detailed information about the ENVI Series Viewer ActiveX program ...

Page 37: ...ou re connected to 8 1 Entering Admin Menu Click Admin then you ll see a login window In the login window enter root for both ID and password as they are the factory defaults Press Enter key or click OK Now the Admin Menu will be displayed as shown below This will guide you to the top level menu items which are Quick System Network Device Advanced Recording and Utilities Clicking any of these top ...

Page 38: ... would like to configure 9 1 Step 1 Changing Server Name Click Server Name on System Configuration menu then Server Name Setup windows will be displayed Refer to Section 13 1 Server Name Setup on page 38 to see how to change the server name 9 2 Step 2 Time Setup Click Date Time on System Configuration menu then the Local Date Time Configuration window will be displayed Refer to Section 13 2 Date T...

Page 39: ...ion with microSD card on page 71 to see how to set up 9 6 Finish After clicking Finish all changes will be saved automatically to the camera server 10 System Configuration Menu When you click on System Configuration item on Admin Menu the following sub menu will be displayed 10 1 Server Name Setup Click Step 1 on Quick Configuration or Server Name under System Configuration then the following will...

Page 40: ...ystem Configuration Fill the Date and Time fields with your local time and date information If you re in a different time zone put a checkmark on Change Time Zone then select the correct region from the dropdown list to make the time zone change you need to click Apply button and reboot the system If you want to retrieve the exact current time from a NTP server on the network click Get NTP Server ...

Page 41: ...era using new password 10 4 Access Control Click Access Control on System Configuration menu The following windows will be displayed From the Access Permission window select either one you would like to use Click Apply button to save the change Full Access Any user can access the camera server and use all the features without limits Limited Access Only registered users can access the camera server...

Page 42: ...he permission level for registered users to the VITEK camera All Channels Access User can use all the features except for Configuration in Admin Page General Access only live viewing access User can only use Live View feature No Access User is not permitted any of the features Selective Access User is allowed to use only the selected features With this item selected you can now configure the detai...

Page 43: ...ing user s name password and access permission User ID is not allowed to change Once selecting a user ID to edit the procedure is the same as in Add section To see existing users click Select UserId and select a user to be edited from the dropdown box Then you can change the password name or access permission and click Apply button to save the setting Setup of Access Permission can be done the sam...

Page 44: ...After apply program will ask to close web browser for updates which will take 20 30 seconds If Back button is clicked all values will be discarded If Refresh button is clicked the program will load previous values 11 2 DHCP Client Configuration To use DHCP a DHCP server must exist in the network environment Select DHCP Client from Network Configuration click Apply And all information needed will b...

Page 45: ...K cameras to communicate with the Client PC HTTP Port is the network port that is used when a Client PC connects to the VITEK camera Web page It can be assigned between 80 and 65535 The default value is 80 Note If the HTTP port number is changed to a different value than default 80 make sure the new HTTP port number goes together with the VITEK cameras IP address For example when a VITEK cameras I...

Page 46: ...he VITEK camera will share network bandwidth limit 11 6 View Network Status This menu shows network status of VITEK cameras Note This bandwidth control feature works well in M JPEG video transmission But for H 264 dropping data packets may cause low quality of video so it is recommended to utilize CBR and frame rate control instead of bandwidth control for H 264 video Refer to Section 15 2 Camera ...

Page 47: ...etwork status will be emailed to a specific person in case of the following events When it is set to Dynamic IP in the Network Configuration menu and the VITEK camera has been given a new dynamic IP address and connects to the network Or When it is set to PPP Client on WAN Modem menu and the VITEK camera has been connected to the network with ISP or PPP server To configure click Network Status Not...

Page 48: ...s 11 8 IP CCTV DNS Setup Note Refer to Section 36 IP CCTV DNS Registration on page 141 for further details on configuration IP CCTV DNS service provides a static public domain name to help user s access VITEK cameras even though their IP address has changed or they are used in a local network For proper function of IP CCTV DNS service products need to be accessible through the internet Mail Notifi...

Page 49: ...nto IPCCTVDNS server and IP CCTV DNS service should be enabled There are 3 options in UPnP Port Forwarding Manual User Assigned Port issued when users can access network router hub and manually assign available network ports to VITEK cameras In this case users have to type already assigned network ports under User Assigned port UPnP User Assigned Port is used when users want VITEK cameras to confi...

Page 50: ...ronment within a firewall There are two types of usage one for Unicast address condition and the other for Multicast address condition For Unicast Address Use rtsp network video server ip address cam0_0 If there are multiple channels use cam0_x x 0 3 with each number applied If there are multiple modules use camx_0 x 0 3 with each module number applied For Multicast Address Use rtsp network video ...

Page 51: ... you want to use e g port number 445 rtsp network video server ip address 445 cam0_0 RTP Start Port The starting number of the port for video transfer Each time video transfer connection is made the port number also increases Multicast Address Address for multicast video transfer The multicast address 0 0 0 0 is for stopping multicast Multicast Port Port number for viewing the video with a multica...

Page 52: ...on click Privacy Zone from Device Configuration category To Add a Privacy zone click New button a Green colored box will appear click on the Green box and it will turn Red at this point you can resize it by clicking and holding any corner and drag to desired size To relocate box click and hold anywhere inside the box and drag to desired location Click Apply when done ...

Page 53: ...Users can add up to 8 Privacy Zones per screen by repeating above steps If you add more than 8 an error message will display on the screen To delete a privacy zone click the zone and click Delete button followed by Apply button ...

Page 54: ...pression But because of its higher quality of still image it is adequate for detailed reviewing of stored video H 264 In this format each frame data is related to other nearby frames For this reason it provides much higher compression ratio than M JPEG and is adequate for video transfer However if network conditions are limited dropped frames in video data is possible the video quality can be rela...

Page 55: ... not available on this model Video with IP address If Enabled video data will contain the IP address of the video server Feature not available on this model Audio not available on all models Select if Audio function is to be used applies to Primary Stream only VITEK Cameras provides 2 way audio streaming by combining microphone input with video data Users can listen to the streamed audio through a...

Page 56: ...l Mode H 264 Rate Control Mode VBR Variable Bit Rate Video frames are encoded with selected image quality and GOP Encoded frames have different data size from each other Image Quality one of 6 quality levels Low Compression Highest High Normal Low Lowest GOP Structure Distance between I Frames That is filled with P frames Rate Control Mode CBR Constant Bit Rate Video frames are encoded with select...

Page 57: ...d click Apply button to save the setting If you click Default button the entire configuration will be reset to the original values Camera Control Select Models Select Camera Control on the bottom of Camera Motion Configuration menu Power Frequency Select NTSC 60Hz or PAL 50Hz according to the region Environment Indoor or Outdoor Noise Filter To reduce static on image Brightness Select the brightne...

Page 58: ...elect between 1 and 32 and lower the value the earlier the transition point Vertical Flip this is to rotate the image 180 Vertically Horizontal Flip this is to rotate the image 180 Horizontally Manual Shutter Enable If enabled the shutter speed will be selected manually If disabled it is controlled automatically Manual shutter Speed available only when Manual Shutter is Enable Select the shutter s...

Page 59: ...e grid will turn Green then click on any box inside scene to take out that area from Motion Detection box will turn Red then click Apply to save Motion Sensitivity Set the sensitivity of motion defined in Motion Detection Area Select between 100 and 100 100 is the most sensitive After all the settings are done click Apply button to save it If Default button is clicked all the fields return back to...

Page 60: ...nuously being stored in a buffer memory of the camera server for a certain period of time When the camera server is triggered by an event or schedule the images or alarm status just before and after the event schedule are reported to you by email or buffered FTP services In Periodic Service only the image alarm sensor status after an event schedule is reported to you upon the server being triggere...

Page 61: ...ber of frames for Pre Alarm Buffer and Post Alarm Buffer is limited to 10 frames Pre Alarm Speed You can set the buffering speed If it s set to Fastest the server will store images as fast as it can Each cannel can be set with different values This configuration applies to E mail and FTP Buffered and click Save button to apply changes E mail Set up Email Service configuration FTP Buffered Set up F...

Page 62: ...s address for sending email Authentication Login Select Enable if SMTP server requires ID and password User ID Enter User ID to log in to SMTP server Password Enter Password to log in to SMTP server Sender Enter email address of the sender 1st Recipient Enter the email address of the first recipient 2nd Recipient Enter the email address of the second recipient 3rd Recipient Enter the email address...

Page 63: ...re Alarm Images The number of image frames to store before Alarm Post Alarm Images The number of image frames to store after Alarm Pre Alarm Speed This field shows the speed of Pre Alarm Configuration can be done in Advances Services page Post Alarm Speed Select the speed of Post Alarm Fastest is the highest value Subject Subject of the E mail message to send 1 Content of the first line in the ema...

Page 64: ...Save button If you want to cancel it click Back Service This shows what service this condition is for Module ID Module ID for current setup Camera ID Channel ID for current setup Enable Disable Select Enable to use Condition otherwise select Disable Always This Condition applies all the time Schedule or Event is not usable Schedule Only Use Week Time and Date in Condition parameter If none of the ...

Page 65: ...fered Service Select Enable to use the FTP Buffered service Otherwise select Disable Server Address FTP Server Address Base Directory Name The directory in FTP server where the data will be uploaded You should make the directory in the FTP server before using the service Base File Name The base file name of the data to be uploaded in FTP server ...

Page 66: ...ted with month If File Name is checked new file name is created with month Day If Directory Name is checked new directory name is created with day If File Name is checked new file name is created with day Hour If Directory Name is checked new directory name is created with hour If File Name is checked new file name is created with hour Minute If checked new file name is created with minute Sec If ...

Page 67: ...es for video buffer setup Pre Alarm Images The number of image frames to store before Alarm Post Alarm Images The number of image frames to store after Alarm Pre Alarm Speed This field shows the speed of Pre Alarm Configuration can be done in Advances Services page Post Alarm Speed Select the speed of Post Alarm Fastest is the highest value After finishing setup click Save button to apply If you d...

Page 68: ... checked new directory name is created with weekday If File Name is checked new file name is created with weekday Year If Directory Name is checked new directory name is created with year If File Name is checked new file name is created with year Month If Directory Name is checked new directory name is created with month If File Name is checked new file name is created with month Day If Directory ...

Page 69: ...ons of VITEK IP cameras will have a microSD card slots on the back Those models can record and playback video from the microSD card if installed Vitek IP cameras can Support cards up to a 32GB Only use quality class 10 microSD cards 14 1 MicroSD Configuration If a microSD card SD card is not present in the slot already power down the VITEK IP camera before inserting an SD card Make sure to turn th...

Page 70: ...button followed by clicking SD Status Format Click on 1st SD and the following screen will be displayed Note Be sure to turn off the device before installing a SD card Otherwise the SD card may become defective Always check the recommended type of SD card because non conforming SD cards can cause abnormal behavior of the system ...

Page 71: ...ill display asking if you want to do a Partition and formatting click OK to continue or Cancel to stop After clicking OK the following screen will be displayed Note if program is terminated during the Format process SD Card might be damaged After formatting is completed the following screen will be displayed ...

Page 72: ...o 14 2 Recording Configuration with microSD card Each camera has 2 streams referred as Camera 1 Camera 2 see image below which can be configured for recording options in this section Configuration items include motion detection recording 24 hour continuous recording event driven recording etc You can find out the list of streams camera 1 camera 2 with recording capability by clicking Recording Con...

Page 73: ...s an example of configuring the motion detection triggered recording It starts by clicking Recording Configuration and clicking on Camera1 the following screen will be display Select Condition 1and the following window will be display ...

Page 74: ...ly etc in this example we will be selecting Event Only Schedule Under Schedule you can select time and date for motion recording if left blank motion recording will be 24hrs 7 days a week In this example we will be leaving it blank 24 7 Event Under Event click Motion Detection stream 1 stream 2 Click on Save to finish ...

Page 75: ...ENVI Series VT IPSN16M 74 15 Utilities In Utilities part of the Admin menu you can view the System Log file Save Configuration Reboot Factory Default and System Update ...

Page 76: ... consists of date time category IP address user ID 15 2 Save Configuration VITEK cameras save the configurations after every step 15 3 Reboot It is recommended to reboot the system after making changes to the configuration To reboot click Reboot on Utilities menu A screen will display to confirm a system reboot click ok to continue Windows Internet Explorer will ask to close the webpage click Yes ...

Page 77: ...es menu A confirmation screen will be displayed as shown Click Factory Default button otherwise click Back button to cancel it The second confirmation screen will appear Click OK button to restore the factory default condition right away If you click Cancel web browser will go back to the previous screen without any change made 15 5 System Update Is Highly Recommended to Use the IP Installer Progr...

Page 78: ...picture the firmware version of this product is 4 14 01 ds while the latest firmware version available is 4 16 B0 ds VI as you can see at Vitek s homepage http www vitekcctv com Downloads asp If you decide to update the firmware first create a folder on your computer for the update firmware than download the latest firmware to that folder Then select the IP device to be updated on IP Installer win...

Page 79: ...o update the firmware if the correct password is not provided After the password is entered the Start Update button will be enabled now Click the button to see the following window for selecting the folder where the file has been saved Highlight the folder than click OK After clicking OK the following window will be displayed Note Do not CLOSE window until completed to avoid permanent damage to th...

Page 80: ...ers Plays audio transmitted from Vitek Cameras Servers supported cameras Transmits audio from PC with ENVI Series Viewer to Vitek Camera Servers Stores live video screen as image files Stores live video streams as video files Controls Relay Output of Vitek Cameras Servers supported cameras PTZ Controls supported cameras Supports the group mode to see specific channels for Network Video Recorders o...

Page 81: ...t s possible to manually install the program file in advance from supplied CD and connect to the Vitek Camera Server later 17 1 1 Installing on Web Browser Click Live View after access to Vitek Server on Internet Explorer If you re using Windows XP Service Pack 2 or later the Information message will show up as seen below Click the Information message If the Information message doesn t come up due...

Page 82: ...ck the Install ActiveX Control and the pop up window will be displayed as above Click the Install button Click YES to allow program to run After the installation is successfully completed ENVI Series Viewer window will be displayed ...

Page 83: ...plied CD using ENVI Series Viewer program file Execute the downloaded file and you will see the ENVI Series Viewer Setup Wizard window as shown below Click the Install button to start installing The following window will be displayed during the installation After installation is successfully completed the following window will be displayed Click the Finish button ...

Page 84: ...ries Viewer program from your computer Before uninstalling close all the Internet Explorer windows 17 2 1 Uninstalling with Program Menu Click Uninstall and the following window will be shown Click the Yes button If the uninstall is successful the following window will be displayed Click CLOSE to finish ...

Page 85: ...ENVI Series VT IPSN16M 84 17 2 2 Uninstalling on Control Panel Click Start button on the screen then select the Control Panel In the Control Panel window double click the Add or Remove Programs icon ...

Page 86: ...tton You will see the Uninstall or change a program list Click ENVI Series Smart Viewer button and then right click Uninstall Change button Then it will start uninstalling the program 18 Starting ENVI Series Viewer Once ENVI Series Viewer is installed in your computer you can start it by connecting to the Vitek ...

Page 87: ...ver Network Camera or Network Video Recorder ENVI Series Viewer window for Network Video Server or Network Camera 18 1 Control Bar Displays and hides Channel control bar System Information Display Displays and hides PTZ control bar Displays and hides Audio control bar Display image by aspect ratio Displays image normal screen Display Enhancer on off uses more CPU Display Full Normal screen Display...

Page 88: ... be captured and saved as an image file either in JPEG or BMP format Select the live view video you want saved and click Snapshot button on OSD Channel Buttons The following window will be displayed In this dialog box you see the captured image to be saved Enter the folder and file name and click the Save button then the image will be saved with the name you entered Note If live view video is in M...

Page 89: ...stopped after 10 min if left un clicked In video files recorded from M JPEG format video the time information file will be generated in SMI subtitle format which puts time stamp every second When you play back the recorded video the time stamp will be displayed as a subtitle on the video screen as shown in the picture below upper left 18 3 3 Manual Recording To manual record from network cameras w...

Page 90: ...am To finish click the icon again Max duration is 1 minute and recording will be stopped after 1 minute 18 3 4 Instant Playback For network cameras with local storage microSD Instant Playback is supported Clicking the Instant Playback button from the OSD menu will open the window below Instant playback will scan the video data up to 1 min before it was executed And scanned data will be played auto...

Page 91: ...ideo Click the Pause button to stop and resume live view video 18 4 2 FPS Control FPS Frame per Second can be controlled only in MJPEG mode In MPEG4 and H 264 video mode FPS control is not supported Set the beginning of video data Instant playback will scan 1 min after this Se the playback speed Begin searching data Playback Reverse playback 1 frame playback 1 frame reverse playback Pause Stop ...

Page 92: ...ENVI Series VT IPSN16M 91 18 4 3 Flip Control Flip Control The horizontal view of the image can be changed using the mirror function The vertical view of the image can be changed using the flip function ...

Page 93: ... 4 H 264 stream supported Supports various vendors IP devices Multi Vendor Version only for recording and retransmission of video voice and data Supports Megapixel cameras up to 3M pixels Users can connect to EN V R via web browsers to access live video Audio and data and search for video to play back Up to 128 channels supported for cameras Note A product key is required for proper installation o...

Page 94: ...0 TB Compression of Channels Resolution Recommended CPU Memory H 264 16 Channels D1 Intel Core2Duo T5200 1 0GB 720P Intel Core2Duo E7550 1 5GB 1080P Intel Core i 5 2500S 2 0GB 32 channels D1 Intel Core2Duo E6700 1 0GB 720P Intel Core i 5 750 2 0GB 1080P Intel Core i 7 970 4 0GB 64 channels D1 Intel Core i 5 661 1 5GB 720P Intel Xeon X5660 4 0GB 1080P Intel Xeon X5680 Dual CPU 4 0GB 128 channels D1...

Page 95: ...lling EN V R After downloading EN V R double click EN V R Setup icon to start installation The following window will be displayed on the screen Before installing check the version of the EN V R which is shown on the window You may encounter the following security warning To continue installing the program click Yes button Then select language for installation You will see the below window then cli...

Page 96: ...tton You will see the progress of copying install files to the hard drive as shown below once is completed click on NEXT Click Finish to complete the Installation After installing EN V R program for the first time it needs to be configured before use so it automatically executes the configuration program which is called EN V R Configurator ...

Page 97: ...window on the screen To use EN V R Configurator program refer to Section 27 Starting EN V R Configurator on page 99 22 Uninstalling EN V R 22 1 Closing Active EN V R If you need to uninstall EN V R first you need to make sure EN V R program is not running on your computer by checking the system icon As you see on the following picture you can easily find out if EN V R service running ...

Page 98: ...ck the right mouse button You ll see the pop up menu Select Exit Then the EN V R icon disappears and you know that EN V R is no longer running on your computer Now you re ready to start uninstalling 22 2 Executing Uninstaller To start uninstalling click Start All Programs Vitek EN V R Uninstall When the following window appears click YES button The progress of uninstalling is displayed ...

Page 99: ...ify and delete IP devices and users with this program It also provides configuring tools for recording alarm event and other functions 23 2 EN V R Service EN V R program is a Windows service and runs in a background mode which means that it is not shown on the Windows desktop EN V R receives video audio alarm even data from IP devices over the network and then it can record the data on the hard dr...

Page 100: ... show You can open EN V R Configurator or EN V R Controller program from this menu or you can go to the Home page of the EN V R program for live view or playback 24 Starting EN V R Configurator EN V R Configurator starts automatically right after installation is completed you may also click the EN V R icon on the Windows desktop If EN V R program is already running in background you may also selec...

Page 101: ...y window as below Click Yes button to continue Once EN V R program starts a log in window will be displayed as below Type in the proper admin password and click the OK button The default admin password is root Now EN V R Configurator window will be displayed ...

Page 102: ...ng etc 25 1 EN V R Configurator User Interface The following picture shows the main window of EN V R Configurator program Items Descriptions A Main Toolbar Frequently used menu items are shown on this toolbar B Configuration Menu tree Configurable categories are shown as a menu tree style C Configuration Menu Description Descriptions and usages of the selected category are displayed D Sub Menu Too...

Page 103: ...am 25 2 Searching for IP Devices Click the first button on the Main Toolbar You are now given a choice to register the IP devices by search and register or manually To make it easy choose Search and register IP Device in this stage and click Next button On the following window click Scan button ...

Page 104: ... middle of searching the EN V R will retain only the IP devices found until that moment 25 3 Registering IP Devices After scanning is finished you have a list of IP devices found on your network Next step is registering them Double click the IP device you want to register or you may highlight it and then click Register button In this example the first one is chosen to register ...

Page 105: ...shows up and it s for entering the network parameters and camera resolutions of the IP device you ve chosen You may need to enter the Login ID and Password here Click Save to finish registering it Click on Save after configuring IP device camera ...

Page 106: ...6M 105 Click Apply after registering one or more IP devices cameras The image below represents the configurator with multiple IP devices registered After clicking Apply the program will ask you to confirm it Then click OK ...

Page 107: ...viewing the live video from those devices To view the EN V R home page click the Go NVR Home button on the main toolbar Below is an image of the EN V R home page Click Live View on top right part of the window to see the live video from registered IP devices cameras If this is the first time you are using Vitek Live View feature the web browser may ask you to allow installing of an ActiveX program...

Page 108: ...Recording Video The essential feature of EN V R is recording the video from IP devices Before starting the recording it is required to prepare the hard drive of your PC where EN V R program is running Click Disk Quota on the Menu tree The hard drive will be ready to start recording video after the progress window is done counting drives It shows the target drive s total capacity available size and...

Page 109: ... Maximum Quota the available of free space on your HDD Possible Minimum Quota the minimum amount required Set Quota desired amount of HDD to be use for recording To set up the recording feature select an IP device from the Menu tree on the left pane The device information will be shown on the right pane Click the button for recording configuration on the sub menu Toolbar as shown below ...

Page 110: ...nfigure Recording Condition window as below The recording feature is already enabled and recording conditions are configured in default settings In the example shown above you can see that Camera 1 of Device 0 will record video only when motion is ...

Page 111: ...ailable to configure C If Event is selected the event section will be available to configure D After conditions are selected click Apply to condition E After apply to condition click Apply to camera F Click OK when done Now that the configuration is done you need to start the EN V R service program Select Start All Programs Vitek smart NVR Smart NVR controller You will find the EN V R icon on the ...

Page 112: ...ntroller program from this menu or you can go to the Home page of the EN V R program for live view or playback You can find out from this window that the service is running at that moment If not click Start Service button to run Once EN V R service is started the video sent from the configured camera will be recorded according to the recording condition ...

Page 113: ...or PC and network cameras equipped with microSD card as well as standalone NVR Network Video Recorder devices 26 2 Key Features Transforming recorded video into AVI FJP IDX formats Supports Printing of video Playing Audio from recorded video Group Searching from recorded video Supports Full Screen Mode 26 3 System Requirement for PC For best quality and performance your computer needs to meet the ...

Page 114: ...ck on the Install ActiveX control After the installation is successfully completed Smart Player window will be displayed 27 1 1 Manual Installation When an Internet connection is not available or having some difficulties you can manually download and install the Smart Player program file prior to setup visit http www vitekcctv com Downloads asp You may also install from the provided CD Execute the...

Page 115: ...es VT IPSN16M 114 The following window will appear Click Next The following window will be displayed Click Install After installation is successfully completed the following window will be displayed Click Finish ...

Page 116: ...the Internet Explorer windows 27 2 1 Uninstalling on Program Menu Click Uninstall and the following window will be shown Click the Yes button Live View Play Back To live view and play back your cameras go to Start menu All Programs Vitek Folder Click on Smart NVR Controller as shown below ...

Page 117: ...ook for icon on right side of taskbar as shown below windows XP and windows 8 might show it different Right click icon The following window will display Click on Open Smart NVR Controller Click on Start Service to run the program ...

Page 118: ...n Go Home to view Smart Player Home Page Click on Live View The following screen will be display were you can configure your live view Server Control Bar Allows you to view cameras servers that are registered in the system Toggle On Off ...

Page 119: ...In order to view video cameras must be assigned to a group in this section you create groups with cameras you want to view Create Group In order to create a group in Group Control Bar right click on Group another window will appear then select New ...

Page 120: ...or Circulation and click OK A new group with the assigned name will be created as shown below To add cameras to the new group drag from server control bar and drop on newly created group You can create multiple groups and add multiple cameras in each group PTZ control Bar In this section you will be able to control PTZ s connected to the system ...

Page 121: ...ol Bar Controls Speaker and Mic volume When audio is available click on Connect and adjust speaker and mic levels when done click Disconnect Full Normal Screen Select full screen as seen below to return to normal press Esc on your keyboard ...

Page 122: ...ENVI Series VT IPSN16M 121 Group Circulation Start sequencing between groups ...

Page 123: ...ENVI Series VT IPSN16M 122 Layout settings You can change the screen layout between 1 2 4 etc Image in Original Size This allows for digital zoom ...

Page 124: ...ENVI Series VT IPSN16M 123 Draw Image by Maintaining Aspect Ratio Maintains the aspect ratio of the camera Draw Image by Filling the Screen ...

Page 125: ...ENVI Series VT IPSN16M 124 Enhanced Draw Mode On Off Enhance image for a better reproduction ...

Page 126: ...ENVI Series VT IPSN16M 125 About Smart Viewer You can see the status of the Smart Viewer 28 Configuring Viewing Player From the Home Screen click on Player ...

Page 127: ...te The appearance of Smart Player window may vary depending on version and type of Vitek device you re using This user s manual is based on general display screen Server Control Bar A Allows you to view cameras servers that are registered in the system ...

Page 128: ...s additional features such as backup and snapshot Time Line Control Bar E Search condition calendar condition and data can be refined in this bar Display screen F This screen shows multiple numbers of recorded videos 28 2 Connecting to NVR Player In order to playback video cameras must be assigned to a Group in this section you create groups with cameras you want to playback Playback directly from...

Page 129: ... following window will be displayed Type in the group name and click OK A new group with the assigned name will be created as shown below To add a camera to the new group drag and drop from the server tree to the newly created group ...

Page 130: ...and playback video Smart Player requires one or more groups to exist If a search is executed on the basis of a selected group a search will be performed on all the cameras in that group If a search is executed on the basis of a single camera the search will be performed only from that camera For example if you select a group and start searching the search from that group will be displayed If you o...

Page 131: ...n this mode you can search for video on the basis of combination of 3 different conditions which are Time Motion and Sensor Initially only Time condition is available for searching and you need to enter Advance Search mode to utilize Motion and Sensor state if necessary Search Select time and date from beginning to end of search criteria Then click Search The following window will be displayed to ...

Page 132: ...irst select Time checkbox and choose the desired time frame Start date and time End date and time and then click Add Condition button to add to Search Condition Now select Event checkbox and choose Camera 1 from Motion and then click Add Condition button to add to Search Condition Next select Event checkbox choose Sensor 1 and then click Add Condition button to add the Sensor condition to Search C...

Page 133: ...conditions have been configured click Search button to start searching Any video data which meets at least one of the conditions in Search Condition list will be shown as the results 30 Video Playback Controls Play Reverse Play Forward Pause Stop ...

Page 134: ...back Speed Control Player Path Control only for condition search mode 31 Extra Features 31 1 Window Control Users can open or close control windows 31 2 Recording Period You can view the starting and ending date of a recorded channel Record time is displayed as shown below ...

Page 135: ...ndow is displayed as below Select Camera Check the camera to backup For AVI backup only one camera is permitted For FJP IDX multiple backup is allowed Backup Period Select the time frame Start date and time End date and time to backup Backup Type Select either AVI or FJP IDX format Backup Path Select the HDD path where the backup file will be saved After selecting the parameters click OK then the ...

Page 136: ... completed the following window will appear Click OK button 31 4 Snapshot Choose the camera currently being played or paused click Snapshot button Then a snapshot file will be saved in a designated path Note For AVI file backup only one camera is allowed For IDX backup multiple cameras are allowed ...

Page 137: ...m the above window 31 5 Print Choose the camera currently being played or paused then click Print button Then the image of the selected camera will be sent to your default printer 31 6 Ratio Display You have three options to view videos which are Original Ratio and Stretch ...

Page 138: ...ENVI Series VT IPSN16M 137 ...

Page 139: ...32 1 1 Configuring System name To name the system click configuring system name the following window will be displayed Change the name as desired Items Descriptions System Name Setting Enter the system s name Set up Admin password Modify the password for Admin Access Control Configure the access privileges of users HTTP Port Assign Assign an HTTP Port for EN V R Service Configure IP CCTV DNS Confi...

Page 140: ...use Confirm Password Enter the new password again to confirm OK Click this button to apply the changed password Cancel Click this button to discard the change 32 1 3 System Network Configuration Access Control To configure User Access Control click System Network Configuration on the menu tree Click configure access control Items Descriptions System name Type in a System name OK Click this button ...

Page 141: ...etwork Configuration HTTP Port To configure HTTP port to use click System Network Configuration on the menu tree Then click Change HTTP Port Items Descriptions HTTP Port Enter a HTTP Port to use in the EN V R Service Default is 80 OK Click this button to apply the changed HTTP port number Cancel Click this button to apply discard the changed port number 32 1 5 System Network Configuration IP CCTV ...

Page 142: ...rt Enter an external HTTP Port to use for IP CCTV DNS service Default is 80 Register verify Click to test the connection with IP CCTV DNS server after setting is done in IP CCTV DNS server OK Click this button to apply the changed IP CCTVV DNS settings Cancel Click this button to discard the changed IP CCTV DNS settings 33 IP CCTV DNS Registration To register your camera server please visit http w...

Page 143: ...SN16M 142 than on the NEXT button as shown below Fill out the requested information as shown below and click on Apply The following screen will confirm that your Membership has been completed successfully that click OK ...

Page 144: ...viously created To register your first product click on Product Registration as shown below Enter the requested information The name of your camera the Mac Address and product Key as shown below Note that the Mac Address and the product Key will be available under the Network Configuration IP CCTV DNS setup in the camera menu Please see image below ...

Page 145: ...duct has been registered successfully click on OK You will be directed to the Product List page where you will be able to see your recent camera registration By clicking the Detail Information tab you will be allow edit DDNS Host Name Click Edit to change the DDNS Host Name ...

Page 146: ... click Apply A window will pop up asking if you really want to apply the new configurations to continue click OK A window will pop up confirming that the product information has been modified successfully click OK Click under Product List to view your changes ...

Page 147: ...ENVI Series VT IPSN16M 146 Your camera with the new DDNS Host name will be displayed Your camera is now registered and ready for use ...

Page 148: ... manually register an IP Device click IP Device Camera Management on the menu tree Click Register IP device manually Items Descriptions A IP Device Manual Registration Register IP Devices manually by users B IP Device Automatic Registration Scan and register IP Devices automatically by the program C IP Device Modification Modify the information of registered IP Devices D IP Device Deletion Delete ...

Page 149: ...e ID to register B Vendor Select the Vendor name of the IP Device to register Click the pull down list and choose a proper vendor name from the list C Model Select the total number of channels streams the IP device has Click the pull down list and choose proper one from the list ...

Page 150: ...use with the IP Device Default is 80 J RTSP Port Enter the RTSP Port Default is 554 K Login ID Type in the Login ID to use Default is root L Login Password Type in the Login Password to use for the Login ID Default is root M Confirm Password Type in the same password to confirm Default is root O Checking available resolution Select the Video Resolution for the device Not used all resolution is don...

Page 151: ...es found during the scan process If you need to select multiple IP devices at the same time drag your mouse over the devices or keep pressing CTRL or SHIFT key while clicking the IP devices B Clear Clear the scanned IP Devices from the list C Scan Start scanning for IP Devices on the network D Go Home Go to the home page of the IP device selected from the list E Register Go to the registration win...

Page 152: ... R7 R8 R9 R10 B PTZ Install Description Descriptions of the PTZ numbers in the IP Device list P1 P2 P3 P4 C IP Device list IP Device list to select from D Apply to All Click this button to copy the information of a selected IP Device to all other devices Only Model Login ID and Login Password will be copied E Register Click this button to confirm and save the registered IP Device added F Cancel Cl...

Page 153: ... for non Vitek IP devices Vitek products can be set to 0 to 15 and default is 0 I HTTP Port Enter the HTTP Port to use with the IP Device Default is 80 J RTSP Port Enter the RTSP Port Default is 554 K Login ID Type in the Login ID to use Default is root L Login Password Type in the Login Password to use for the Login ID Default is root M Confirm Password Type in the same password to confirm Defaul...

Page 154: ... the menu tree Then select the IP device Click Go to IP Device homepage 34 5 Camera Management In this section you will see how to manage the device information video resolutions recording configuration and alarm event configuration Firstly select a camera name under IP Device Camera Management on the menu tree When you select IP Device Camera Management on the menu tree it will show the Camera Ma...

Page 155: ...en click on camera1 or camera 2 and then click Configure Camera Name and Information A Camera Information Configure Information of the selected camera B Resolution and Quality Choose the resolution and quality of cameras C Recording Conditions Set up recording conditions D Alarm and Map service settings Configure Alarm and Map service functions ...

Page 156: ...lay adjust resolution F then click Apply to camera H then OK Items Descriptions A B C D Camera Selection Select one or more cameras for name assignment by clicking buttons E Unselect All Clear the device list which shows the selected cameras F Name Type in a camera name G Clear Clear the camera name field H Apply to Camera Apply the changed camera name to the system I OK Click this button to confi...

Page 157: ... Descriptions A B C D Camera Selection Select one or more cameras by clicking buttons E Unselect All Clear the device list which shows the selected cameras F Resolution Select the video resolution G Quality Select the video quality H Apply to Camera Apply the selected video resolution and quality to the system I Go Home Go to the homepage of the product J Close Close and exit the window ...

Page 158: ...started G Condition to use Decide whether to use the defined condition or not H Condition Mode Select the condition mode for recording I Scheduling Set up the schedule for recording J Event setup Set up the event to initiate recording K Apply to Condition Apply the configured schedule and event data to condition list L Apply to Camera Apply the condition to camera M Enable Recording Service Enable...

Page 159: ...amera under Condition list F This enables the Configure Recording Condition G H I and J Now you can select your condition mode H Under condition mode you have four choices always schedule event and schedule and event In this example we will record by event only Schedule To schedule time and date of recording I When schedule is activated in condition mode Event Here you can select Alarm or Motion J...

Page 160: ...ENVI Series VT IPSN16M 159 34 5 4 Alarm Event Configuration To configure the Alarm and Event features select a camera to configure and then click Configure alarm map service Item Description ...

Page 161: ...k this button to apply the changes to the camera I OK Click this button to confirm the change and exit the window J Cancel Click this button to cancel the Alarm Event configuration 34 6 User Management In this section you will see how to manage user information To start managing users select User Management from the menu tree Items Descriptions A User Registration Register new users to the system ...

Page 162: ... Choose the level of permission for System resource access All channels access Viewing all cameras Alarm PTZ Audio Searching General access Viewing all cameras only No access An user account without any access to cameras Selective access Access to only selected cameras and privileges F System Permission Eight different modules can be set The setup can be made on Module camera alarm PTZ Audio and S...

Page 163: ...an click Remove Registered user account another screen will pop up confirming to proceed with deletion click OK to proceed 34 7 Disk Setup 34 7 1 Disk Setup When you click Disk Setup on the menu tree it will show two sub menu items One is Disk Quota and the other is Disk Mode The following window shows the Disk Quota mode 34 7 2 Disk Quota Modification and Deletion Items Descriptions A Disk Quota ...

Page 164: ...k quota click Disk Quota on the menu list Then choose the drive quota to be deleted Click the 2 nd button on the sub tool bar 34 7 3 Disk Mode Change To modify the disk circulation style click Disk Setup and then Disk Mode on the menu tree Item Description A Use HDD Decide whether this HDD is to be used B Possible Maximum Quota Display Possible maximum quota on this HDD C Possible Minimum Quota Di...

Page 165: ...splayed Items Descriptions A Disk Circulation Setup Configure disk circulation type B Disk Usage Report Setup Configure email address for reporting Item Description A Use circulation Select this if disk circulation will be used B Not use circulation Select this if disk circulation will not be used ...

Page 166: ... be seen when Use circulation is selected D Expired days Enter the date when the recorded content will expire E OK Click this to apply the Disk circulation settings F Cancel Click this to Cancel Disk circulation settings Item Description A Use to report HDD usage Choose whether to Enable or Disable the report service B Report HDD space When disk circulation is not used select the HDD size when it ...

Page 167: ...eceive email notification from the EN V R program upon certain events To configure an email accounts click Utilities on the menu tree Click Configure email account for mail service Items Descriptions A Email Account Configure email account B About Program Display the information of EN V R program Item Description ...

Page 168: ...thentication D Email user id Enter the sender s id for email account E Email user password Enter the password of the sender s email account F Sender email Enter the Sender s email address G H I Recipient email 1 2 3 The email addresses of three Recipients to be notified J Email subject Enter the title of the Email when it s sent K OK Click to apply the Email account registration L Cancel Click to ...

Page 169: ...talled You can connect to EN V R in various ways as explained below Click Go Home in EN V R Configurator Items Descriptions A Current Service State Shows whether EN V R Service is running or stopped B Start Service Click this button to start EN V R Service when it s stopped C Stop Service Click this button to stop EN V R Service when it s running D Refresh Refresh the Screen E Go Home Go to the EN...

Page 170: ...lorer enter the IP address of the computer that EN V R is running on In case that the HTTP port for EN V R is not 80 default the port number should be entered together with the IP address the example below assumes HTTP port of 7777 After you successfully connecting to the EN V R homepage you will see the following window ...

Page 171: ...tems Descriptions A Home Go to EN V R s homepage B Live View Click this button to execute Live View program You can use various features such as live view audio transmission PTZ control unconditional recording etc C Player Click this button to search record and back up the video data sent from IP devices registered in EN V R Note Refer to Section 19 ENVI Series Viewer 79 for details on how to use ...

Page 172: ...quest of the customer subject to availability with a new product that equals or exceeds the performance of the original product purchased Within the first 6 months of purchase at its sole discretion VITEK may issue an advance replacement for a defective product however all related costs including but not limited to shipping and or delivery charges will be the responsibility of the customer If upon...

Page 173: ...ned to provide reasonable protection against harmful interference when the equipment is operated in a commercial environment This equipment generates uses and can radiate radio frequency energy and if not installed and used in accordance with the instruction manual may cause harmful interference to radio communications Operation of this equipment in a residential area is likely to cause harmful in...

Reviews: