Vision Engineering DX41, User Manual
The Vision Engineering DX41 is a cutting-edge optical inspection system that delivers outstanding clarity and precision. Enhance your user experience by downloading the free user manual from manualshive.com to unlock the full potential of this innovative product. Get your manual today and revolutionize your inspection process.
Share
Download


Reviews:
No comments
Related manuals for DX41

ML41 Series
Brand: MshOt Pages: 23

McDATA Sphereon 4500
Brand: Hitachi Pages: 6
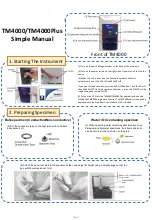
TM4000
Brand: Hitachi Pages: 3

3400-N
Brand: Hitachi Pages: 9

TM3000
Brand: Hitachi Pages: 272

TM3030 Plus
Brand: Hitachi Pages: 384

BX51
Brand: Olympus Pages: 34

SM-4 Series
Brand: AmScope Pages: 37

490 Series
Brand: AmScope Pages: 64

LSM 710 SIM
Brand: Zeiss Pages: 22

EXC-400 Series
Brand: Accu-Scope Pages: 24

M8211E
Brand: Omax Pages: 10

88-52200
Brand: Bresser Pages: 54

Axioskop
Brand: Zeiss Pages: 32

IWT
Brand: VISIO-TEC Pages: 31

LEDD1
Brand: THORLABS Pages: 24

Ryeco Ecoline RST20 Series
Brand: Ryf Pages: 3

Ryeco LAB-10
Brand: Ryf AG Pages: 4


