Victor 6056B, User Manual
The Victor 6056B user manual is a valuable resource for understanding and operating your device effectively. Easily download the manual for free from manualshive.com to access important information on setup, troubleshooting, and maintenance. Stay informed and get the most out of your Victor 6056B with this comprehensive manual.
Share
Download


Reviews:
No comments
Related manuals for 6056B

2002
Brand: Keithley Pages: 366

CM-1200
Brand: Greenlee Pages: 44

DT4221
Brand: Twilight Pages: 81

74F257A
Brand: Philips Pages: 8

HD3024
Brand: Philips Pages: 20

PM2528
Brand: Philips Pages: 37

PM2454
Brand: Philips Pages: 40

LTC 2622/90
Brand: Philips Pages: 59

System4 LTC 2650/00
Brand: Philips Pages: 76

PM2517E
Brand: Philips Pages: 104

PM2525
Brand: Philips Pages: 154

LTC 2600 Series
Brand: Philips Pages: 46

ZI-849
Brand: Zico Pages: 17

Scope/Meter M2
Brand: Snap-On Pages: 8
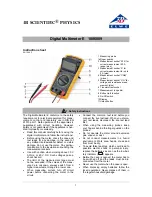
E 1006809
Brand: 3B SCIENTIFIC PHYSICS Pages: 4

BM315s
Brand: Brymen Pages: 16

BM251
Brand: Brymen Pages: 16

BM230 Series
Brand: Brymen Pages: 24


