Vertiv VP7811B, Manual
The Vertiv VP7811B user manual is available for free download from our website. This comprehensive manual provides detailed instructions and information on efficiently operating and maintaining the VP7811B. Get your manual now at manualshive.com, ensuring a hassle-free experience with your Vertiv VP7811B.
Share
Download


Reviews:
No comments
Related manuals for VP7811B
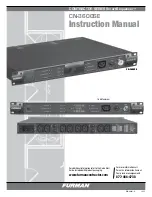
CONTRACTOR Series
Brand: Furman Pages: 14
MX30-1
Brand: California Instruments Pages: 246

PM0816-01
Brand: Racktivity Pages: 25

WB-600-SVCE-12
Brand: WattBox Pages: 12

ES2P
Brand: Panduit Pages: 15

ePDU G3HD
Brand: Eaton Pages: 2

MotorSaver Plus 777-P2-DEMO
Brand: SymCom Pages: 20

RIGrunner 8012
Brand: West Mountain Radio Pages: 6

RIGrunner 4004USB
Brand: West Mountain Radio Pages: 8


