background image

DVR4QAF


VELLEMAN 

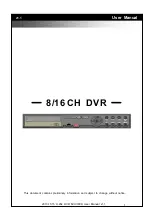
DVR4QAF – DIGITAL 4-CHANNEL MPEG4 VIDEO RECORDER 


1. Introduction and Features 


To all residents of the European Union 

Important environmental information about this product 

This symbol on the device or the package indicates that disposal of the device after its lifecycle could harm 

the environment. 

Do not dispose of the unit (or batteries) as unsorted municipal waste; it should be taken to a specialised 

company for recycling. 

This device should be returned to your distributor or to a local recycling service. 

Respect the local environmental rules. 

If in doubt, contact your local waste disposal authorities. 


Thank you for buying the 

DVR4QAF

! Please read the manual thoroughly before bringing this device into service. 

If the device was damaged in transit, don't install or use it and contact your dealer. Its main features are: 


Automatic NTSC/PAL detection 


Built-in HD replaces VCR tapes 


Alarm function following power failure 


MPEG4 compression 


Backup possible onto Compact Flash card 


2. Safety Instructions 


Damage caused by disregard of certain guidelines in this manual is not covered by the warranty and the dealer will 

not accept responsibility for any ensuing defects or problems. 


A qualified technician should service this device. 


Keep this device away from rain and moisture. 


Make sure that the available voltage does not exceed the voltage stated in the specifications of this manual. 


Do not crimp the power cord and protect it against damage. Have an authorised dealer replace it if necessary. 


Note that all modifications of the device are strictly forbidden for safety reasons. Damage caused by user 

modifications to the device is not covered by the warranty. 


Do not shake the device. Avoid brute force when installing or operating the device. 


Familiarise yourself with the functions of the device before actually using it. Do not allow operation by unqualified 

people or children. Any damage that may occur will most probably be due to unprofessional use of the device. 


Only use the device for its intended purpose. Using the device in an unauthorised way will void the warranty. 


3. Specifications 


Display Mode 

single channel display, continuous rotation (1-9s adjustable), quad display.   

Recording Quality 

NTSC: 704x240: 15 frames/sec (adjustable) or 352x240: 30frames/sec (adjustable). 

PAL: 704x288: 15 frames/sec (adjustable) or 352x288: 30 frames/sec (adjustable). 

Recording Mode 

manual / scheduled / event trigger / motion detection 

Sound Recording/playback  CH1 only 

Compression 

MPEG4 

Camera Input 

4 x BNC (NTSC/PAL) 

Video Output 

2 x BNC connector (1 x Video out, 1 x VCR out) 

HD 

40 ~ 120GB (e.g. 

HD80GB

 or 

HD120GB

Buzzer 

built-in 

System Monitor 

auto rebooting. 

Search Mode 

camera, date, time and event. 

Temperature 

5

40°C 

Power Supply 

12Vdc/4A through transformer from 100V~240Vac, 50/60Hz 

Power Consumption 

20 W 

Dimensions (W x H x D) 

430mm x 77mm x 305mm  

Weight 

3kg 

Summary of Contents for DVR4QAF

Page 1: ...voltage does not exceed the voltage stated in the specifications of this manual Do not crimp the power cord and protect it against damage Have an authorised dealer replace it if necessary Note that all modifications of the device are strictly forbidden for safety reasons Damage caused by user modifications to the device is not covered by the warranty Do not shake the device Avoid brute force when ...

Page 2: ...o see the next picture frame 15 REW fast backward search button 16 PLAY play button to display recorded video 17 F F fast forward search button 18 Compact Flash card reader writer 19 Alarm LED 20 Play LED 21 HDD LED 22 Rec LED Rear panel 23 POWER INPUT 12Vdc 4A 24 VIDEO IN 4 camera 4 input terminal 25 VIDEO IN 3 camera 3 input terminal 26 VIDEO IN 2 camera 2 input terminal 27 VIDEO IN 1 camera 1 i...

Page 3: ... Mode Press PLAY to playback the latest recorded video select or for full screen monitoring or for quad screen monitoring Image search press F F or to search fast forward press REW or to search while rewinding Press PLAY to return to normal playback speed Pause Frame by frame press STEP once to pause playback Press it repeatedly to advance frame by frame Press PLAY to return to normal playback spe...

Page 4: ... the setup value Press EXIT button returns to the previous page Press STOP button exit the selection System Status Select SYSTEM STATUS and press ENTER to see an overview of TOTAL CAPACITY capacity of the HD REMAINING TIME free space on the HD VIDEO MODE recording mode QUAD or EACH each channel separately QUALITY recording quality RECORD MODE displays the cameras and their recording mode DISK FULL...

Page 5: ...or OFF RECORD TIME TOTAL TIME According to recording resolution recording speed and HDD capacity REMAINING TIME According to recording resolution recording speed and the remaining capacity c RECORD MODE In the main menu select RECORD MODE and press ENTER The screen at the right appears POST ALARM TIME time the alarm continues after being triggered 0 99 sec 3 modes are available Schedule Recording ...

Page 6: ...l not sound RELAY ON OFF ON when an event occurs the relay output is switched on To enable this function press ALARM LED lights up OFF the relay function is disabled Period The duration of the alarm output 1 15min The alarm can be switched off manually by pressing ALARM e VIDEO LOSS ALARM In the main menu select VIDEO LOSS ALARM and press ENTER The screen at the right appears CHANNEL ALL 1 2 3 or ...

Page 7: ...S SETUP and press ENTER to enter the CAMERA TITLE SETUP display Maximum characters per title is 8 Determine the camera names by means of the and buttons Press ENTER to confirm the titles or EXIT to exit ON displays camera title OFF Camera title not displayed CHANNEL SEQUENCE The Sequence consists of 8 steps hence 1 8 There are 6 options for the CAMERA NUM ber Q Quad 1 camera 1 2 camera 2 3 camera ...

Page 8: ...ES and press ENTER To exit press EXIT REBOOT SETUP The system supports daily rebooting function at a fixed moment The system default is set to OFF 8 Troubleshooting Q1 Certain items cannot be selected or setup 1 Enter Record Mode selection and verify if all channels are set to OFF 2 If not set all channels to OFF and press STOP or EXIT to skip to live display the setup will be stored Q2 How can th...

Page 9: ...t the system operates normally after software update Q6 Why does it show only 137G storage capacity while the actual capacity is 160G The highest compatible storage capacity supported by the DVR is 120G Hard disk compatibility tests have been made on MAXTOR 120G 80G 40G WD 120G 80G 40G HITACHI 120G 80G 40G Q7 What are the formats for hard disk and CF card What file type does the device produce Har...

Page 10: ...mag niet hoger zijn dan de spanning in de specificaties achteraan de handleiding De voedingskabel mag niet omgeplooid of beschadigd zijn Laat uw dealer zo nodig een nieuwe kabel plaatsen Om veiligheidsredenen mag de gebruiker geen wijzigingen aanbrengen aan het toestel Schade door wijzigingen die de gebruiker heeft aangebracht aan het toestel vallen niet onder de garantie Schud het toestel niet do...

Page 11: ...eens om het volgende beeld te zien 15 REW snel terugspoelen 16 PLAY weergavetoets om opgenomen videofragmenten weer te geven 17 F F snel doorspoelen 18 Compact Flash kaartlezer schrijver 19 Alarm LED 20 Play LED 21 HDD LED 22 Rec LED Achterpaneel 23 POWER INPUT 12Vdc 4A 24 VIDEO IN 4 ingang camera 4 25 VIDEO IN 3 ingang camera 3 26 VIDEO IN 2 ingang camera 2 27 VIDEO IN 1 ingang camera 1 28 VIDEO ...

Page 12: ...deofragment te tonen of op SEARCH om een videofragment te zoeken b Weergavemode Druk op PLAY om het laatst opgenomen videofragment weer te geven druk op of voor full screen monitoring of voor quad monitoring Beeldzoeken druk F F of voor versneld afspelen druk REW of om met beeld terug te spoelen Druk op PLAY om terug te keren naar de normale weergave snelheid Pauze beeld per beeld druk 1x op STEP ...

Page 13: ...op of rechts neer Druk op ENTER om een submenu te openen of een instelling te bevestigen Druk op en om een waarde te wijzigen Druk op EXIT om terug te keren naar de vorige pagina Druk op STOP om het menu te verlaten Systeemstatus Selecteer SYSTEM STATUS en druk op ENTER voor een overzicht TOTAL CAPACITY capaciteit van de HD REMAINING TIME vrije ruimte op de HD VIDEO MODE opnamemode QUAD of EACH el...

Page 14: ...is AUDIO IN opname met microfoon ON of OFF RECORD TIME TOTAL TIME totale opnameduur voor de HD volgens de capaciteit en ingestelde resolutie en snelheid REMAINING TIME resterende opnametijd volgens de capaciteit en ingestelde resolutie en snelheid c RECORD MODE opnamemode Selecteer RECORD MODE in het hoofdmenu en druk op ENTER Een scherm zoals rechts aangegeven verschijnt POST ALARM TIME hoe lang ...

Page 15: ...ARM om deze functie te activeren LED licht op OFF bij een event zal de zoemer niet afgaan RELAY relais ON OFF ON bij een event zal de relais schakelen Druk op ALARM om deze functie te activeren LED licht op OFF bij een event zal de relais niet schakelen Period duur van het alarm 1 15min Het alarm kan manueel uitgeschakeld worden door op ALARM te drukken e VIDEO LOSS ALARM alarm bij verlies van vid...

Page 16: ...om het paswoord te bevestigen of op EXIT om het menu te verlaten CAMERA TITLES SETUP Plaats de cursor op CAMERA TITLES SETUP en druk op ENTER om het CAMERA TITLE SETUP scherm te openen max aantal karakters per titel is 8 Geef de cameranamen in met de knoppen en Druk op ENTER om de naam namen te bevestigen of op EXIT om het menu te verlaten ON toont de cameranaam OFF de cameranaam wordt niet getoon...

Page 17: ...herm te verlaten REBOOT SETUP heropstartfunctie Het systeem kan automatisch dagelijks heropstarten op een vastgelegd moment De fabrieksinstelling voor deze functie is OFF 8 Problemen en Oplossingen Q1 Bepaalde items kunnen niet worden geselecteerd of ingesteld 1 Open Record Mode en ga na of alle kanalen op OFF staan 2 Zoniet zet alle kanalen op OFF en druk op STOP of EXIT om terug te keren naar li...

Page 18: ...date Dit kan even duren Q6 Waarom is de getoonde opslagcapaciteit slechts 137GB terwijl het een harddisk is van 160GB De grootste capaciteit die wordt ondersteund is 120GB Er zijn compatibiliteitstesten uitgevoerd op MAXTOR 120G 80G 40G WD 120G 80G 40G HITACHI 120G 80G 40G Q7 Welke formaten mogen harddisk en CF kaart zijn Als welk formaat worden de videofragmenten geschreven De harddisk moet FAT32...

Page 19: ...il à l abri de pluie et d humidité La tension réseau ne peut pas dépasser la tension mentionnée dans les spécifications à la fin de ce manuel Le câble d alimentation ne peut pas être replissé ou endommagé Demandez à votre revendeur de renouveler le câble d alimentation si nécessaire Toute modification de l appareil est interdite pour des raisons de sécurité Les dommages occasionnés par des modific...

Page 20: ...er la lecture et encore une fois pour voir l image suivant 15 REW touche de rembobinage rapide 16 PLAY touche de lecture pour afficher un fragment vidéo enregistré 17 F F touche d avance rapide 18 Lecteur graveur carte Compact Flash 19 LED Alarm 20 LED Play 21 LED HDD 22 LED Rec Panneau arrière 23 ENTRÉE POWER 12Vcc 4A 24 VIDEO IN 4 entrée caméra 4 25 VIDEO IN 3 entrée caméra 3 26 VIDEO IN 2 entré...

Page 21: ...b Mode de lecture Pressez PLAY pour jouer le dernier fragment enregistré sélectionnez ou pour surveillance en plein écran ou pour surveillance en quad Chercher un image pressez F F ou pour rapidement chercher en avant pressez REW ou pour chercher en rembobinant Pressez PLAY pour retourner à la vitesse de lecture normale Pause Image par image pressez STEP une fois pour pauser la lecture Pressez le ...

Page 22: ...essez et pour déplacer le curseur gauche en haut ou droite en bas Pressez ENTER pour entrer un sous menu ou pour confirmer un réglage Pressez et pour modifier la valeur sélectionnée Pressez EXIT retourne à la page précédente Pressez STOP quitter la sélection SYSTEM STATUS Sélectionnez SYSTEM STATUS et pressez ENTER pour voir un aperçu de TOTAL CAPACITY capacité du DD REMAINING TIME espace libre su...

Page 23: ...strement s arrête quand le DD est plein AUDIO IN enregistrement microphone ON ou OFF RECORD TIME TOTAL TIME tenu compte des résolution et vitesse d enregistrement et de la capacité du DD REMAINING TIME tenu compte des résolution et vitesse d enregistrement et de la capacité libre du DD c RECORD MODE Dans le menu principal sélectionnez RECORD MODE et pressez ENTER L écran à droite apparaît POST ALA...

Page 24: ...ement ouvert NO voir également schéma du connecteur DB9 BUZZER ON OFF ON en cas d un événement le buzzer ronflera Pour activer cette fonction pressez ALARM LED s allume OFF en cas d un événement le buzzer ne ronflera pas RELAY ON OFF ON en cas d événement le relais de sortie est activé Pour activer cette fonction pressez ALARM LED s allume OFF la fonction du relais est désactivée Period la durée d...

Page 25: ...ressez ENTER pour confirmer le mot de passe ou EXIT pour quitter CAMERA TITLES SETUP Mettez le curseur sur CAMERA TITLES SETUP et pressez ENTER pour ouvrir l écran CAMERA TITLE SETUP Nombre max de caractères par nom est 8 Déterminez les noms des caméras par moyen des touches et Pressez ENTER pour confirmer les noms ou EXIT pour quitter ON affiche le nom du caméra OFF le nom du caméra n est pas aff...

Page 26: ...t fixe Le réglage standard de cette fonction est OFF 8 Problèmes et solutions Q1 Certaines choses ne peuvent pas être sélectionnées ou réglées 1 Entrez la sélection Record Mode et vérifiez si tous les canaux sont mis sur OFF 2 Si ce n est pas le cas mettez tous les canaux sur OFF et pressez STOP ou EXIT pour passer à la surveillance en direct les réglages seront sauvegardés Q2 Comment peur le logi...

Page 27: ... le système fonctionnera normalement avec le nouveau logiciel Q6 Pourquoi est ce que la capacité de stockage n est que 137GB pendant que la capacité du DD est 160G La capacité max supporté par l appareil est 120GB Des essais de compatibilité ont été faits avec MAXTOR 120G 80G 40G WD 120G 80G 40G HITACHI 120G 80G 40G Q7 Quels sont les formats pour le disque dur et la carte CF Les fichiers vidéo son...

Page 28: ...yor que la tensión indicada en las especificaciones No aplaste el cable de alimentación y protéjalo contra posibles daños causados por algún tipo de superficie afilada Si es necesario pida a su distribuidor reemplazar el cable de alimentación Por razones de seguridad las modificaciones no autorizadas del aparato están prohibidas y los daños causados no están cubiertos por la garantía No agite el a...

Page 29: ...canales 13 STOP tecla de parada se utiliza durante la grabación y la reproducción 14 STEP II pulse esta tecla para pausar la reproducción y vuelva a pulsar para ver la imagen siguiente 15 REW tecla de reproducción rápida hacia atrás 16 PLAY tecla de reproducción para visualizar un fragmento de vídeo grabado 17 F F tecla de reproducción rápida hacia adelante 18 Lector grabador tarjeta Compact Flash...

Page 30: ...o va automáticamente al modo de vigilancia seleccione o para la vigilancia en pantalla completa o para vigilancia quad vuelva a pulsar para el modo secuencial En el modo de vigilancia pulse PLAY para reproducir el último fragmento grabado o SEARCH para buscar un fragmento b Modo de reproducción Pulse PLAY para reproducir el último fragmento grabado seleccione o para la vigilancia en pantalla compl...

Page 31: ...rabación por detección de movimiento y por activación a través de sensor externo véase a continuación 7 Menú principal Pulse MENU en el panel frontal Aparecerá la pantalla a la derecha En todos los sub menús Pulse y para desplazar el cursor izquierda hacia arriba o derecha hacia abajo Pulse ENTER para entrar en un submenú o para confirmar un ajuste Pulse y para modificar el valor seleccionado Puls...

Page 32: ...ién Por tanto es importante siempre tener la hora y la fecha correctas para facilitar una búsqueda eventual más tarde b RECORD SETTING ajustar la grabación En el menú principal seleccione RECORD SETTING y pulse ENTER La pantalla a la derecha aparece COMPRESSION compresión MPEG4 RESOLUTION resolución 704x240 ó 352x240 NTSC 704x288 ó 352x288 PAL VIDEO MODE modo de vídeo QUAD pantalla dividida en 4 o...

Page 33: ...iempo introducido En OFF el aparato no hará nada SEN nivel de sensibilidad seleccionable de 1 a 5 para detectar movimientos 1 sensibilidad máx 5 sensibilidad mín para entrada de sensor 1 0 2 seg la grabación y la alarma se activan 0 2 seg después de la señal 2 0 5 seg la grabación y la alarma se activan 0 5 seg después de la señal 3 1 seg la grabación y la alarma se activan 3 seg después de la señ...

Page 34: ...JETA COMPACT FLASH En el menú principal seleccione CF CARD SETUP y pulse ENTER La pantalla a la derecha aparece COPY copiar los datos en la tarjeta CF Véase a continuación FORMAT ERASE borrar los datos en la tarjeta CF Véase a continuación TOTAL CAPACITY capacidad de almacenaje de la tarjeta CF REMAINING CAPACITY capacidad libre en la tarjeta CF COPY Coloque el cursor en COPY y pulse ENTER La pant...

Page 35: ...mbre de la cámara no se visualiza CHANNEL SEQUENCE sucesión de canales La Sequence consta de 8 pasos de ahí 1 8 Hay 6 opciones para CAMERA NUM ero Q Quad 1 cámara 1 2 cámara 2 3 cámara 3 4 cámara 4 ir directamente al canal siguiente Dwell Time tiempo que el canal queda visualizada en la pantalla seleccionable de 2 a 9 seg En el ejemplo a la derecha canal 1 canal 2 canal 3 y canal 4 se visualizan c...

Page 36: ...ccionar o ajustar algunas cosas 1 Introduzca la selección Record Mode y asegúrese de que todos los canales estén en OFF 2 Si no es el caso coloque todos los canales en OFF y pulse STOP o EXIT para ir a la vigilancia en vivo los ajustes se guardarán Q2 Cómo actualizar el software del DVR 1 Copie la actualización del software fichero YOKO4CH BIN en el disco duro o la tarjeta CF formato FAT16 2 Coloq...

Page 37: ...r el aparato es 120GB Se han realizado pruebas de compatibilidad con MAXTOR 120G 80G 40G WD 120G 80G 40G HITACHI 120G 80G 40G Q7 Cuáles son los formatos para el disco duro y la tarjeta CF Cuales son los formatos para los ficheros de vídeo El disco duro utiliza el formato FAT32 Los ficheros de vídeo en el DD y la tarjeta CF tienen el tipo asf Por consiguiente es posible mirar los ficheros en un ord...

Page 38: ...eanspruch Für daraus resultierende Folgeschäden übernimmt der Hersteller keine Haftung Ein qualifizierter Techniker soll dieses Gerät warten Von Regen und Feuchte fernhalten Vergewissern Sie sich dass die anzuschließende Netzspannung nicht höher ist als die Netzspannung beschrieben in dieser Bedienungsanleitung Achten Sie darauf dass die Netzleitung nicht gequetscht oder durch scharfe Kanten besch...

Page 39: ...zu bestimmen ob der Alarmausgang bei einem Alarm Ereignis ausgelöst werden soll 12 REC manuell Aufnahmetaste um mit allen Kameras aufzunehmen 13 STOP Stopp Taste kann während Aufnahme und Wiedergabe verwendet werden 14 STEP II drücken Sie diese Taste um die Wiedergabe zu pausieren und drücken Sie diese Taste nochmals um den nächsten Bildframe zu sehen 15 REW Taste für Schnellsuche rückwärts 16 PLA...

Page 40: ...ücken Sie ENTER 6 Systemeinstellung a Überwachungsmodus Das Gerät startet automatisch im Überwachungsmodus wählen Sie oder für Vollbild oder für Quad Schirm und drücken Sie nochmals um auf sequentiellen Modus umzuschalten Im Überwachungsmodus drücken Sie PLAY um die zuletzt aufgenommenen Videobilder abzuspielen oder SEARCH um einen Videoausschnitt zu suchen b Wiedergabe Modus Drücken Sie PLAY um d...

Page 41: ... einer programmierten Aufnahme wird STOP nicht funktionieren STOP funktioniert nur bei einer manuellen Aufnahme Andere Aufnahme Modi ununterbrochene programmierte Aufnahme Aufnahme durch Bewegungsdetektion und Auslösung der Sensoren werden weiter in dieser Bedienungsanleitung besprochen 7 Hauptmenü Drücken Sie MENU auf der Frontplatte der Schirm rechts wird erscheinen In jedem Menü oder Submenü Dr...

Page 42: ...Zeit zeigen LEFT TOP links oben RIGHT TOP rechts oben LEFT BOTTOM links unten RIGHT BOTTOM rechts unten TOP oben BOTTOM unten Während einer Aufnahme werden Datum und Zeit auch gespeichert Deshalb ist es wichtig dass Sie möglichst bald das richtige Datum einstellen so erleichtern Sie später die Datensuche b RECORD SETTING AUFNAHME EINSTELLUNGEN Wählen Sie im Hauptmenü RECORD SETTING und drücken Sie...

Page 43: ...ährend der eingestellten Zeit wenn ON selektiert ist OFF bedeutet dass nichts geschehen wird SEN Empfindlichkeitsstufe von 1 bis 5 für Bewegungsdetektion 1 maximale Empfindlichkeit 5 minimale Empfindlichkeit Sensoreingang 1 0 2 Sek Sensor löst die Aufnahme und den Alarm nach 0 2 Sek aus 2 0 5 Sek Sensor löst die Aufnahme und den Alarm nach 0 5 Sek aus 3 1 Sek Sensor löst die Aufnahme und den Alarm...

Page 44: ...Sie im Hauptmenü CF CARD SETUP und drücken Sie ENTER Der Schirm rechts wird erscheinen COPY kopieren auf die CF Karte Siehe unten FORMAT ERASE alle Daten auf der CF Karte löschen Siehe unten TOTAL CAPACITY Speicherkapazität auf der Festplatte REMAINING CAPACITY freie Speicherkapazität auf der CF Karte COPY Bewegen Sie den Cursor nach COPY und drücken Sie ENTER Der COPY Schirm erscheint Quelle wähl...

Page 45: ...ANNEL SEQUENCE KANALSEQUENZ Die Sequenz besteht aus 8 Schritten 1 8 Es gibt 6 Optionen für die CAMERA NUM mer Q Quad 1 Kamera 1 2 Kamera 2 3 Kamera 3 4 Kamera 4 einen Kanal übergehen und zum nächsten Kanal gehen Dwell Time Haltezeit pro Kanal kann von 2 bis 9 Sekunden eingestellt werden Im Beispiel an der rechten Seite werden der Quad Schirm Kanal 1 Kanal 2 Kanal 3 und Kanal 4 jeweils 3 Sekunden g...

Page 46: ...OFF stehen 2 Wenn das nicht der Fall ist stellen Sie alle Kanäle auf OFF und drücken Sie STOP oder EXIT um zum live Bild zurückzukehren die Einstellungen werden gespeichert werden F2 Wie kann die Software des DVR aktualisiert werden 1 Kopieren Sie das Software Update Dateiname YOKO4CH BIN auf die Festplatte oder speichern Sie es auf der CF Karte FAT16 Format 2 Führen Sie die Festplatte oder die CF...

Page 47: ...tät des DVR ist 120G Festplattenkompatibilitätstests wurden bei MAXTOR 120G 80G 40G WD 120G 80G 40G HITACHI 120G 80G 40G ausgeführt F7 Was sind die Formate für Festplatte und CF Karte Welchen Dateityp erzeugt das Gerät Die Festplatte verwendet das FAT32 Format die CF Karte FAT16 oder FAT32 Videobilder werden als asf gespeichert Deshalb können Ausschnitte über einen normalen Computer mit Windows Me...

Reviews: