background image

Document 483593 

Model VX / VXE

Dedicated Outdoor Air Unit

Dedicated Outdoor Air Unit

1

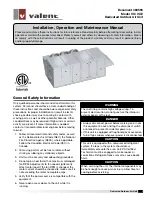
Installation, Operation and Maintenance Manual

Please read and save these instructions for future reference. Read carefully before attempting to assemble, install, 
operate or maintain the product described. Protect yourself and others by observing all safety information. Failure 
to comply with these instructions will result in voiding of the product warranty and may result in personal injury 
and/or property damage.

General Safety Information

WARNING

The roof lining contains high voltage wiring. To 
prevent electrocution, do not puncture the interior or 
exterior panels of the roof.

DANGER

•  Always disconnect power before working on or near 

this equipment. Lock and tag the disconnect switch 
or breaker to prevent accidental power up.

•  If this unit is equipped with optional gas accessories, 

turn off gas supply whenever power is disconnected.

CAUTION

This unit is equipped with a compressed refrigerant 
system. If a leak in the system should occur, 
immediately evacuate the area. An EPA Certified 
Technician must be engaged to make repairs or 
corrections. Refrigerant leaks may also cause bodily 
harm.

CAUTION

When servicing the unit, the internal components may 
be hot enough to cause pain or injury. Allow time for 
cooling before servicing.

Only qualified personnel should install and maintain this 
system. Personnel should have a clear understanding of 
these instructions and should be aware of general safety 
precautions. Improper installation can result in electric 
shock, possible injury due to coming in contact with 
moving parts, as well as other potential hazards. Other 
considerations may be required if high winds or seismic 
activity are present. If more information is needed, 
contact a licensed professional engineer before moving 
forward.
  1.  Follow all local electrical and safety codes, as well 

as the National Electrical Code (NEC), the National 
Fire Protection Agency (NFPA), where applicable. 
Follow the Canadian Electrical Code (CEC) in 
Canada.

  2.  All moving parts must be free to rotate without 

striking or rubbing any stationary objects.

  3.  Unit must be securely and adequately grounded.
  4.  Do not spin wheel faster than maximum cataloged 

fan RPM. Adjustments to fan speed significantly 
affect motor load. If the fan RPM is changed, the 
motor current should be checked to make sure it is 
not exceeding the motor nameplate amps.

  5.  Verify that the power source is compatible with the 

equipment.

  6.  Never open access doors to the unit while it is 

running.

Summary of Contents for VX Series

Page 1: ...ause bodily harm CAUTION When servicing the unit the internal components may be hot enough to cause pain or injury Allow time for cooling before servicing Only qualified personnel should install and m...

Page 2: ...Piping Installation 12 Electrical Information 13 Control Center Components 14 Component Operation 15 Optional Component Operation 15 18 Factory Installed Refrigeration System 19 21 Start Up Unit 22 2...

Page 3: ...f dirt water ice or snow and wipe dry before moving to indoor storage To avoid condensation allow cold parts to reach room temperature Leave coverings loose to permit air circulation and to allow for...

Page 4: ...ilable on VX VXE 311 and 352 Packaged DX and ASHP units are shipped fully charged with refrigerant and are ready for operation upon arrival Heating There are three different optional heat sources that...

Page 5: ...ng 311 uses furnace model PVF 200 600 or model HMA 700 800 Housing 352 use furnace model HMA 600 1200 Packaged DX System Any unit may be ordered with a packaged DX system Housing size 112 will include...

Page 6: ...224 22 27 30 8 300 VXE 352 30 70 99 5 96 263 307 47 NA 10 450 Bottom or Side Side All dimensions are shown in inches Weight is shown in pounds and includes largest supply and exhaust fans PDX with re...

Page 7: ...Unit Size ACS Access Side CC Control Cabinet End OAI Outdoor Air Intake NA from Unit NA from Condensing Section NA from Piping Vestibule not shown Other Indoor Mounted with IG Furnace Outdoor Mounted...

Page 8: ...with a defrost cycle to remove ice from the outdoor coil During defrost cycles melted water may drip from the bottom of the refrigeration section under the outdoor coil In cold climates proper draina...

Page 9: ...openings Guide unit while lowering to align with duct openings Roof curbs fit inside the unit base Make sure the unit is properly seated on the curb and level 5 Install Vestibule If unit was ordered w...

Page 10: ...an L configuration and the area directly beneath the heat source must not have any openings such as louvers or grates No louvers or grates Installation Typical Unit Installed on Rails Supplied by Oth...

Page 11: ...rvice and gas supply be brought into the cabinet through the end wall as shown below There are three penetrations into the cabinet that are required one for high voltage supply wiring one for low volt...

Page 12: ...epted industry standards Pipework should be supported independently of the coils Undue stress should not be applied at the connection to coil headers 2 The condensate drain pipe should be sized adequa...

Page 13: ...isconnect and must be compatible with the ratings on the nameplate supply power voltage phase and amperage Consult ANSI NFPA 70 and CSA C22 1 for proper conductor sizing Provide the Opening s for the...

Page 14: ...Outdoor airflow monitor 17 Exhaust airflow monitor 18 Digital scroll controller Optional Indirect Gas Fired Furnace Note In some models two furnaces are installed to provide greater output When two fu...

Page 15: ...ain room air temp at a desired set point Optional 0 10 VDC by others to VFD Supply fan is modulated by a 0 10 VDC field provided by others Component Operation Exhaust Fan VFD Sequence Optional Buildin...

Page 16: ...ling mode the following conditions must be true 1 Supply air temperature above minimum low supply temperature limit 35 F 2 Outside air temperature above the cooling ambient lockout 55 F adj To operate...

Page 17: ...en the system undergoes test and balance Hot Gas Reheat Valve Units equipped with a reheat coil use a three way valve with actuator to control the supply air discharge temperature of the unit during d...

Page 18: ...l be fully programmed at the factory Optional Component Operation Rotation Sensor The rotation sensor monitors energy wheel rotation If the wheel should stop rotating the sensor will close a set of co...

Page 19: ...ble and is located on the side of the evaporator coil and can be accessed through the coil access panel 13 Evaporative Coil 14 Low Limit Pressure Switch The switch is installed on the suction line and...

Page 20: ...Source Heat Pump with Three Way Hot Gas Reheat 4WV Outdoor Coil Indoor Coil Outdoor Airflow Hot Gas Reheat Coil Supply Airflow Compressor PT HRV LPS SG SG EXV FDS HPS SV HCV ACC 4WV Outdoor Coil Indoo...

Page 21: ...rsing valve to reverse the direction of refrigerant flow switching the unit between heating and cooling mode 12 Electronic Expansion Valve EXV or Thermostatic Expansion Valve TXV An expansion valve is...

Page 22: ...or Allow 5 minutes between on cycles to prevent compressor damage DX system is charged with refrigerant Start up must be performed by EPA Certified Technician Start Up Unit Every installation requires...

Page 23: ...ital scroll compressor The variable speed compressor uses internal stator heating Each compressor needs power supplied to it 24 hours prior to start up If start up is scheduled in 24 hours unlock the...

Page 24: ...Energy Wheel Motor if equipped L1 Amps L2 Amps L3 Amps Condensing Fans PDX only Condensing Fan 1 L1 Amps L2 Amps L3 Amps Condensing Fan 2 L1 Amps L2 Amps L3 Amps Condensing Fan 3 L1 Amps L2 Amps L3 Am...

Page 25: ...ween 10 and 20 F 0 reheat or should be between 10 and 30 F 100 reheat Deg F Deg F Deg F Deg F Subcooling Models VX VXE 352 Should be between 10 and 15 F 0 reheat or should be between 2 and 10 F 100 re...

Page 26: ...n Line Temp Deg F Deg F Moisture Indicating Sight Glass Liquid Visible Yes No Yes No Color of Center Dot Purple Pink Purple Pink Heating Superheat Should be between 10 and 20 F Deg F Deg F Subcooling...

Page 27: ...ntrol center door Vibration Excessive vibration may be experienced during initial start up Left unchecked excessive vibration can cause a multitude of problems including structural and or component fa...

Page 28: ...ess ENTER 7 Set number of flows and press ENTER 8 Set flow and press ENTER 9 Set flow to actual CFM measured by Test and Balance and press ENTER 10 Wait for calibration before cycling power 11 Proceed...

Page 29: ...re that you do not have power at the alert signal leads The unit is now ready for operation Setscrew on front of switch must be manually adjusted after the system is in operation Negative pressure con...

Page 30: ...the factory but are field adjustable The VFD will be fully programmed at the factory Optional Energy Wheel Start Up If selected the energy wheel is installed in the unit s airstream with one half of...

Page 31: ...e when a clip is open the clip will jam against the bearing support bar and could cause damage Cleaning Maintenance or cleaning of the wheel segments should be done with the segments removed from the...

Page 32: ...dition is corrected It is located in the main control center Variable Frequency Drive VFD Variable frequency drives have a display screen that will show an alarm condition If a fault such as a voltage...

Page 33: ...rted windings in motor Replace motor Low airflow cfm Unit damper not fully open Adjust damper linkage or replace damper motor System static pressure too high Improve ductwork to eliminate losses using...

Page 34: ...and repair Replace fuse after correcting problem Low line voltage Check line voltage If more than 10 from compressor marking correcting is necessary Compressor motor protector open Motor thermal prote...

Page 35: ...for two hours Recheck for open circuit Improper refrigerant charge Check subcooling Improperly wired Review wiring schematics Loose wiring Check all connections Defective start relay Replace relay Mot...

Page 36: ...sible air recirculating Clean coil Condenser fan motor defective Check condenser fan motor Too much refrigerant Check subcooling Remove excess refrigerant Non condensable in system Remove non condensa...

Page 37: ...ings Refrigerant flood back Check thermal expansion valve setting Check for refrigerant overcharge Check crankcase heater operation Reheat flush cycle inadequate Contact factory Not enough capacity or...

Page 38: ...ntenance session and observations and then establish a maintenance schedule that is appropriate for the installation The following is provided as a guideline Maintenance Frequency Monthly 1 External F...

Page 39: ...ces only Removing dust and grease buildup on the motor housing assists proper cooling Never wash down the motor with high pressure spray Greasing of motors is only intended when fittings are provided...

Page 40: ...0x25x2 2 20x25x2 4 20x20 VXE 212 4 25x25x2 4 16x25x2 4 16x25x2 8 16x25 VXE 311 6 20x25x2 7 16x20x2 7 16x20x2 12 16x20 VXE 311 6 25x25x2 8 20x20x2 20x24x2 8 20x20x2 20x24x2 12 16x20 VXE 352 30 40 tons...

Page 41: ...212 300 14 8 23 3 38 1 44 1 6 6 6 400 6 6 6 500 14 9 23 6 25 2 57 1 6 6 6 B A C D 500MBH 300 400MBH A B C D 200 300MBH 100 150MBH C A B D C A B D COMBUSTION AIR INLET EXHAUST OUTLET IG FURNACE ACCESS...

Page 42: ...ng Location Model Furnace Size MBH A B C D E F G H I J Inlet Dimensions Outlet Dimensions Length Height Edge Thickness Length Height VX VXE 352 600 6 13 8 17 2 20 5 50 NA NA NA NA NA 21 5 6 1 6 5 5 5...

Page 43: ...X 112 15I 3775 VX 112 15D 3775 VX 112 15S 3775 VX 112 15A 4300 VX 212 15I 4100 VX 212 15D 4100 VX 212 15S 4100 VX 212 15A 4800 Model Airflow SCFM VX 212 17 5I 4650 VX 212 17 5D 4650 VX 212 17 5S 4650...

Page 44: ...8th Avenue North Minneapolis MN 55411 Main 612 877 4800 MORE INFORMATION UNIT SCHEMATICS For configuration and connection questions see the schematics that shipped with your unit They can typically be...

Page 45: ...ause bodily harm CAUTION When servicing the unit the internal components may be hot enough to cause pain or injury Allow time for cooling before servicing Only qualified personnel should install and m...

Page 46: ...ntenance session and observations and then establish a maintenance schedule that is appropriate for the installation The following is provided as a guideline Maintenance Frequency Monthly 1 External F...

Page 47: ...ces only Removing dust and grease buildup on the motor housing assists proper cooling Never wash down the motor with high pressure spray Greasing of motors is only intended when fittings are provided...

Page 48: ...0x25x2 2 20x25x2 4 20x20 VXE 212 4 25x25x2 4 16x25x2 4 16x25x2 8 16x25 VXE 311 6 20x25x2 7 16x20x2 7 16x20x2 12 16x20 VXE 311 6 25x25x2 8 20x20x2 20x24x2 8 20x20x2 20x24x2 12 16x20 VXE 352 30 40 tons...

Page 49: ...including proper refrigerant charge and repair of minor refrigerant leaks outside the coil At the completion of start up an approved start up record must be submitted to the Unison service department...

Page 50: ...te of shipment from the Unison factory whichever occurs first The ship date for the units noted above is 5 4 2020 Please refer to the Unison Comfort Technologies terms and conditions of sales for addi...

Page 51: ......

Page 52: ......

Page 53: ......

Page 54: ......

Page 55: ......

Page 56: ......

Page 57: ......

Page 58: ......

Page 59: ......

Page 60: ......

Page 61: ......

Page 62: ......

Page 63: ......

Page 64: ......

Page 65: ......

Page 66: ......

Page 67: ......

Page 68: ......

Page 69: ......

Page 70: ......

Page 71: ......

Page 72: ......

Reviews: