background image

The General Store

TM

Point Of Sale Software For Windows!


Unitech PT630 

Setup And User Instructions 

The General Store can interface to the Unitech PT630 Handheld data collector for taking 
inventory, receiving inventory, and creating purchase orders. This document shows you how to 
set up and use the Unitech with The General Store. 

Setup 

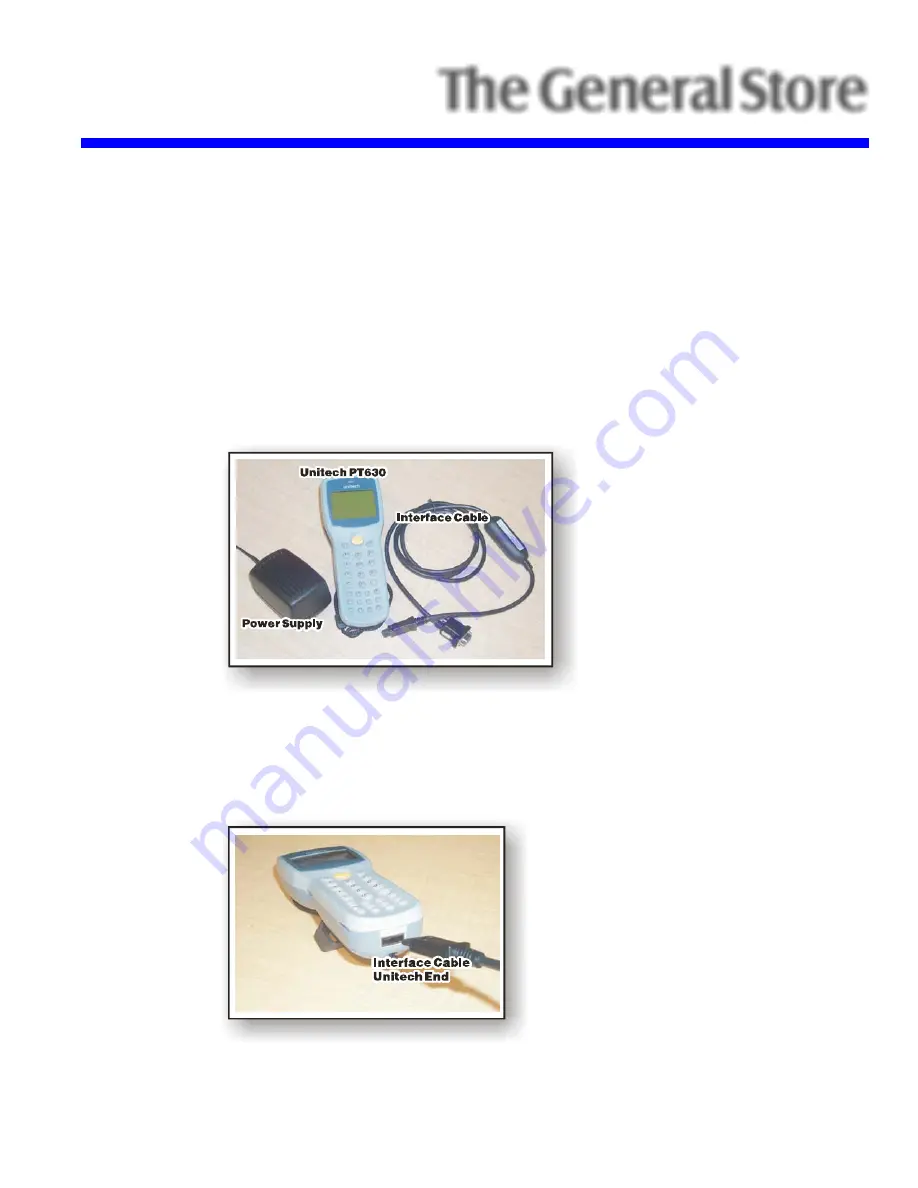
Step 1 – Connect The Unitech To Your PC 


Your Unitech kit consists of 2 CD’s and the hardware shown in the above figure. The Unitech CD 
is not needed, so set it aside. 

First connect the power adapter cable into the Unitech serial interface cable as show below. 
Then attach Unitech interface side of the serial interface cable into the bottom of the Unitech. 


Summary of Contents for PT630

Page 1: ...rs This document shows you how to set up and use the Unitech with The General Store Setup Step 1 Connect The Unitech To Your PC Your Unitech kit consists of 2 CD s and the hardware shown in the above...

Page 2: ...power source Then connect the other end of the Unitech interface cable to an available serial port on your PC The software assumes that you will be connecting the Unitech to the COM1 port so we sugge...

Page 3: ...must install the software on both the server and on each workstation that may be used to connect the Unitech Unitech Pt630Handheld www thegeneralstore com C o pyright 1983 2004 CrichlowDataSciences I...

Page 4: ...4 Unitech Instructions Select Single User or if operating on a network select either Server or Workstation You will see the following screen Click Install General Store Files first...

Page 5: ...y selected the default directory when installing The General Store click the Next button If however you are installing the Unitech on a workstation in a local area network or when originally installin...

Page 6: ...on type Reviewing The Installation You should now see two Icons on your desktop as shown below This will be the easiest way to access the Unitech interface programs but you can also access them by cli...

Page 7: ...using Notepad or WordPad change the comport 1 portion of the batch file line to reflect the proper comport being used For example let s say you had the Unitech connected to COM port number 2 on a sin...

Page 8: ...METRO DAT file 4 Go to General Store function you selected in step 3 and apply the METRO DAT file 5 Delete the data on the Unitech When using the Unitech at point of sale you would follow these steps...

Page 9: ...the unit powers off NOTE The unit will automatically power itself off after several minutes with no activity Bringing Up The Program On The Unitech The General Store Handheld Menu should be on the Uni...

Page 10: ...ookup file you can press the CMD button located at the lower right corner of the Unitech keypad You will see the following menu 1 RUN 2 TER 3 COM 4 DIR 5 ERA 6 TYP 7 CPY 8 SET Press option 4 ERA The u...

Page 11: ...top of the Unitech at the barcode and press the large yellow oval shaped button below the Unitech s screen The unit will beep when you get a good read Then enter the quantity on the keypad and press...

Page 12: ...te Unitech Lookup When the program has finished creating the lookup file you will be returned to the General Store main menu Uploading the Full Count Lookup File to the Unitech Attach the Unitech inte...

Page 13: ...e quantity on the keypad and press the ENT key Continue this process until you are through scanning and then press the ESC key on the unit s keypad to return to the main menu If you scan an item that...

Page 14: ...e From the tools menu select the Process Unitech Data option You will see the following menu Here you select the inventory function you wish to route or import the data in the METRO DAT file to Click...

Page 15: ...atically Click the Save button and the receipts will be saved and a receiving report will be printed Purchase Orders When using the data collector to process a purchase order you must click the Add bu...

Page 16: ...16 Unitech Instructions Then click the Import From File icon on the navigational toolbar This will then apply the transfer...

Page 17: ...transfer to the FTP site If you are finished and do not need to go back and add items to the transfer at a later date click Yes Otherwise click No Orders See special section on Processing Point Of Sal...

Page 18: ...eating the lookup file you will be returned to the General Store main menu Step 2 Upload the Lookup File to the Unitech Attach the Unitech interface cable to the Unitech and turn it on Now on your Win...

Page 19: ...products that a customer wishes to purchase This data is then placed inside the General Store and extracted directly into an order at point of sale If you only have one Unitech select option F1 Now y...

Page 20: ...ech screen will show Ok Press any key to continue Step 3 Process The Order File At POS Now access the point of sale function in the General Store From the main point of sale screen If you have multipl...

Page 21: ...The General Store For Windows 21 Now you can add more items or complete the transaction...

Page 22: ...ar coded unless the y already have upc codes All items on the selling floor should be neatly organized whether on shelves or in storage bins Stock rooms should be neatly organized and all cases should...

Page 23: ...the Unitech and turn it on Now on your Windows Desktop Icon Screen on your PC click the Upload Unitech Lookup Icon You will see a progress indicator on you computer screen as well as a record count o...

Page 24: ...is not in the lookup file the Unitech will send multiple beeps and it will re prompt you for the SKU When this happens it is usually best to pull the item aside and have someone enter it into The Gene...

Page 25: ...l Store From the tools menu select the Process Unitech Data option You will see the following menu Here you select the inventory function you wish to route or import the data in the METRO DAT file to...

Page 26: ...tegory or subcategory Then click the Process button The system will then compare the actual inventory file against what you have counted The system then determines which items in the selected departme...

Page 27: ...tenance and Adjustments from the main menu You will see the following You should see the vanilla folder icon in the top left of the adjustments screen Step 4A Select the Adjust Method Adjust or Replac...

Page 28: ...Program When all items have come through click the exit icon on the toolbar and the adjustments report will be printed When the process is complete click the exit icon at the top right corner of the...

Reviews: