[
_
[
1
φ20
0mm
天井
スプリング
スピーカパネル
(別売)
スピーカのスプリングの
フックを引き出し
スピーカパネルにかける
1.
天井にφ200mmの穴をあける
スピーカパネル (別売)に取付穴の型紙が付属
していますので、ご利用ください。
2.
スピーカ線を接続端子に差し込む。
3 .
スピーカ本体を天井裏側に水平に
のせ、穴の中央に置く。
4 .
スピーカパネル(別売)をスプリングのフックにかける。
結 線 方 法
適用スピーカ線
Speaker Lines
ご注意)
このたびは、天井スピーカをお買い上げいただき、誠にありがとうございます。 スピーカを取付けの際は、この取扱説
明書の「安全上のご注意」と取付工事に関する説明をよくお読みの上、正しくお取付、配線をおこなってください。
設置工事終了後、この取扱説明書は必ずお客様にお渡しください。この取扱説明書はお読みになりましたら大切に保
管し、後日わからないことがあれば再びご覧ください。
取付方法
Installation
●
600V vinyl-insulated wire (IV wires) 1, 1.2, 1.6mm in diam. (Single wire only).
●
600V second-class insulated wire (HIV wires) 1.2 and 1.6mm in diam. (Single wire only).
○
Do not use wires other than those specified above. Otherwise, heating and poor connections may be caused.
○
Never use soldered stranded cable ---- these may cause overheating.
●600Vビニル絶縁電線 [IV電線]φ1、φ1.2、φ1.6 (単線専用)
●600V二種ビニル絶縁電線[HIV電線]φ1.2、φ1.6 (単線専用)
○上記の電線以外は使用しないでください。使用した場合は発熱したり、接触不良の原因になります。
○より線をハンダ仕上げして使用しますと、発熱の原因になります。絶対に使用しないでください。
Notes:
天井
1.
Drill a hole of 200mm diam.
in the ceiling.
2 .
Insert the speaker wires into the input terminal.
3 .
Insert the speaker through the hole
in the ceiling and position it in place.
4 .
Hook the speaker panel (optional) onto the springs.
Pull out the springs
and hook them on
the speaker panel.
Speaker panel
(optional)
Springs
Ceiling
Connecting
はずしかた
Disconnecting
Ceiling
Use the mounting hole template which is
attached to the speaker panel (optional).
Ceiling
フック
Hook
●電線被ふくを8〜9mm程むいてくださ
い。
●接続端子上部のボタンを押しながら、
端子穴に芯線を奥まで差し込んでく
ださい。
●電線を取りはずす場合は、接続端子
上部のボタンを押しながら、電線を
引き抜いてください。
• Insert deeply the peeling zone (8
〜
9mm) into the terminal hole, with the
knob pushed.
• When connecting or disconnecting,
push this knob.
CO
M
4k
Ω
(2.
5W
)
この部分で必要なW数に接続してください。
2kΩ
(5W
)
Select either terminal you require.
接続端子
Input terminal
接続端子
Input terminal
8〜
9mm
When connecting or
disconnecting,
push this knob.
接続、または取りはずすときに、
このボタンを押してください。
ボタン
knob
スピーカ線
Speaker
wire
CO
M
10k
Ω
(1W
)
この部分で必要なW数に接続してください。
※本機の専用品につきましては予告なく廃番または新製品に切り換えることがあります。
※
3.3
kΩ
(3W
)
Select either terminal you require.
8〜
9mm
When connecting or
disconnecting,
push this knob.
接続、または取りはずすときに、
このボタンを押してください。
ボタン
knob
スピーカ線
Speaker
wire
ス ピ ー カ パ ネ ル ( 別 売 )
Speaker panel
(optional )
●ジャージネット :PL‑230W(ホワイト )、PL‑460W
(ホワイト)、PL‑230LG(ライトグレー )、
PL‑460LG(ライトグレー )
●パンチングメタル :PL‑230P(シルバー )、
PL‑230PW(ホワイト)
●エキスパンドメタル :PL‑233W(ホワイト )
•
Panel with jersey netting: PL‑230W
(White), PL‑460W (White), PL‑230LG (Light
gray),
PL‑460LG (Light gray)
•
Panel with punching metal: PL‑230P
(Silver) PL‑230PW (White)
•
Panel with expand metal: PL‑233W (White)
• Be sure to hand over this Instruction Manual to the User after installing.
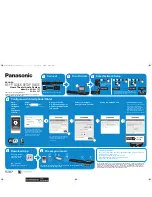
PR‑175A
Model
PR‑173A
Model
PR-173A
天井スピーカ
Spring Catch type
Ceiling Speaker
MODEL
スプリングキャッチ式
PR-175A
MODEL
定格入力 (Rated input) 5W
定格入力 (Rated input) 3W
INSTRUCTION MANUAL
取扱説明書
Summary of Contents for PR-175A
Page 2: ......