UNAcare UNAwheel Mini Basic, Руководство пользователя
UNAcare UNAwheel Mini Basic - компактный и эргономичный мануальный колесный стул для легкой передвижения. Для более подробной информации об использовании продукта, загрузите бесплатное руководство по эксплуатации с нашего веб-сайта. (User Manual) Загрузите его с manualshive.com.
Поделиться
Скачать


Отзывы:
Нет отзывов
Похожие инструкции для UNAwheel Mini Basic

Indoor Wave
Бренд: TA Service Страницы: 30

Airide B-Ace
Бренд: Excel Страницы: 45

M-MU 18-MULTI ONE
Бренд: Valex Страницы: 12

Kombinera
Бренд: Etac Страницы: 2

Transit
Бренд: Etac Страницы: 28

R82 Turtle
Бренд: Etac Страницы: 23

immedia OneWayGlide
Бренд: Etac Страницы: 54

Quantum 6000
Бренд: Quantum Rehab Страницы: 2

Fenix
Бренд: CareCo Страницы: 18

Advance
Бренд: Küschall Страницы: 35

TR Series 1
Бренд: Ti Lite Страницы: 122

Jazzy 610 2S
Бренд: Pride Страницы: 43

buffalo
Бренд: R82 Страницы: 4

ROHO AirLITE Cushion
Бренд: Permobil Страницы: 9

Evolution
Бренд: VARILITE Страницы: 68

Nxt seating LTSS
Бренд: Dynamatic Страницы: 12

Beatle - Puma
Бренд: Handicare Страницы: 68
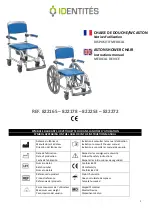
Aston 822165
Бренд: identités Страницы: 13


