U-Line Combo CO2175DWR, Use And Care Manual
The U-Line Combo CO2175DWR is a versatile and efficient appliance perfect for any kitchen. With its sleek design and advanced features, this product is a must-have for any homeowner. You can easily access the user manual for free download from our website, ensuring smooth operation and optimal performance.
Share
Download


Reviews:
No comments
Related manuals for Combo CO2175DWR
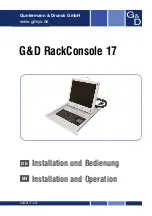
RackConsole 17
Brand: G&D Pages: 24

RLM-150
Brand: IEI Technology Pages: 15

Lolly 6 9016
Brand: Babyletto Pages: 12

ADR124
Brand: DCS Pages: 32

RF24-D
Brand: DCS Pages: 40

StyleView SV31
Brand: Ergotron Pages: 12

KEWS105S
Brand: KitchenAid Pages: 1

LCDK1016 Series
Brand: Synergy Global Technology Pages: 12

LCD2U17-3H-01
Brand: Synergy Global Technology Pages: 13

LCDK10002-n
Brand: Synergy Global Technology Pages: 13

LCD2U20-01
Brand: Synergy Global Technology Pages: 17

LCD2U17-04
Brand: Synergy Global Technology Pages: 19

LCD2U17-07
Brand: Synergy Global Technology Pages: 22

LCD1U19-12
Brand: Synergy Global Technology Pages: 21

LCD2U17-2H-02L
Brand: Synergy Global Technology Pages: 28

LCD2U17-03
Brand: Synergy Global Technology Pages: 30

NS-1UCABCONS15
Brand: NewStar Pages: 11

WD6299
Brand: Cardini Pages: 11


