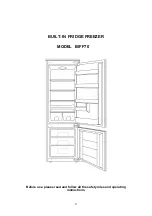
background image

USER GUIDE

SAFETY

INSTALLATION & INTEGRATION

OPERATING INSTRUCTIONS

MAINTENANCE

SERVICE

ADA Series  


ADA24RGL  


24" Glass Door Refrigerator

RIGHT PRODUCT. RIGHT PLACE. RIGHT TEMPERATURE. SINCE 1962.

Summary of Contents for ADA SERIES ADA24RGL

Page 1: ...USER GUIDE SAFETY INSTALLATION INTEGRATION OPERATING INSTRUCTIONS MAINTENANCE SERVICE ADA Series ADA24RGL 24 Glass Door Refrigerator RIGHT PRODUCT RIGHT PLACE RIGHT TEMPERATURE SINCE 1962...

Page 2: ...s Electrical Cutout Dimensions Product Dimensions Side by Side Installation Anti Tip Bracket General Installation Grille Plinth Installation Door Swing Door Stop Door Adjust Operating Instructions Fir...

Page 3: ...PRODUCT INFORMATION Looking for additional information on your product User Guides Quick Reference Guides CAD Drawings Integrated Panel Instructions Compliance Documentation and Product Warranty info...

Page 4: ...jury or death WARNING Warning means that failure to follow this safety statement could result in serious personal injury or death CAUTION Caution means that failure to follow this safety statement may...

Page 5: ...doors and leave shelves in place so children may not easily climb inside If the unit is being removed from service for disposal check and obey all federal state and local regulations regarding the di...

Page 6: ...ability to reach low temperatures and or reduce ice production on applicable models For best performance keep the unit out of direct sunlight and away from heat generating equipment In climates where...

Page 7: ...nty Never use an extension cord to connect power to the unit Always keep your working area dry NOTICE Electrical installation must observe all state and local codes This unit requires connection to a...

Page 8: ...sides or rear However the front grille must NOT be obstructed and clearance is required for an electrical connection in the rear CAUTION Unit can NOT be installed behind a closed cabinet door Never r...

Page 9: ...ER GUIDE Product Dimensions 1 u line com SAFETY INSTALLATION INTEGRATION OPERATING INSTRUCTIONS MAINTENANCE SERVICE Product Dimensions 23 1 4 591 mm 32 to 33 813 mm 838 mm 24 610 mm Not Including Hand...

Page 10: ...y grounded electrical receptacles placed according to each unit s electrical specifications requirements Side by Side Installation with Bracket 1 Slide both units out so screw on top of units are easi...

Page 11: ...ee screws but same screws are used in both applications Right handed units shown Left handed units are mirrored 3 Place bracket part 14154 over holes and attach to unit with two screws removed in step...

Page 12: ...height in the front by adjusting the front feet This allows the unit to be gently tipped into the opening Readjust the front feet to level the unit after it is correctly positioned in the opening INST...

Page 13: ...before removing the grille WARNING DO NOT touch the condenser fins The condenser fins are SHARP and can be easily damaged REMOVING THE GRILLE 1 Disconnect power to the unit 2 Loosen the two screws 1 S...

Page 14: ...ed adjacent to cabinets Stainless Steel and black and white models require 2 1 8 54 mm door clearance to accommodate the handle if installed next to a wall Integrated models require 1 4 6 mm clearance...

Page 15: ...ng conditions It is not designed for excessive force Do not use the door to move the unit in out of the cut out during installation If your unit is already under counter it might need to be moved out...

Page 16: ...so make sure the door gasket is not pinched on the hinge side of the door To align and adjust the door 1 Loosen do not remove top and bottom hinge screws 2 Align door squarely with cabinet 3 Make sure...

Page 17: ...holes where the hinge was removed Take care not to scratch cabinet 5 Remove it from the cabinet Repeat for cabinet base Prepare door for reinstallation 1 Rotate door 180 to reverse 2 Align the flat ed...

Page 18: ...at the factory Initial startup requires no adjustments NOTICE U Line recommends allowing the unit to run overnight before loading with product When plugged in the unit will begin operating under the f...

Page 19: ...turn ON or OFF Toggle lights Press and release to leave interior light on for 3 hours Glass door wine and beverage centers only Adjust refrigerator set point Press and release When the F or C in the...

Page 20: ...ntain internal temperatures and set points View a full list of Star K certified U Line units at www star k org To enable Sabbath Mode 1 Press 4 and hold for ten seconds and release the F C symbol will...

Page 21: ...perform as expected When loading your unit leave space between the internal fans or vents and product loaded Anything blocking the required airflow circulation will result in uneven temperature distr...

Page 22: ...he hump on the right hand side 3 Tilt up right hand edge of shelf 2 4 Remove shelf from unit by pulling out 3 Insert the shelves as follows 1 To move to a different position in the unit insert shelf a...

Page 23: ...ces this includes glass tile and counter cleaners If any surface discoloring or rusting appears clean it quickly with Bon Ami or Barkeepers Friend Cleanser and a nonabrasive cloth Always clean with th...

Page 24: ...lining NOTICE The drain pan was not designed to capture the water created when manually defrosting To prevent water from overflowing the drain pan place towels or other absorbent materials over the i...

Page 25: ...ental conditions more or less frequent cleaning may be necessary WARNING Disconnect electric power to the unit before cleaning the condenser WARNING DO NOT touch the condenser fins The condenser fins...

Page 26: ...it is returned to service 3 If ice is on the evaporator allow ice to thaw naturally 4 Clean and dry the interior of the unit Ensure all water has been removed from the unit 5 The door must remain open...

Page 27: ...1 u line com SAFETY INSTALLATION INTEGRATION OPERATING INSTRUCTIONS MAINTENANCE SERVICE Accessories 80 51004 00 Accessories Anti Tip Mounting Brackets US 18 99 WATERHOOKUP Accessories Braided Water Li...

Page 28: ...ct may not contain all the components listed Compressor The compressor makes a hum or pulsing sound that may be heard when it operates Evaporator Refrigerant flowing through an evaporator may sound li...

Page 29: ...mperatures of the cabinet include Temperature setting Ambient temperature where installed Installation in direct sunlight or near a heat source The number of door openings and the time the door is ope...

Page 30: ...ervice com 3 The warranty listed above does not apply to floor display models The warranty for these models shall be 30 days from the date of retail purchase and only if U Line s Product Registration...

Page 31: ...IS IN LIEU OF ANY AND ALL OTHER WARRANTIES EXPRESS OR IMPLIED INCLUDING ANY IMPLIED WARRANTY OF MERCHANTABILITY OR IMPLIED WARRANTY OF FITNESS FOR A PARTICULAR PURPOSE ALL OF WHICH ARE DISCLAIMED U Li...

Reviews: