Tricks &
Tips
for
Great
Flights!
Flying the Ai Drone
The Drone can be flown in one of two ways, using the Juice Button with proximity sensors or advanced flying mode with
sensors deactivated. When learning to fly it is highly recommended you use the Juice Button method to fly the Drone, as
the patented sensor technology will allow for much easier flights.
Getting Started with the Juice Button!
Note, the Juice Button flight uses patented proximity sensors that will not operate in sunlight. This flight mode is therefore
not recommended outdoors or in bright direct sunlight. Hovering heights will vary as well on different surfaces, being
especially low on non-reflective surfaces (such as black carpet) and high on surfaces such as shiny white gloss paint. On
highly variable or changing surfaces it is recommended not to use the Juice Button start option.
1. Make sure that the Throttle Joystick (1) is positioned downwards (no throttle is given). Switch the handset Power Switch
(1) to ON. The Power Indicator LED (2) will start to flash.
2. Switch the Drone's ON/OFF Button (17) to ON, the Drone LED (18) will be illuminated.
3. Place the Drone on a flat surface, as detailed above and facing away from you (red Drone LED closest).
4. Move the Throttle Joystick (5) up and then back down again until the Power Indicator LED (2) stops flashing. The handset
is now paired with the Drone.
5. Press the Juice Button (7). The Drone will Auto Take-Off and Auto-Hover by itself at a height of around 1m. It is now over
to you to take control! You can press the Juice Button at any time for the Drone to Auto-Land
6. It is highly recommended that on initial flights you do not use the Throttle Joystick (5). Simply move and control the
Drone around using the Directional Joystick (6). Press the Directional Joystick (6) forward and backwards and the Drone
will move in that direction. Move to the left and right and the Drone will turn in that direction. The Drone will always stay at
approximately the same distance from the ground (Auto-Hover), so the novice pilot does not need to worry about the
height. This is the massive benefit the Ai Drone has over any other Drones on the market!
7. When you become a more experienced pilot, then you can use the Throttle Joystick (5) to move to your preferred height.
The Throttle Joystick (5) can also be used to rotate the Drone around its axis.
8. There are two speed options on the Ai Drone. Using the Speed Mode (20) button, the speed of the Ai Drone can be
switched between slow and fast modes (slow/fast).
9. The Ai Drone can perform flips using the Left Flip (3) and Backward Flip (4) buttons. Only perform flips when the Drone is
settled stationary in the air or ascending gently, otherwise the Drone will be difficult to control.
10. Press the Juice Button (7) at any time and the Drone will Auto-Land.
Emergency Stop press and hold down the Juice Button (7) if you loose control of the Drone at any time.
To land the Ai Drone press and release the Juice Button (7).
Auto-Stunt Operation
The Auto-Stunt Operation can only be activated when flight was started with the Juice Button. Press Auto-Stunt Button (8),
while the Drone is settled stationary in the air or gentle ascending, after taking off with the Juice Button. It is important
that there are no objects within 2m of the Drone in any direction and it has at least 1m above its hovering height.
Press the Auto-Stunt Button (8), the Drone turns around, moves slowly upwards, does a 360 degree flip, before moving
back down to its resting height (approximately 1m).
Press Auto-Stunt Button only when Drone is very still. If Drone is moving, it will become difficult to control after the flip.
Practice makes perfect!
Advanced Flying
The Drone can also be flown without any proximity sensors.
Follow steps 1-5 in section Getting Started with the Juice
Button (7) then push the Throttle Joystick (5) forward
and the Drone will take to the skies!
Not using the Juice Button (and hence deactivated proximity sensors during flights) does make flying more difficult, as you
need to control height (with Throttle Joystick (5)), as well as Direction (with Directional Joystick (6)). However there are
also advantages to this mode:
•
The Drone can be used on un-even coloured or textured ground.
•
The Drone can be flown outside in full sunlight.
•
You can move the Drone very close to the ground (below the 1m height determined by the sensors in Juice Button mode).
•
You can start flights by throwing the Drone into the air before immediately taking control. A spectacular trick, but only
recommended by experienced and highly skillful pilots! To do this you must use the Throttle Joystick (5) straight away once
you have thrown the Drone into the air.
Press and hold down for Emergency Stop.
Trimming the Drone
To get best performance for the Ai Drone, it is important to trim it. To adjust trimming we recommend:
•
When the Drone is flying forward, push the Backward Trim (14)
•
When the Drone is flying backward, push the Forward Trim (13)
•
When the Drone is flying to the left side, push the Right Trim (12)
•
When the Drone is flying to the right side, push the Left Trim (11)
•
When the Drone is rotating to the left, push the Right Turn Trim (10)
•
When the Drone is rotating to the right side, push the Left Turn Trim (9)
Contents
Charging
Replacing the Propeller Protectors
Problem
Reason
Solution
The Power Indicator LED (2) is not on
The Power Switch (1) is in the OFF position
Switch the Power Switch (1) to ON
Replace with new batteries
Handset is not working
Auto-Stunt Button (8) does not work
Flips are difficult to perform
Batteries not correctly loaded as per the
polarity shown
Check and make sure the batteries are
loaded as per the correct polarity
shown in the battery compartment
The Power Switch (1) is in the OFF position
Switch the Power Switch (1) to ON
Auto-Stunt only works when Drone is hovering
and stable after being started with Juice
Button (7)
Follow instructions and start with Juice
Button (7)
Drone power is low
Recharge Drone
You are flying outside or in direct sunlight
Fly indoors only when using Juice
Button (7)
Floor surface is not even (colour/texture)
Move to a more evenly reflective
surface or to Pro Mode (not using the
Juice Button)
Juice Button (7) does not give stable
hovering flights
Drone is out of control
Drone has crashed
Press and hold down Juice Button (7)
and press Throttle Joystick (5) down
for emergency stop
The Drone ON/OFF Button (17) is in the OFF
position
Wind is too strong
Do not fly the Ai Drone in windy
conditions
Switch the Drone ON/OFF Button (17) to
ON
Troubleshooting
Where to Fly the Ai Drone
Operating Safety Instructions
China Industries Ltd. T/A Wow! Stuff
Property: TX Juice
Product: Ai Stunt Drone
Product No: TX-1028
Date: 26/04/16
Printed: Black
Distributed by: China Industries Ltd. T/A Wow! Stuff,
Creative Industries Centre, Wolverhampton Science Park,
Wolverhampton, WV10 9TG
.
© Copyright. All rights
reserved.
www.wowstuff.com
Designed by TX Juice in the UK, California and Asia.
Manufactured and assembled in China.
Battery requirement for Handset
Rating: 4 x 1.5V AAA batteries (not included)
This device complies with Part 15 of the FCC Rules. Operation is subject to the following two conditions: (1) this device may not cause harmful interference, and (2)
this device must accept any interference received, including interference that may cause undesired operation
Warning:
Changes or modifications to this unit not expressly approved by the party responsible for compliance could void the user's authority to operate the
equipment.
NOTE:
This equipment has been tested and found to comply with the limits for a Class B digital device, pursuant to Part 15 of the FCC Rules.
These limits are designed to provide reasonable protection against harmful interference in a residential installation. This equipment generates, uses and can
radiate radio frequency energy and, if not installed and used in accordance with the instructions, may cause harmful interference to radio communications.
However, there is no guarantee that interference will not occur in a particular installation. If this equipment does cause harmful interference to radio or television
reception, which can be determined by turning the equipment off and on, the user is encouraged to try to correct the interference by one or more of the following
measures:
- Reorient or relocate the receiving antenna.
- Increase the separation between the equipment and receiver.
- Connect the equipment into an outlet on a circuit different from that to which the receiver is connected.
- Consult the dealer or an experienced radio/ TV technician for help.
CHOKING HAZARD – Small Parts
Not suitable for children under 3 years
Not recommended for use by children under 8 years old.
Please retain this information for future reference.
Adult supervision required. Operates on 2.4 GHz frequency.
!
Battery Information
• Non-rechargeable batteries are not to be recharged.
• Rechargeable batteries are only to be charged under adult supervision.
• Rechargeable batteries are to be removed from the toy before being charged.
• Do not mix old and new batteries.
• Do not mix alkaline, standard (carbon-zinc) or rechargeable (Ni-Cd) batteries.
• Batteries are to be inserted with the correct polarity.
• Exhausted batteries are to be removed from the toy.
• The supply terminals are not to be short-circuited.
• Contains Li-poly battery. Battery must be recycled or disposed of properly.
Always :
• Make sure battery compartments are secure.
• Use batteries of the correct size and type.
• Fit batteries correctly observing the plus and minus marks on the battery and compartment.
• Replace a whole set of batteries at one time.
• Remove exhausted batteries from equipment.
• Remove batteries from appliance that will not be used again for a long time.
• Please remember that all batteries should be kept away from young children as they could be easily swallowed. Seek medical advice
if you believe a cell has been swallowed.
• Please ensure that batteries are installed by an adult prior to use.
Never
• Never dispose of batteries in a fire.
Consumers have a significant role to play in reducing the impact of waste, electrical and electronic equipment on the environment, you
can help by re-using or recycling such equipment.
The crossed out wheelie-bin symbol indicates that the product & batteries must not be disposed of in domestic waste as they
contain substances which can be damaging to the environment and human health. If you cannot re-use or recycle the product or
batteries, please use designated collection points, or civic recycling facilities to dispose of them.
Before first use : read the user’s information carefully together with your child. Keep the instructions and packaging after reading it. •Check if
the product is assembled as instructed. •Do not change or modify anything on the product. •Warning! Do not touch the rotating propeller.
•Keep face, eyes, fingers, hair, body parts etc away from moving parts. •Always fly in an open space. •Do not expose to rain or moisture. •Do
not fly in a crowded environment. •Do not fly in a dusty area. •Do not fly in complete darkness. •Ensure people know that you are flying the
product. •Use only the handset included in this package. •Always turn “OFF” when not in use. •Contains battery. Battery must be recycled or
disposed of properly. •Do not start the product when persons, animals or any objects are within flying range of the product. •Children should be
supervised when playing with the product. •Do not fly near your face to avoid injuries.
Caution! Risk of eye injuries! Keep a safe distance of at least 2.5m.
• Ai Drone includes rechargeable Li-poly battery and in-built ground detection system
• 2.4 GHz TX handset uses 4 x AAA 1.5V batteries (not included)
• USB charging cable
• 4 x spare propellers (1 x set)
• 4 x spare removable propeller protectors
• Full instructions for use
1. Using a screw driver, loosen the screw and remove
the case cover.
2. Insert 4 x 1.5V AAA alkaline batteries, following
polarity markings.
3. Replace case cover and replace screw.
1. Turn over the Drone so underside is
upwards
2. Gently remove each arm of the
Removable Propeller Protectors (19)
off the base of the Drone
3. Gently pull off the Removable
Propeller Protectors (19) from the
corner of the Drone
4. Repeat on all four corners
• When using indoors, choose a spacious, obstacle-free area and ensure that the device is operated away from fans and air
conditioners as these may affect air flow.
• When using outdoors, choose a fine, calm day. It is not recommended to fly the product in winds over 5mph. Power
consumption will increase when operating in strong winds, which can also affect proper control of the product and may result
in damage. Operation away from crowds, ponds, residential buildings and trees is recommended. Do not operate in the rain or
snow or near to any high voltage cables.
• This product is not intended for use by individuals (including children) with reduced physical, sensory or mental capabilities or
lack of experience and / or knowledge, unless they are supervised by a person responsible for their safety and is able to give
instructions about how the product should be used.
• After you have used the product, always allow the motor, electronics and battery to cool down especially before recharging.
• This toy is intended to be used in domestic area (house and garden) only.
Safe Usage and Maintenance
•
If not in use for a long time, remove batteries from the controller.
•
Ensure that the device is placed away from heat sources.
•
Do not place in water as this may cause a short circuit of the circuit board.
•
Do not expose the product to extreme temperatures.
•
Always keep the product clean, use a damp cloth to clean, followed by a dry cloth to wipe water away. Never use chemicals to
clean the product.
•
Long operation time may generate high heat levels causing wear and tear. To extend product life, operators are recommended to
allow a 10-15 minute cool down period before recharging batteries.
•
Keep this instruction manual for future use.
Attention!
Before operating: Switch the handset on first, then the Drone.
When finished: First switch off the Drone, then the handset.
When the drone is hovering at a constant height, not close to the ceiling, wall, floor etc. the user can stop the drone by pressing
once the Juice Button (7) (1 second).
If the drone is not hovering at a constant height and is attached to the ceiling or wall, the user can stop the drone by holding the
Juice Button (7) and press Throttle Joystick (5) down for 3 seconds until the drone completely stops.
WARNING: CUTTING BOTH WIRES AT THE SAME TIME MAY CAUSE A SHORT CIRCUIT & POTENTIALLY DANGEROUS RISK OF THE
BATTERY OVERHEATING
Disposal of Ai Drone
Disposal of Li-poly battery instructions
(Only follow these instructions when you wish to dispose of your Ai Drone).
Warning:
Batteries should only be removed by an adult. Children should not be allowed to carry out the following procedure.
Replacing the Propellers
It is recommended to use tweezers in order to replace the propellers. Use the tweezers to remove the propellers from the centre axle by
pulling it upwards. Then use a new propeller and insert this by pushing onto the axis.
Each propeller is engraved with a code to identify its location on the Drone.
Using the engraved code on the propeller, the propellers should match the below format:
Front (blue LED) left is A1/A2/A3/A4, right is B1/B2/B3/B4.
Back (red LED) left is B1/B2/B3/B4, right is A1/A2/A3/A4.
Batteries are exhausted
1.
Using a Phillips screwdriver, unscrew the four
screws on the base of the Drone.
2.
Remove the casing and carefully remove the
battery.
3.
Carefully cut the wires connecting the Li-poly
battery to the Ai Drone. Use tape to cover the
end of each wire from the battery to prevent a
short circuit.
1
2
3
in-built ground detection system
t included)
18. Drone
LED
19. Removable
Propeller
Protectors
6. Directional
Joystick
2. Power
Indicator
LED
13. Forward
Trim
12. Right
Trim
14. Backward
Trim
11. Left
Trim
7. Juice
Button
10. Right Turn
Trim
8. Auto-Stunt
Button
9. Left Turn
Trim
20. Speed
Mode
1. Power
Switch
3. Left
Flip
5. Throttle
Joystick
1
2
The Ai Drone is best flown indoors, though in calm weather conditions it can also be flown outside. Note that the
proximity sensor will not perform outdoors in sunlight. See Flying the Ai Drone section.
When flying indoors choose a spacious, flat, obstacle free area, away from strong drafts, fans or air conditioners, as these
can affect airflow and make controlling flights very difficult.
Only attempt to fly outdoors on a very calm day (wind less than 5mph) with no rain, snow or water on the ground. Never
fly near crowds of people, pets or other animals, near ponds, or any other water, and keep well away from any high
voltage power lines.
The Propeller Protectors (19), can be removed and replaced as required (if broken or damaged). There are four spare
propeller protectors. Do not fly the drone without the Propeller Protectors (19).
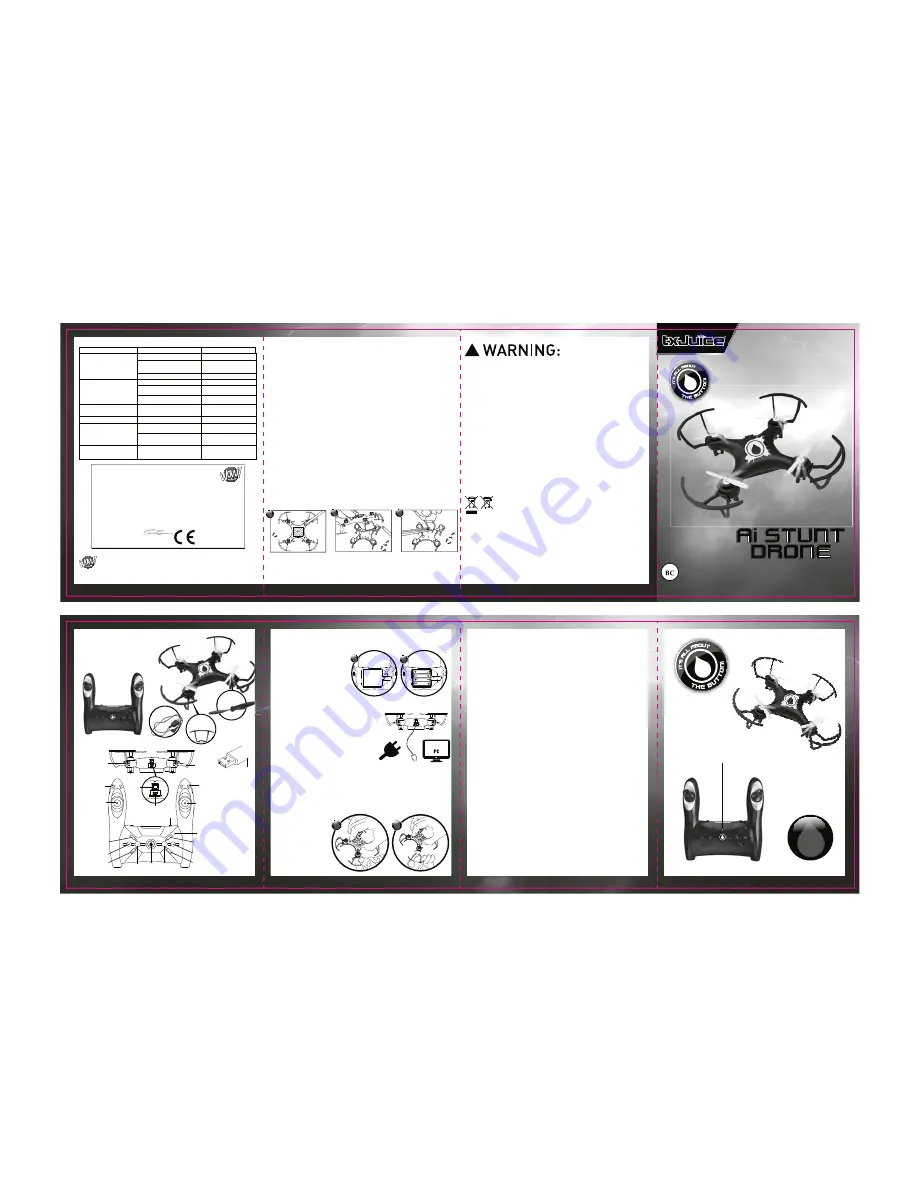
Handset Charging
The handset is charged and powered by the 4 x 1.5V AAA batteries inserted into the handset as shown below.
Ai Drone Charging
The Drone is charged using the USB charging cable provided. Do not use any other means to charge the Drone.
15. Drone
Charging
Port
17. Drone
ON/OFF
Button
1. Press the Drone ON/OFF Button (17) to OFF position.
2. Connect the charging cable into the Drone Charging Port (15), and the other
end to a USB power port. This can be plugged into a computer or via the
adapter of a suitable USB plug.
3. While charging, the Charging LED (16) will be OFF.
4. Charging is complete (and Drone fully charged) when the Charging LED (16)
is ON.
5. Charging takes around 30 minutes, for up to 5 minutes of flying time.
After 2 – 3 minutes of flight, the Left Flip (3) and Backward Flip (4) does not
function due to low power. The Drone LED (18) will start to flash to indicate
power is getting low.
1
2
4. Backward
Flip
16. Charging
LED
4 x Spare
Propellers
included
ope e s
included
8+
USB Cable
included
2
3
4
5
6
7
8
4 x Spare
Propeller
Protectors
included
INSTRUCTION MANUAL
ARTIFICIAL INTELLIGENCE
TM
AUT
O-STUNT
SPEED
AUT
O-STUNT
SPEED
THE JUICE BUTTON
ACTIVATES AUTO TAKE-OFF,
AUTO-HOVER & AUTO-LAND
For the most updated instructions as well as Tips & Tricks go to: www.txjuice.com
For the most updated instructions as well as Tips & Tricks go to: www.txjuice.com
Visit Ai Drone at www.txjuice.com
For the most updated instructions as well as Tips & Tricks go to: www.txjuice.com
For the most updated instructions as well as Tips & Tricks go to: www.txjuice.com
For the most updated instructions as well as Tips & Tricks go to: www.txjuice.com
For the most updated instructions as well as Tips & Tricks go to: www.txjuice.com
For the most updated instructions as well as Tips & Tricks go to: www.txjuice.com
For the most updated instructions as well as Tips & Tricks go to: www.txjuice.com
0DQXIDFWXUHU·V1DPH
&KLQD,QGXVWULHV/WG7$:RZ6WXII
0DQXIDFWXUHU·V$GGUHVV
&UHDWLYH,QGXVWULHV&HQWUH:ROYHUKDPSWRQ6FLHQFH3DUN
:ROYHUKDPSWRQ:97*8.
7\SHRI(TXLSPHQW
$L6WXQW'URQH
0RGHO1XPEHU
7;
<HDURI0DQXIDFWXUH
5HFHLYHU&DWHJRU\
$SSOLFDWLRQRI&RXQFLO'LUHFWLYHV(87KH5DGLR(TXLSPHQW'LUHFWLYH
6WDQGDUGVWRZKLFK&RQIRUPLW\LV'HFODUHG(1(1(1(1
3ODFH
:ROYHUKDPSWRQ8. 'U*UDHPH7D\ORU
'DWH
0D\
'LUHFWRU
DECLARATION OF CONFORMITY
:HGHFODUHRQRXUVROHUHVSRQVLELOLW\WKDWKLVHTXLSPHQWFRPSOLHVZLWKWKHHVVHQWLDOUHTXLUHPHQWVRIWKH5DGLR
(TXLSPHQW'LUHFWLYH(8DQGWKDWDQ\DSSOLFDEOH(VVHQWLDO7HVW6XLWHPHDVXUHPHQWVKDYHEHHQSHUIRUPHG
&(YHUVLRQVRIWKH$L6WXQW'URQH017;ZKLFKGLVSOD\WKH&(V\PERORQWKHSURGXFWODEHOFRPSO\ZLWKWKH
HVVHQWLDOUHTXLUHPHQWVRIWKH5DGLR(TXLSPHQW'LUHFWLYH(8