background image


TUVVA 

KSD7875


In-Dash 7” Monitor 
Touch Screen 
DVD/CD/MP3/MP4 
AM/FM Radio 
With Bluetooth 

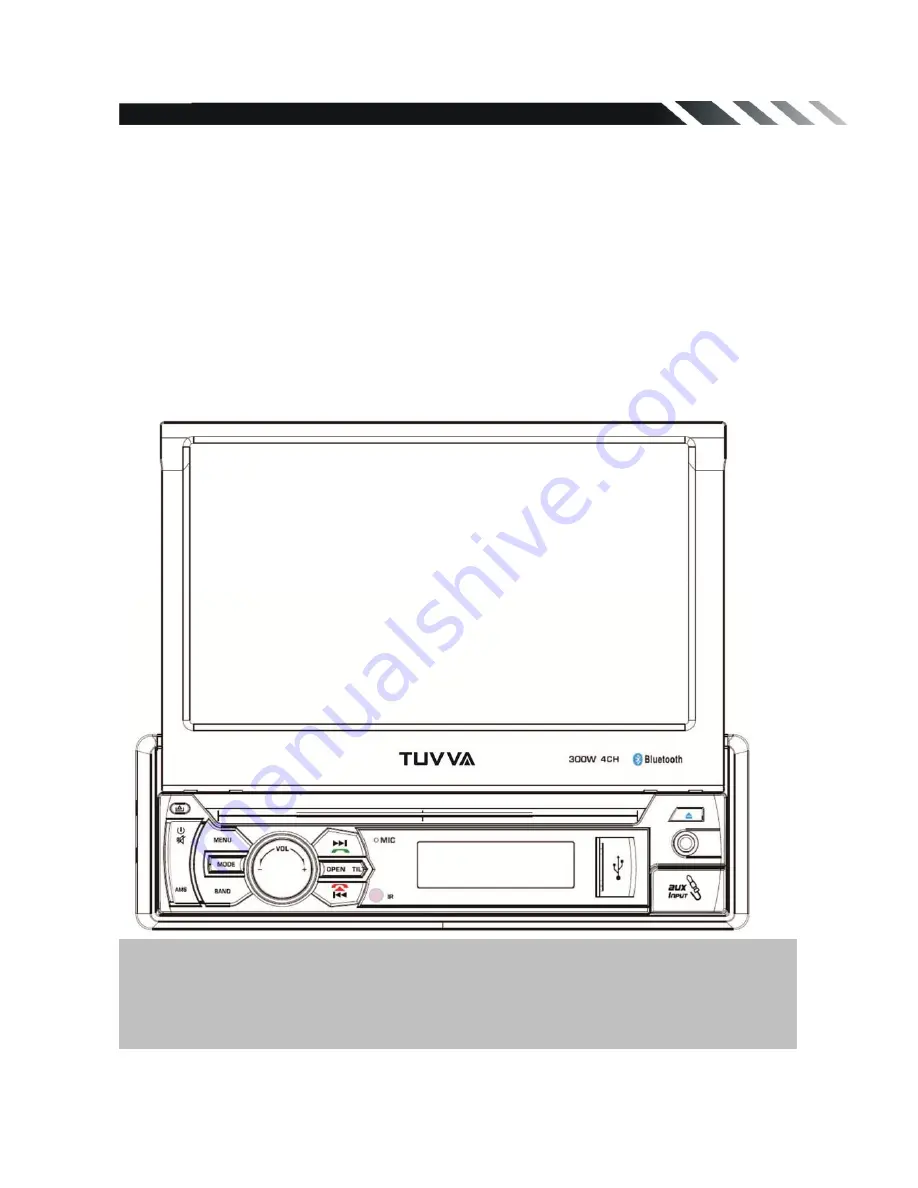
.

Owner’s Manual

.


Take the time to read through this owner’s manual. 
Familiarity with installation and operation procedures will help you obtain the 
best Performance from your new DVD-receiver. 

Summary of Contents for KSD7875

Page 1: ... Screen DVD CD MP3 MP4 AM FM Radio With Bluetooth Owner s Manual Take the time to read through this owner s manual Familiarity with installation and operation procedures will help you obtain the best Performance from your new DVD receiver ...

Page 2: ... car interior by means of ventilation or air conditioning Operate in well ventilated areas Do not turn on or off the product in short intervals When turning the unit off wait for at least 10 seconds prior to turning the unit on again Do not operate the player with scratched bended or broken discs and when a disc is not loaded properly do not force it into the player Do not watch video playback whi...

Page 3: ...L 10 REMOVE BATTERY 12 MAIN MENU 13 RADIO PLAYER 13 DVD PLAYER 14 DISC USB SD MMC INTERFEACE OPERATION 15 SETTING CONTROL 16 SYSTEM CONTROL 16 DISC CONTROL 16 SOUND CONTROL 16 DISPLAY CONTROL 16 BLUETOOTH CONTROL 17 BLUETOOTH SCETION 17 AUX MODE 19 OTHER FUNCTIONS 19 NOTES ON DISC 20 TROUBLESHOOTING 21 TROUBLESHOOTING 22 TECHNICAL SPECIFICATIONS 23 ...

Page 4: ...CCESSORIES Package contains the following accessories for installation and operation of the unit Remote Control User Manual Power cable Trim Ring Note Product image may vary from the actual delivery 4 1 ...

Page 5: ...e is a sudden stop like an emergency stop INSTALLATION Figure 1 Insert Half Sleeve into dash board hole and bend mount tabs outwards to fix it If necessary place the mount strap at the rear of the unit and fix it with provided washer as figure 2 Push the unit into the Half Sleeve until you hear a click sound Place Trim Ring over the unit and installation is completed as figure 3 Some vehicle may n...

Page 6: ...e ISO connectors as illustrated 2 For connections without the ISO connectors check the wiring in the vehicle carefully before connecting incorrect connection may cause serious damage to this unit 3 Cut the connector connect the colored leads of the power cord to the car battery as shown in the color code table below for speaker and power cable connections NOTE Never connect cable to the system whi...

Page 7: ...akers at higher volumes Use 4 8 Ω Ohm impedance loudspeakers only using higher or lesser impedance may damage the unit Do not use 3 cable loudspeakers and do not connect the loudspeakers minus to the car body GND The unit is using a BTL circuit and each loudspeaker must be connected with insulated cables according the diagram Loudspeaker cables and or optional external power amplifiers must always...

Page 8: ...attach it insert the right side first and then press the left side until hear a click sound 3 POWER MUTE Button Press it to turn the unit on When the unit is on short press it mute the volume output long press it to turn off the unit 4 AMS Button In RADIO mode press to start automatic searching press and hold for two seconds to start manual searching then press to tune each frequency step downward...

Page 9: ...utton and hold for two seconds to activate fast forward FF search in a track In BLUETOOTH mode press to reject a coming call or hang up while calling 11 OPEN TILT Button Press this to open and close the TFT monitor WARNING Do not obstruct the monitor while in the opening or closing cycle this may cause damage to the monitor mechanism and is NOT covered under warranty Press and hold for 2 second to...

Page 10: ...put press it again to resume volume Long press it enters to Bluetooth mode 5 BAND RDM Only for BT In Radio mode press to change radio band in sequence of FM1 FM2 FM3 AM1 AM2 In DVD mode press it to play randomly 6 Cursor buttons Use the buttons to select the menu item The title it track or to show next frame 7 MENU ROOT button Press it to show main menu In DVD mode long press it to enter TITLE MEN...

Page 11: ...only for RDS BT Press STEREO button to select STEREO or MONO 19 VOL button Press to increase volume level 20 A B ZOOM button During playback press it at the starting point of section you want to repeat A press this button again at the ending point of the section you want to repeat B section A B repeating starts Press it again to cancel the A B repeat function Press it and hold for two seconds in D...

Page 12: ...versal and full featured Some options are available with the corresponding model REMOVE BATTERY Note The distance may vary according to the brightness of ambient light If the remote is not used for an extended period of time remove the battery to prevent possible damage from battery leakage and corrosion Do not place any objects between the remote control unit and the sensor on the unit Do not dro...

Page 13: ... choose FM Touch this button can choose AM Touch this icon to select station forward manually Touch and hold this icon to select station forward automatically Touch this icon to select station backward manually Touch and hold this icon to select station backward automatically Touch this button to set the local turning on or off Touch this icon select stereo or mono sound reception Touch this butto...

Page 14: ... fast forward FF search in a track Touch it to select audio to AUTOR Stereo Mono L Mono R AUTOL Touch it to enter to page 2 menu Enlarge or reduce the playback screen Adjust the brightness of the screen Touch it can choose User Classic Rock Pop Jazz Electric Flat Touch it to select the subtitle language Available only if the disc with subtitle function In VCD mode touch it can choose PBC ON or OFF...

Page 15: ... play MP3 MP4 WMA JPEG files on a SD MMC card insert the card into the card slot you should press the Open button on the panel to flip down front panel and insert the SD MMC card into card slot The unit will play automatically MP3 MP4 WMA JPEG files Or repeatedly press the MODE button to select SD mode Touch it can choose Repeat REP 1 REP DIR REP ALL Touch it to skip to the previous track Touch it...

Page 16: ...ersion The software version is just for your reference Restore Default Restore Disc Audio Language Chinese English Japan French Spanish Portuguese Latin and German Subtitle Language Chinese English Japan French Spanish Portuguese and German and Off Menu Language Chinese English Japan French Spanish Portuguese German and Off Sound Sound Effect Adjust EQ and balance surround and field Subwoofer Sele...

Page 17: ...ice by tap the buttons Tap Dial button to enter call mode Tap Music button to start Bluetooth Music player Tap this icon translate Bluetooth to mobile mode Tap this icon to disconnect Bluetooth Tap this icon to clear number Tap Phone button to choose moblie phone connect BT function Tap this button Hand up and reject calling Tap this button Making and accept calling Touch this button to exit Bluet...

Page 18: ... button the device automatically makes a call to the latest call in its call log Voice Transfer During a call you can change a call from Bluetooth mode to phone by tapping Transfer button To have a call in Bluetooth mode again tap Transfer button NOTE the phonebook only supports Western Characters Any difference in character will be shown such as or 2 In calling Out calling mode Tap In calling but...

Page 19: ...main menu setting choose setting menu Choose SOUND and set subwoofer ON to enable subwoofer Parking When the car is stopped and the parking brake is working the screen can display the video image otherwise the screen can t display the video image Back View Camera This unit is equipped with back view camera output The camera is used to observe the situation behind the vehicle when you are backing t...

Page 20: ...mpedance may damage the unit Do not use 3 cable loudspeakers and do not connect the loudspeakers minus to the car body GND using a BTL circuit and each loudspeaker must be connected with insulated cables according the diagram Loudspeaker cables and or optional external power amplifiers must always be about 30cm away from the antenna and or antenna extension parts If want to display for 7 TFT parki...

Page 21: ...othing happens when buttons are pressed Display is not Accurate The microprocessor has malfunctioned due to noise etc Turn off the power Then press the no open button and remove the DCP Press the reset button for about 2 seconds with a thin rod Panel or main unit Connectors are dirty Wipe the dirt off with a soft cloth moistened with cleaning alcohol CD Sound is bad directly after power is turned ...

Page 22: ...IL THE AMBIENT TEMPERATURE RETURNS TO NORMAL NO SOUND VOLUME IS IN MINIMUM ADJUST VOLUME TO A DESIRED LEVEL WIRING IS NOT PROPERLY CONNECTED CHECK WIRING CONNECTION THE OPERATION KEYS DO NOT WORK THE BUILT IN MICROCOMPUTER IS NOT OPERATING PROPERLY DUE TO NOISE PRESS THE POWER BUTTON FOR ABOUT 10 SECONDS TO RESET THE UNIT FRONT PANEL IS NOT PROPERLY FIX INTO ITS PLACE SOUND SKIPS THE INSTALLATION ...

Page 23: ...UROPE AREA 87 5 108MHz Step 50KHz Frequency range SOUTH AMERICA AREA 87 5 108MHz Step 100kHz Frequency range RUSSIA AREA 87 5 108MHz Step 50KHz 65 74MHz Step 10KHz Frequency range U S A AREA 87 5 107 9MHz Step 200KHz Preset memory stations 18 AM MW Radio Frequency range EUROPE AREA 522kHz 1620 KHz Step 9KHz Frequency range SOUTH AMERICA AREA 520kHz 1710 KHz Step 10KHz Frequency range RUSSIA AREA 5...

Page 24: ......

Page 25: ...h any question about your new product We can guide you through connections first time setup or any of the features We want you to start enjoying your new product right away CONTACT US BEFORE YOU CONSIDER RETURNING THE PRODUCT Web www tuvva com Email support tuvva com 27 ...

Reviews: