background image

USER MANUAL

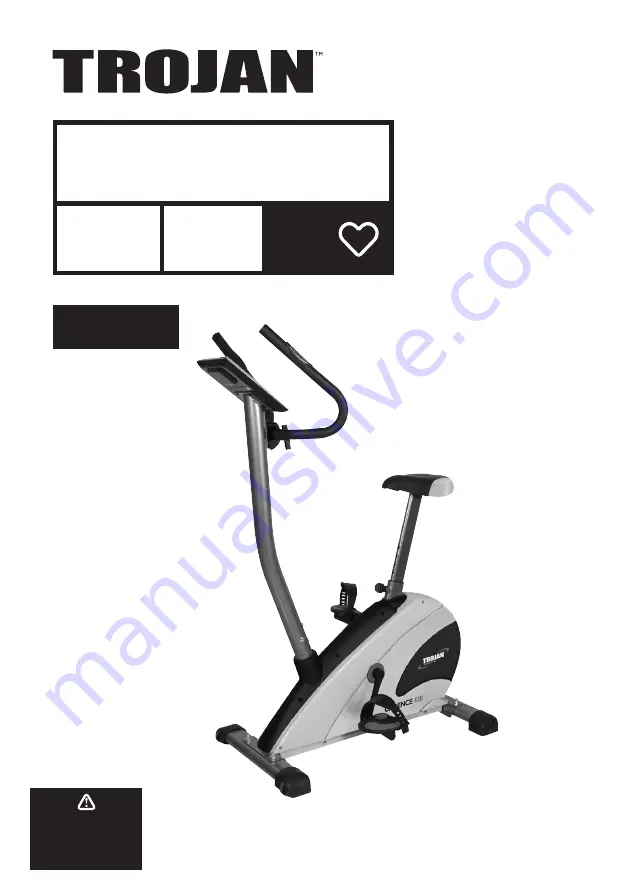
CADENCE 420

STATIONARY 

BIKE

7 KG

FLYWHEEL

CARDIO

Visit facebook.com/trojanhealth

www.trojanhealth.co.za

www.instagram.com/trojanhealth

CAUTION

READ ALL PRECAUTIONS AND 

INSTRUCTIONS IN THIS MANUAL 

BEFORE USING THIS EQUIPMENT.  

KEEP THIS MANUAL FOR 

FUTURE REFERENCE.

Summary of Contents for CADENCE 420

Page 1: ...IKE 7KG FLYWHEEL CARDIO Visit facebook com trojanhealth www trojanhealth co za www instagram com trojanhealth CAUTION READ ALL PRECAUTIONS AND INSTRUCTIONS IN THIS MANUAL BEFORE USING THIS EQUIPMENT KEEP THIS MANUAL FOR FUTURE REFERENCE ...

Page 2: ...___________________________________ 11 Console Functions ____________________________________________ 14 Exercise Instructions _________________________________________ 18 Fitness Tips Techniques _____________________________________ 20 Conditioning Guidelines _______________________________________ 21 Warm Up Cool Down________________________________________ 22 Maintenance _______________________...

Page 3: ...onsult your physician To avoid muscular pain and strain begin each workout by stretching and warming up and end each session by cooling down and stretching INSTALLATION Trojan recommends that all equipment Be secured to or set up on a solid level surface to stabilise and eliminate rocking or tipping over during training Be set up inside your home away from moisture and dust the equipment is not de...

Page 4: ...damaged or worn do not attempt to use or repair the equipment yourself Please contact our service department on 0861 TROJAN 0861 876526 to arrange a repair Customers residing outside South Africa can contact us on 27 10 206 4405 OPERATING WARNINGS It is the purchaser s responsibility to instruct all users as to the proper operating procedures of all Trojan equipment Keep children away from all mov...

Page 5: ... and simple method to begin your assault on getting your body in shape and achieving a healthier lifestyle Before reading further please review the drawing below and familiarise yourself with the parts that are labelled Read this manual carefully before using the Trojan Cadence 420 Stationary Cycle Tension Control Auto Function Time Speed RPM Distance Calories Hand Pulse Recovery ODO Watt Programs...

Page 6: ...ck the hardware packaging to make sure all parts are included Basic tools such as spanners will be provided for assembly No 1 Main Frame No 15 Console No 3 Front Stabiliser No 2 Rear Stabiliser No 10 Right Pedal No 9 Left Pedal No 13 Front Post No 14 Handlebar No 11 Seat Post No 12 Seat ...

Page 7: ... QTY 4 Flat Washer M10 x 22 mm 4 5 Domed Nut M10 4 6 Carriage Bolt M10 x 55 mm 4 26 Curved Washer M8 x 20 mm 4 27 Allen Screw M8 x 16 mm 4 37 Cover for Clamp 1 38 T Type knob 1 Allen Key 6 mm 1 Spanner S13 19 1 HARDWARE TOOLSLIST ...

Page 8: ... R Crank Right 1 23 Foam Grip 2 24 Lower Console Wire 1 25 Middle Console Wire 1 26 Curved Washer M8 x 20 mm 4 27 Allen Screw M8 x 16 mm 4 No Description Qty 28 Hand Pulse Wire 2 29 Grommet 1 30 Flat Washer 17 x 8 mm 5 31 Spring Washer M8 3 32 Nylon Locknut M8 5 33 Quick Release Knob 1 34 Upper Hand Pulse Wire 2 35 Upper Console Wire 1 36 Clamp 1 37 Cover for Clamp 1 38 T Type Knob 1 39 Hex Head B...

Page 9: ...7 Motor 1 58 Motor Wire 1 59 Power Wire 1 60 Inner Cap for Handlebar Post 1 No Description Qty 61 Inner Cap for Seat Post 1 62 Screw ST5 x 15 4 63 Powder Spacer 2 64 Hex Head Bolt M8 x 55 mm 1 65 Adaptor 230V 50HZ 6VDC 1000MA 1 PARTSLIST ...

Page 10: ...10 EXPLODEDDRAWING ...

Page 11: ... to the front of the Main Frame 1 using 2 Carriage Bolts M10 x 55 mm 6 2 Flat Washers M10 x 22 mm 4 and 2 Domed Nuts M10 5 Attach the Rear Stabiliser 2 to the rear of the Main Frame 1 using 2 Carriage Bolts M10 x 55 mm 6 2 Flat Washers M10 x 22 mm 4 and 2 Domed Nuts M10 5 STEP 2 HANDLEBAR POST ASSEMBLY Connect the Middle Console Wire 25 in the Handlebar Post 13 to the Lower Console Wire 24 in the ...

Page 12: ... 28 to the Upper Hand Pulse Wire 34 Connect the Middle Console Wire 25 to the Upper Console Wire 35 Attach the Console 15 onto the bracket of the Front Post 13 securing it using 4 Screws M5 x 10 mm 20 which are pre assembled on the back of the Console 15 STEP 4 SEAT ASSEMBLY Attach the Seat 12 to the Seat Post 11 securing it using 3 Flat Washers 17 x 8 mm 30 3 Spring Washers M8 31 and 3 Nylon Lock...

Page 13: ...outwards Attach the Left and Right Pedals 9 10 to the Crank Arms 22L R Note The Pedals and Crank Arms are marked with R L The Right Pedal R should be threaded in a clockwise direction and the Left Pedal L should be threaded in a counter clockwise direction ASSEMBLYSTEPS STEP 5 STEP 6 ELECTRICAL SUPPLY Plug the Adapter into the Adapter Jack STEP 6 ...

Page 14: ...desired value or work out mode TEST RECOVERY Press to enter into the Recovery function when the Console is displaying heart rate values Hold for 1 minute and Recovery will determine the users fitness level There are 6 Levels 1 6 F1 is the best and F6 is the worst MODE Press to switch display from RPM to SPEED ODO to DIST during workout FUNCTIONS AND OPERATIONS WORKOUT SELECTION After power up use ...

Page 15: ...s down to 0 the Console will sound a warning and stop the workout automatically Press the START key to continue the workout to reach any unfinished workout parameters PRE PROGRAMS There are 12 program profiles ready for use All program profiles have 16 levels of resistance Select 1 of the pre programs using the UP or DOWN key then press ENTER The 1st parameter Time will flash and the value can be ...

Page 16: ...44 Type 9 is from 45 to 50 TARGET HEART Select TARGET H R using the UP or DOWN key then press ENTER KEY RATE PROGRAM The 1st parameter Time will flash and the value can be adjusted using the UP or DOWN key Press ENTER to save value and move onto the next parameter to be adjusted If the user sets up a target time for a workout then the next parameter of Distance cannot be adjusted If the measured P...

Page 17: ... program allows the user to set their own program that can be used immediately Select USER using the UP or DOWN key then press ENTER The 1st parameter Time will flash and the value can be adjusted using the UP or DOWN key Press ENTER to save value and move onto the next parameter to be adjusted NOTE If the user sets up a target time for a workout then the next parameter of Distance cannot be adjus...

Page 18: ...le injury It is advisable to do a few stretching exercises as shown below Each stretch should be held for approximately 30 seconds do not force or jerk your muscles into a stretch If it hurts STOP THE EXERCISE PHASE This is the stage where you put the effort in After regular use the muscles in your legs will become stronger Work at your own pace but it is very important to maintain a steady tempo ...

Page 19: ...tone muscle while on your Trojan Cadence 420 Stationary Cycle you will need to have the resistance set quite high This will put more strain on your leg muscles and may mean you cannot train for as long as you would like If you are also trying to improve your fitness you need to alter your training program You should train as normal during the warm up and cool down phases but towards the end of the...

Page 20: ...elps get rid of and keep off the excess fat that our bodies can store weight training is an essential part of the exercise routine process Weight training helps tone build and strengthen muscle If you are working above your target zone you may want to do a lesser amount of reps Always consult your physician before beginning any exercise program MUSCLE CHART The exercise routine that is performed o...

Page 21: ...NSITY To maximise the benefits of exercising it is important to exercise with the proper intensity The proper intensity level can be found by using your heart rate as a guide For effective aerobic exercise your heart rate should be maintained at a level between 65 and 85 of your maximum heart rate as you exercise This is known as your target zone You can find your target zone in the table below Du...

Page 22: ... hips Allow your back and shoulders to relax as you reach down toward your toes as far as possible Hold for 15 counts and then relax Repeat 3 times Stretches Hamstrings back of knees and back 2 HAMSTRING STRETCH Sit with 1 leg extended Bring the sole of the opposite foot toward you and rest it against the inner thigh of your extended leg Reach toward your toes as far as possible Hold for 15 counts...

Page 23: ...se abrasives or solvents on plastic parts Please wipe your perspiration off the Trojan Cadence 420 Stationary Cycle after each use Please inspect all assembly bolts and pedals on the machine for proper tightness before use STORAGE Store the Trojan Cadence 420 Stationary Cycle in a clean and dry environment away from children ...

Page 24: ...turer in respect of any injury loss or damage direct indirect or consequential arising out of the use of or inability to use this product and whether or not occasioned by the Manufacturer s negligence or any act or omission on its part PROOF OF PURCHASE Any claim in terms of the warranty must be supported by a proof of purchase or a warranty number Warranty numbers can be issued through contacting...

Page 25: ... still under warranty will be repaired free of charge as long as it complies with the terms and conditions of the warranty refer to warranties section in this manual Any items that need to be repaired that are NOT covered in the warranty will be for the Consumer s expense A quote for the repair replacement of these items will be provided to the Consumer for approval prior to repairs being conducte...

Reviews: