background image

User Manual v 1.0

November 2013 

ENGLISH

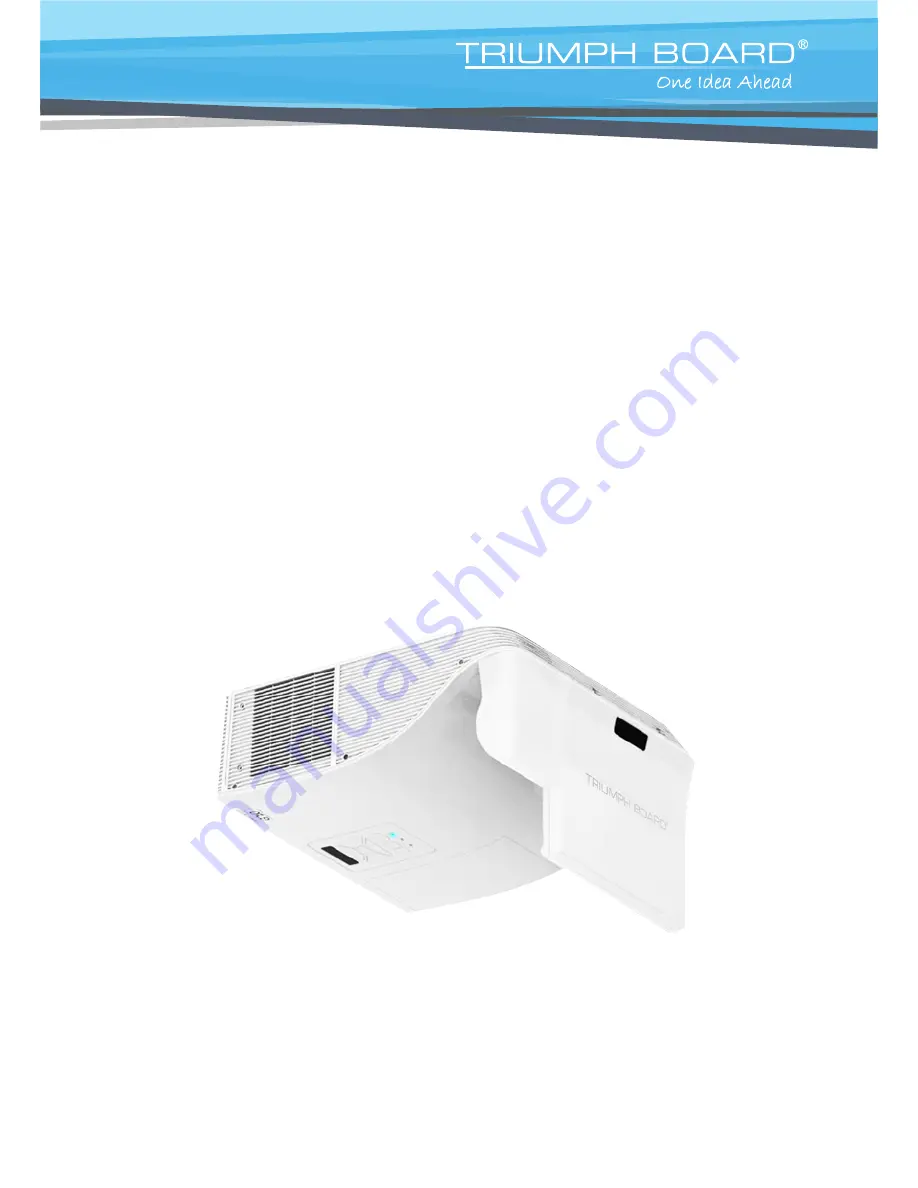
TRIUMPH BOARD PROJECTOR SERIES:

TRIUMPH BOARD PJ 2000 UST DLP

TRIUMPH BOARD PJ 2000i UST DLP

TRIUMPH BOARD PJ 3000 UST-W DLP

TRIUMPH BOARD PJ 3000i UST-W DLP

TRIUMPH BOARD a.s. , Neklanova 122/15, 128 00 Prague 2, Czech Republic, European Union, 

www.triumphboard.com

Summary of Contents for 2000

Page 1: ...BOARD PROJECTOR SERIES TRIUMPH BOARD PJ 2000 UST DLP TRIUMPH BOARD PJ 2000i UST DLP TRIUMPH BOARD PJ 3000 UST W DLP TRIUMPH BOARD PJ 3000i UST W DLP TRIUMPH BOARD a s Neklanova 122 15 128 00 Prague 2 Czech Republic European Union www triumphboard com ...

Page 2: ...of Contents Safety 2 Product specification 6 Product description 8 Installation 13 Settings 19 Troubleshooting 44 Compatibility Modes 49 Replacing the lamp 53 Replacing and cleaning the optional dust filter 54 ...

Page 3: ...t the life of the lamp itself Please be sure to change the lamp when it shows warning messages Warning When the lamp is approaching the end of its lifetime the message Lamp Warning Lamp life exceeded will show on the screen Please contact your local reseller or service center to change the lamp as soon as possible Warning Reset the Clear Lamp Hours function from the on screen display Options Lamp ...

Page 4: ...please contact the service center Do not own wipe to avoid scratching the lens Block the slots and openings on the unit provided for ventilation Use abrasive cleaners waxes or solvents to clean the unit Use under the following conditions In extremely hot cold or humid environments Ensure that the ambient room temperature is within 5 40 C Relative Humidity is 5 40 C 80 Max non condensing In areas s...

Page 5: ...s cause harmful interference to radio or television reception which can be determined by turning the device off and on the user is encouraged to try to correct the interference by one or more of the following measures Reorient or relocate the receiving antenna Increase the separation between the device and receiver Connect the device to an outlet on a circuit different from that to which the recei...

Page 6: ... not cause harmful interference and 2 This device must accept any interference received including interference that may cause undesired operation Notice Canadian users This Class B digital apparatus complies with Canadian ICES 003 Remarque à l intention des utilisateurs canadiens Cet appareil numerique de la classe B est conforme a la norme NMB 003 du Canada Declaration of Conformity for EU countr...

Page 7: ...ns F 2 6 Projection screen size 80 2 96 6 Diagonal 68 81 9 Diagonal Max focus screen size 70 100 Diagonal 60 90 Diagonal Projection distance 517 mm 759 mm 10mm 522 mm 802 mm 10mm Throw ratio 0 35 0 43 Horizontal scan rate 30 k 100 kHz Vertical refresh scan rate 50 120 Hz Weight 7 5 Kg 16 5 lbs Dimensions W x D x H 357 W x 367 D x 135 H mm excluding foot 357 W x 367 D x 231 H mm including reflectio...

Page 8: ...e x 1 3 5 mm audio jack input x 2 RCA L R audio jack input x 2 3 5 mm audio jack input Microphone x 1 3 5 mm audio jack input x 1 Mini USB B x 1 LAN RJ45 x 1 Standard package contents Documentation kit CD x 1 Projector manual Power cord x 3 EU UK US VGA cable x 1 Remote control x 1 CR2025 battery x 1 Product Specifications ...

Page 9: ...Unpack and inspect the box contents to ensure all parts listed below are in the box If something is missing please contact your supplier Documentation y y User s Manual CD Battery Projector Remote Control Contents VGA Cable CR2025 3V Optional ...

Page 10: ... Overview 1 Focus Ring 2 Lens 3 IR Receiver 4 Control Panel 5 Lamp Cover 3 4 8 6 1 3 2 6 Input Output Connection Ports 7 Power Socket 8 Elevator Feet 9 Elevator Feet 10 Elevator Feet Spacer Front View Rear View Bottom View 9 5 7 10 ...

Page 11: ...ct Description Control Panel 1 Power LED 2 Power 3 Menu Exit 4 Lamp LED 5 Temp Temperature LED 6 Source 7 Resync 8 Four Directional Select Keys 9 IR Receiver MENU POWER TEMP LAMP RESYNC SOURCE 5 1 4 2 7 6 8 3 9 ...

Page 12: ... RCA Audio Input Connector For S Video Connector 8 Audio Output Connector 9 DC Out 12V for Laser Curtain 10 RS232 Connector 11 VGA In 1 Connector 12 VGA In 2 Connector 13 Audio In 2 Connector For VGA In 2 Connector 14 Composite Video Input Connector 15 Left Right RCA Audio Input Connector For Composite Video Input Connector 16 3 5mm Microphone Input Connector 17 Power Socket 3 2 1 5 6 8 9 10 7 11 ...

Page 13: ...rectional Select Keys 8 Freeze 9 Blank 10 Aspect 11 Power 12 PC 13 Exit 14 Volume Remote Control 3V O L T S C R 2 0 2 5 2 5 6 7 13 11 4 12 1 3 8 9 14 10 Before using the remote con trol for the first time remove the transpar ent insulation tape See page 18 for battery installation ...

Page 14: ...ok 1 Power Cord 2 Audio Cable 3 VGA to DVI A Cable 4 VGA Cable Notebook Computer Power socket 5 RS232 Cable 6 HDMI Cable 7 USB Cable 8 Interactive cable Monitor Audio Output LAN RJ 45 DC Out 12V 1 2 2 2 4 4 3 4 5 6 7 8 Installation Optional accessory ...

Page 15: ...able Jack RCA 4 S Video Cable 5 Audio Cable 6 VGA to HDTV RCA Cable 7 HDMI Cable 8 Composite Video Cable DVD player Set top box HDTV receiver S Video output Video output Power socket Audio Output DVD player Set top box HDTV receiver LAN DC Out 12V 1 6 2 5 3 4 5 6 7 5 8 3 Optional accessory ...

Page 16: ...trol The Power LED will turn blue 3 Turn on your source that you want to display on the screen computer notebook video player etc The projector will detect the source automatically and will display on the screen 4 If you connected multiple sources at the same time press the Source button on the remote control to switch between inputs Powering on off the Projector MENU POWER TEMP LAMP RESYNC SOURCE...

Page 17: ...indicate standby mode 4 It is now safe to unplug the power cord LED Indicator Messages Message Lamp LED Red Temp LED Red Power LED Red Power LED Blue Power Plug Flash ON to OFF 100ms Flash ON to OFF 100ms Flash ON to OFF 100ms Standby ON Power button ON ON Cooling state 0 5 second H ON 0 5 second L OFF flashing Power button OFF Cooling completed Standby Mode ON Firmware download ON ON ON Thermal s...

Page 18: ...t To raise the image Use screw in feet to raise the image to the desired height angle and fine tune the display angle To lower the image Use screw in feet to lower the image to the desired height angle and fine tune the display angle Projected Image Setting 1 2 Elevator Feet Elevator Feet Elevator Feet Spacer ...

Page 19: ...e position Projection Distance A Projection Distance B Screen WXGA Series Screen Size 16 10 Projection Distance A Projection Distance B Diagonal inch mm Inch mm Inch mm 70 1778 20 4 517 7 2 182 80 2032 23 5 596 10 3 262 87 2 2215 25 8 655 12 6 320 90 2286 26 7 677 13 5 343 100 2540 29 9 759 16 7 424 Projection Distance A mm Screen size mm x 0 296 Tol erance is around 3 1 Ex Projection Distance 655...

Page 20: ...y OSD Exit a menu ReSync Automatically synchronize the PC analog timing to its optimized condition Source Select an input signal Four Directional Select Keys Use to select items or make adjustments to your selec tion Lamp LED Indicate the projector s lamp status Temp LED Indicate the projector s temperature status MENU POWER TEMP LAMP RESYNC SOURCE Settings ...

Page 21: ...3V O L T S C R 2 0 2 5 M 3V O L T S C R 2 0 2 5 2 5 6 7 13 11 4 12 1 3 8 9 14 10 To ensure safe operation please observe the following precautions Use CR2025 type bat tery Avoid contact with water or liquid Do not expose the remote control to moisture or heat Do not drop the remote control If the battery has leaked in the remote control carefully wipe the case clean and install new battery Risk of...

Page 22: ...een display OSD 6 Enter Four Directional Select Keys Press direction buttons to select items or make adjustments 8 Freeze Press to freeze the image Press it again to un freeze the image 9 Blank Hide the screen picture Press again to display screen picture 10 Aspect Use this function to choose your desired aspect ratio 11 Power Power on off the projector 12 PC Switch to VGA 1 VGA2 source 13 Exit 14...

Page 23: ...2 When OSD is displayed use the buttons to select the desired item and adjust the settings by the buttons 3 If the setting has icon you could press the button to enter another sub menu Press the Menu button to close the sub menu after adjustment 4 After adjusting the settings press the Menu button to go back to the main menu 5 To exit press the Menu button again The OSD menu will be closed and the...

Page 24: ...0 32 Microphone Volume 0 32 Logo Default User Logo Capture Auto Source Off On Input HDMI VGA 1 VGA 2 S Video Composite Auto Power Off Min 0 120 Lamp Hours Used Normal Lamp Hours Used ECO Lamp Life Reminder Off On Lamp Power Mode ECO Normal Clear Lamp Hours No Yes Dynamic Black Off On High Altitude Off On Filters Remind Hour Cleaning Up Reminder No Yes Information Model Name SNID Source Resolution ...

Page 25: ...On 3D Invert Off On 3D Format Frame Packing Side by Side Half Top and Bottom Frame Sequential Field Sequential 1080p 24 96Hz 144Hz Interactive Interactive Settings Off On DHCP Off On IP Address Subnet Mask Gateway DNS Store No Yes Reset No Yes LAN LAN Settings ...

Page 26: ...n to choose a proper color according to the wall It will compensate the color deviation due to the wall color to show the correct image tone Brightness Adjust the brightness of the image Press the button to darken image Press the button to lighten the image Contrast The Contrast controls the difference between the lightest and darkest parts of the picture Adjusting the contrast changes the amount ...

Page 27: ...ge Hue Adjust the color balance of red and green Press the button to increase the amount of green in the image Press the button to increase the amount of red in the image Gamma Effects the representation of dark scenery With greater gamma value dark scenery will look brighter Color Temp Adjust the color temperature At higher temperature the screen looks colder at lower temperature the screen looks...

Page 28: ... and the height adjusted to display the image using a 16 10 ratio Phase Synchronize the signal timing of the display with the graphic card If the image appears to be unstable or flickers use this function to correct it Clock Change the display data frequency to match the frequency of your computer s graphic card Use this function only if the image appears to flicker vertically H Position Press the...

Page 29: ... on the projection screen Ceiling Mount Front The image is projected straight on the screen Front Ceiling This is the default selection When selected the image will turn upside down Rear When selected the image will appear reversed Rear Ceiling When selected the image will appear reversed in upside down position ...

Page 30: ... and then use the or button to select your preferred language Press on the remote control to finalize the selection Menu Location Choose the menu location on the display screen Closed Caption Use this function to enable close caption menu Select an appropriate closed captions option Off CC1 CC2 CC3 CC4 ...

Page 31: ...30 Settings 30 VGA OUT Standby Choose On to enable VGA OUT connection Test Pattern Display a test pattern Reset Choose Yes to return the parameters on all menus to the factory default settings ...

Page 32: ...on Choose Off to turn mute off Volume Press the button to decrease the volume Press the button to increase the volume Microphone Volume Press the button to decrease the microphone Volume Press the button to increase the microphone Volume Volume ...

Page 33: ...ress Please wait Auto Source On The projector will search for other signals if the current input signal is lost Off The projector will only search current input connection Input Press button to enable disable input sources The projector will not search for inputs that are not selected Options For successful logo capture please ensure that the onscreen image does not exceed the projector s native r...

Page 34: ...ns run at high speed Select this option when using the projector at altitudes above 2500 feet 762 meters or higher Off The built in fans automatically run at a variable speed according to the internal temperature Filters Remind Hour Filters Remind Hour Set the filter reminder time Cleaning Up Reminder Select Yes to reset the dust filter hour counter after replacing or cleaning the dust filter Info...

Page 35: ...f to hide the lamp end of life warning message Lamp Power Mode Normal Normal mode ECO Use this function to dim the projector lamp which will lower power consumption and extend the lamp life Clear Lamp Hours Choose Yes to reset the lamp hour counter after replacing the lamp Options Lamp Settings Select Enter Exit Lamp Settings Lamp hours used Normal Lamp hours used ECO Lamp life reminder Lamp Power...

Page 36: ...the correct image 3D Format Use this feature to select the 3D format Options are Frame Packing Side by Side Half Top and Bottom Frame Sequential and Field Sequential 1080p 24 Use this feature to select 96 or 144Hz refresh rate as using 3D glasses in the1080p 24 frame packing Frame Sequential is supported the DLP Link 3D input signals from VGA HDMI connector Frame Sequential Field Sequential are su...

Page 37: ... the Interactive Settings in OSD use Mini USB cable to connect notebook desktop with the projector The Interactive function needs an external IR camera Please refer to below figure and plug in IR camera to projector before projector was installed Interactive The Interactive function is available when displaying graphic source from HDMI VGA input Other sources are not supported If 3D or Dynamic Bla...

Page 38: ...Subnet Mask and Gateway IP Address Select an IP address Subnet Mask Configure the Subnet Mask of the LAN connection Gateway Check the Gateway address with your network system administrator if you configure it manually DNS Check the DNS Server IP address with your network system administrator if you configure it manually Store Choose Yes to save the changes made in network configuration settings Re...

Page 39: ... the limitation for Input Length is in the below list space and the other punctuation key included Category Item Input Length characters Projector Projector Name 21 Location 21 Administrator 21 Admin Password New Password 4 Confirm 4 Note The characters allowed to be input are 0 9 and a Z Web Management Use Internet Explore 7 8 9 or Safari version 5 0 3 to enter the IP address You can now access W...

Page 40: ...the General tab under This connection uses the following items click Internet Protocol TCP IP and then click Properties Step 4 Click Use the following IP address and type in as below IP address 192 168 10 99 Subnet mask 255 255 255 0 Step 5 To open Internet Options click IE web browser click Internet Options click the Connections tab and click LAN Settings Step 6 The Local Area Network LAN Setting...

Page 41: ...language for web management LAN Settings Page Set up the Projector Name Location and Administrator information up to 21 characters for each field Press Save to store the settings Choose DHCP to assign an IP address to the projector from a DHCP server automatically or Manual to assign an IP address manually Set up the IP Address Device ID and Port information on the Crestron function ...

Page 42: ...es Front Front Ceiling Rear and Rear Ceiling See Ceiling Mount function Source Select The Source Select menu allows you to select your projector s input source You can select VGA 1 VGA 2 S Video Composite Video and HDMI Color Mode Select a mode to optimize the display image based on how the projector is being used See Color Mode function Blank Screen Select On Off to hide unhide the screen picture...

Page 43: ...ndition You can select the abnormalities or warnings to be notified by email When any of the alert conditions occur an email will be sent to the recipients To Cc Security Setting Page Set up an administrator password to access the Web Management Step 1 Password Click Enable first Step 2 New Password Enter the new password Step 3 Confirm Password Confirm the new password then Submit Step 4 Password...

Page 44: ...43 Settings 43 Login Page Administrator Password Enter the Administrator Password and click Login button Crestron For more information please visit http www crestron com www crestron com getroomview ...

Page 45: ... installed Ensure that the Blank feature is not turned on Partial scrolling or incorrectly displayed image Press Auto Sync on the remote control y y If you are using a PC For Windows 1 Open the My Computer icon the Control Panel folder and then double click on the Display icon 2 Select the Settings tab 3 Verify that your display resolution setting is lower than or equal to 1080p 4 Click on the Con...

Page 46: ...ook Brand Function Keys Acer Fn F5 Asus Fn F8 Dell Fn F8 Gateway Fn F4 IBM Lenovo Fn F7 HP Compaq Fn F4 NEC Fn F3 Toshiba Fn F5 Mac Apple System Preference Display Arrangement Mirror display y y If you experience difficulty changing resolutions or your monitor freezes restart all equipment including the projector The screen of the Notebook or PowerBook computer is not displaying your presentation ...

Page 47: ...u play anamorphic DVD or 16 9 DVD the projector will show the best image in 16 9 format on projector side If you play 4 3 format DVD title please change the format as 4 3 in projector OSD If the image is still stretched you will also need to setup the display format as 16 9 wide aspect ratio type on your DVD player Image is too small or too large Move the projector closer to or further from the sc...

Page 48: ...mote control is within 30 both horizontally and vertically of one of the IR receivers on the projector Make sure there are not any obstructions between the remote control and the projector Move to within 7 m 0 of the projector Make sure the batteries are inserted correctly Replace batteries if they are exhausted Sound Problems If no sound from the projector If you are playing an external source ma...

Page 49: ...Format from OSD and choose Side by Side Half for input signal is HDMI 1 4a 3D 3D Format is only supported on 3D Timing on page 42 On Screen Messages Power off confirm Power Off Press power key again Fan lock error The proejctor will switch off automatically Warning FAN LOCKED No source found VGA 1 No Source Found Out of display range Over temperature Warning TEMPERATURE TOO HIGH Please 1 Make sure...

Page 50: ...IBM 720x400 70 31 5 SVGA 800x600 56 35 1 800x600 60 37 9 800x600 72 48 1 800x600 75 46 9 800x600 85 53 7 800x600 120 77 4 Apple MAC II 832x624 75 49 1 XGA 1024x768 60 48 4 1024x768 70 56 5 1024x768 75 60 0 1024x768 85 68 7 1024x768 120 99 0 Apple MAC II 1152x870 75 68 7 SXGA 1280x1024 60 64 0 1280x1024 72 77 0 1280x1024 75 80 0 QuadVGA 1280x960 60 60 0 1280x960 75 75 2 SXGA 1400x1050 60 65 3 UXGA ...

Page 51: ...mponent signal Modes Resolution V Frequency Hz H Frequency Hz 480i 720x480 1440x480 59 94 29 97 15 7 576i 720x576 1440x576 50 25 15 6 480p 720x480 59 94 31 5 576p 720x576 50 31 3 720p 1280x720 60 45 0 720p 1280x720 50 37 5 1080i 1920x1080 60 30 33 8 1080i 1920x1080 50 25 28 1 1080p 1920x1080 23 98 24 27 0 1080p 1920x1080 60 67 5 1080p 1920x1080 50 56 3 Compatibility Modes ...

Page 52: ...600 56 35 1 800x600 60 37 9 800x600 72 48 1 800x600 75 46 9 800x600 85 53 7 800x600 120 77 4 Apple MAC II 832x624 75 49 1 XGA 1024x768 60 48 4 1024x768 70 56 5 1024x768 75 60 0 1024x768 85 68 7 1024x768 120 99 0 Apple MAC II 1152x870 75 68 7 SXGA 1280x1024 60 64 0 1280x1024 72 77 0 1280x1024 75 80 0 QuadVGA 1280x960 60 60 0 1280x960 75 75 2 SXGA 1400x1050 60 65 3 UXGA 1600x1200 60 75 0 Compatibili...

Page 53: ...25 15 6 480p 720x480 59 94 31 5 576p 720x576 50 31 3 720p 1280x720 60 45 0 720p 1280x720 50 37 5 1080i 1920x1080 60 30 33 8 1080i 1920x1080 50 25 28 1 1080p 1920x1080 23 98 24 27 0 1080p 1920x1080 60 67 5 1080p 1920x1080 50 56 3 HDMI 1 4a mandatory 3D timing Video Signal Modes Resolution V Frequency Hz H Frequency Hz Frame Packing 720p 50 31 5 720p 59 94 60 15 7 1080p 23 98 24 15 6 Side by Side Ha...

Page 54: ...ow the projector to cool down for at least 60 minutes 3 Disconnect the power cord 4 Unscrew the two screws on the cover 1 5 Lift up and remove the cover 2 6 Unscrew the two screws on the lamp module 3 7 Pull up the lamp handle and remove the lamp module slowly and carefully 4 To replace the lamp module reverse the previous steps 8 Turn on the projector and use Lamp Reset after the lamp module is r...

Page 55: ...the Dust Filter Procedure 1 Switch off the projector power by pressing the button 2 Disconnect the power cord 3 Pull the latch by the arrow direction 1 4 Remove the dust filter slowly and carefully 5 Clean or replace the dust filter 2 To install the dust filter reverse the previous steps 6 Turn on the projector and use Reset Dust Filter after the dust filter is replaced 1 2 Replacing and Cleaning ...

Page 56: ...55 Notes ...

Page 57: ...56 56 TRIUMPH BOARD a s Neklanova 122 15 128 00 Prague 2 Czech Republic European Union www triumphboard com TRIUMPH BOARD 2013 ...

Reviews: