background image


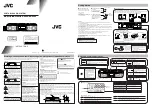
OPERATING  INSTRUCTIONS


WIRELESS 

MICROPHONE SYSTEM 


S4.04 / S4.10 series


CONTENTS


1.  SAFETY PRECAUTIONS


2.  GENERAL DESCRIPTION


3.  FEATURES


4.  HANDLING PRECAUTIONS


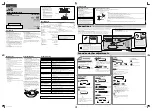
5.  NOMENCLATURE AND FUNCTIONS


6.  CHANNEL NUMBER SETTING by MANUAL


7.  CHANNEL NUMBER SETTING by


INFRARED SYNCHRONIZATION


8.  CHANNEL SCAN 
9.  BATTERY ALARM


10.  OPERATIONAL HINTS 
11.  TROUBLESHOOTING 
12.  SPECIFICATIONS 


Thank you for purchasing TOA's TRANTEC S4 series


Wireless


Microphone system. 

Please carefully follow the instructions in this manual to ensure long, trouble-free use of your equipment. 


English: Page  

Español: Página      37 

Deutsche: Seite  13  Português: Página  49  
Français: Page  25 

Summary of Contents for S4.04 Series

Page 1: ...NUAL 7 CHANNEL NUMBER SETTING by INFRARED SYNCHRONIZATION 8 CHANNEL SCAN 9 BATTERY ALARM 10 OPERATIONAL HINTS 11 TROUBLESHOOTING 12 SPECIFICATIONS Thank you for purchasing TOA s TRANTEC S4 series Wireless Microphone system Please carefully follow the instructions in this manual to ensure long trouble free use of your equipment English Page 1 Español Página 37 Deutsche Seite 13 Português Página 49 ...

Page 2: ... or a slanted surface Doing so may result in the unit falling down and causing personal injury and or property damage To prevent lightning strikes install the unit at least five meters away from a lightning rod and yet within the protective range angle of 45 of the lightning conductor Lightning strikes may cause a fire electric shock or personal injury Since the unit is designed for in door use do...

Page 3: ...supply plug or in the wall AC outlet a fire may result Clean it periodically In addition insert the plug in the wall outlet securely Switch off the power and unplug the power supply plug from the AC outlet for safety purposes when cleaning or leaving the unit unused for 10 days or more A fire or electric shock may result Any modifications made to this device that are not approved by TOA Corporatio...

Page 4: ...on Power Battery lamps indicate battery consumption to prevent the unit from malfunctioning when the battery level remarkably decreases Up to 10 hours of continuous use with single AA alkaline battery S4 series HDX employs a built in antenna The state of battery consumption can be displayed on S 4 s e r i e s R X receiver s indicator Quick channel scanning and auto channel set up Infra red auto ch...

Page 5: ...ow when the receiver matches a radio signal from the transmitter 5 AF peak lamp PEAK Lights red when the receiver output level reaches the point about 3 dB below the clipping level 6 Infrared IR port IR Transmit the infrared signal when pressing SYNC key 7 Numerical LED display Indicates the current channel number in normal state In setting mode the indicated channel number flashes until registere...

Page 6: ... A B S4 10 RXA only BNC connectors for antennas Phantom powering for the external antenna optional For the wireless system covering a relatively narrow area use the supplied two rod antennas which should be set up at 45 outwards from a vertical line Tip S4 10 RXA receiver gain is continuously adjustable Should the receiver signal be too high it will distort your mixer amplifier If the signal is to...

Page 7: ...7 Handheld microphone S4 04 HDX S4 10 HDX ...

Page 8: ...8 Belt pack transmitter S4 04 BTX S4 10 BTX ...

Page 9: ...ontrol BTX only Adjust the audio level control using the suppliedscrewdriver The transmitter sensitivity increases as the control is rotated clockwise and decreases as rotated counterclockwise 10 Input connector BTX only 3 5 mm jack socket Connect the microphone or the instrument cable 11 Antenna BTX only 12 Clip BTX only Clip the transmitter to a belt through the belt clip 13 Microphone BTX only ...

Page 10: ...for about 3 seconds Channel scan begins and an idle channel number is indicated blinking on the channel number display Step 2 After channel scan finishes the idle channels are displayed in turn Step 3 Press the SET key and the SYNC key at the same time the receiver sets the idle channel automatically Note Before starting the channel scan turn off all transmitters and any other equipment that could...

Page 11: ...nds from all directions It is better that the microphone is placed closer to the sound source Take care not to bring your mouth too close to the microphone within 5 cm as this impairs speech clarity if you speak loudly In case of the headset microphone by adjusting the gooseneck locate the microphone with the supplied windscreen in front of your mouth and position it 3 5 cm away from your mouth fo...

Page 12: ...rier Power 10 mW 10 mW Audio Frequency Response 80 15000 Hz 50 15000 Hz Audio input Level 140 dB SPL maximum 6dBV maximum mic gain 0dB Battery Life approx 10 hours approx 10 hours Power Supply 1 AA size alkaline battery 1 5 V 1 AA size alkaline battery 1 5 V Finish Resin coating Resin coating Dimensions 250 x φ50 mm 62 W x 100 H x 25 D mm with clip Weight 245 g with battery 85 g with battery RECEI...

Page 13: ... UND FUNKTIONEN 6 MANUELLE KANALWAHL 7 KANALWAHL mit SYNCHRONISATION ÜBER INFRAROT 8 SENDERSUCHLAUF 9 BATTERIEALARM 10 HINWEISE ZUM BETRIEB 11 STÖRUNGSSUCHE 12 TECHNISCHE DATEN Wir danken Ihnen für den Kauf dieser Drahtlos Mikrofonanlage der S4 Serie von TOA s TRANTEC Beachten Sie bitte stets die Anweisungen in dieser Bedienungsanleitung um einen langen und störungsfreien Betrieb des Geräts zu gew...

Page 14: ...er schrägen Fläche installieren oder montieren Das Gerät kann herunterfallen und Verletzungen und oder Sachschäden verursachen Um Blitzeinschläge zu vermeiden installieren Sie das Gerät in einem Mindestabstand von fünf Metern zum nächstgelegenen Blitzableiter und dennoch innerhalb der Schutzzone im Winkel von 45 des Blitzableiters Ein Blitzeinschlag kann einen Brand Stromschlag oder Verletzungen z...

Page 15: ... das Gerät den mitgelieferten WS Netzadapter Keine anderweitigen Adapter verwenden da dies zu einem Brand führen kann Angesammelter Staub auf dem Netzstecker oder in der WS Steckdose kann einen Brand verursachen Wischen Sie diese daher gelegentlich sauber Stecken Sie den Stecker jeweils fest und sicher in die Steckdose ein Wenn das Gerät voraussichtlich 10 Tage oder länger nicht gebraucht oder bev...

Page 16: ...tzt werden Aufstellorte an denen das Gerät mit Wasser oder anderen Flüssigkeiten bespritzt werden kann sind zu vermeiden da dies zu einer Fehlfunktion führen kann Das Gehäuse des Geräts niemals öffnen oder entfernen um Modifikationen am Gerät vorzunehmen Lassen Sie sämtliche Servicearbeiten bei Ihrem TOA Händler in der Nähe durchführen Lassen Sie das Gerät nicht auf den Boden fallen und vermeiden ...

Page 17: ...ndes Funksignal vom Sender auffindet 5 AF Spitzenlampe PEAK Leuchtet rot auf wenn der Ausgangspegel des Empfängers den Punkt ungefähr 3 dB unter dem Begrenzungspegel erreicht 6 Infrarot IR Port IR Beim Drücken auf die SYNC Taste wird das Infrarotsignal übertragen 7 Numerische LED Anzeige Zeigt die aktuelle Kanalnummer im Normalstatus an Im Einstellmodus blinkt die angezeigte Kanalnummer bis zur Ei...

Page 18: ...hlüsse für die Antennen Phantomspeisung für die externe Antenne optional Für eine drahtlose Anlage in einem relativ beengten Raum verwenden Sie die beiden mitgelieferten Stabantennen die von einer vertikalen Linie in einem Winkel von 45 nach außen asugerichtet werden können Hinweis Die S4 10 RXA Empfängerverstärkung ist stufenlos einstellbar Ein zu hohes Empfängersignal kann zu Verzerrungen bei Ih...

Page 19: ...19 Handmikrofon S4 04 HDX S4 10 HDX ...

Page 20: ...20 Taschensender S4 04 BTX S4 10 BTX ...

Page 21: ...instellen Die Empfindlichkeit des Senders wird beim Drehen des Reglers nach rechts erhöht Beim Drehen nach links wird die Empfindlichkeit des Senders reduziert 10 Eingangsbuchse nur BTX 3 5 mm Steckerbuchse zum Verbinden des Mikrofon oder Instrumentenkabels 11 Antenne nur BTX 12 Sicherung nur BTX Den Sender an einen Gürtel durch die Sendersicherung anstecken Der Gürtel sollte dabei an die Basis de...

Page 22: ...endersuchlauf beginnt wobei eine Leerkanalnummer blinkend auf dem Kanalnummerdisplay blinkt Schritt 2 Nach dem Sendersuchlauf werden die Leerkanäle der Reihe nach angezeigt Schritt 3 Drücken Sie gleichzeitig auf die SET und SYNC Taste Der Empfänger stellt den Leerkanal automatisch ein Hinweis Schalten Sie vor Beginn des Sendersuchlaufs alle Sender und andere Geräte die während des Vorgangs Störung...

Page 23: ...lte sich näher zur Klangquelle befinden Halten Sie das Mikrofon nicht zu nahe an Ihren Mund innerhalb von 5 cm da dadurch die Klarheit des Klangs beeinträchtigt wird wenn Sie lauter sprechen Bei einem Kopfbügelmikrofon richten Sie das Mikrofon mit dem mitgelieferten Windschutz durch Justieren des Schwanenhalses vor Ihren Mund aus Für die beste Klangwiedergabe muss sich das Mikrofon 3 5 cm von Ihre...

Page 24: ...ung 10 mW 10 mW Audiofrequenzgang 80 15000 Hz 50 15000 Hz Audioeingangspegel 140 dB SPL max 6dBV max mic Verstärkung 0dB Batterielebensdauer Ungefähr 10 Stunden Ungefähr 10 Stunden Stromversorgung 1 AA Alkalibatterie 1 5 V 1 AA Alkalibatterie 1 5 V Finish Harz Beschichtung Harz Beschichtung Abmessungen 250 x φ50 mm 62 B x 100 H x 25 D mm mit Sicherung Gewicht 245 g mit Batterie 85 g mit Batterie E...

Page 25: ...TIONS 6 PARAMETRAGE MANUEL N DE CANAL 7 PARAMETRAGE N DE CANAL par SYNCHRONISATION INFRAROUGE 8 BALAYAGE CANAL 9 ALARME BATTERIE 10 CONSEILS D UTILISATION 11 DEPANNAGE 12 SPECIFICATIONS Merci pour votre achat du système Microphones Sans fils Séries S4 de TOA TRANTEC Veuillez suivre attentivement les instructions de ce manuel pour garantir une longue vie sans problèmes pour votre appareil ...

Page 26: ...res ou des dommages matériels Afin de protéger l appareil contre la foudre l installer à 5 mètres au moins d un paratonnerre néanmoins dans son champ de protection angle de 45 0 du conducteur de foudre La foudre peut entraîner un incendie un choc électrique ou blessures Ne pas installer l appareil à l extérieur l appareil étant conçu pour l utilisation à l intérieur En cas d installation à l extér...

Page 27: ...eil ou dans la prise secteur peut provoquer un incendie Nettoyez les régulièrement Branchez avec précaution votre appareil à sa prise secteur Pour des raisons de sécurité toujours éteindre votre appareil et le débrancher lorsque vous le nettoyez ou en cas de non utilisation pendant 10 jours ou plus Cela pourrait provoquer des risques d incendie et de choc électrique Toute modification apportée à c...

Page 28: ...e brutalement Jusqu à 10 heures d utilisation continue avec une seule pile alcaline AA Le HDX séries S4 utilise une antenne intégrée Le niveau de batterie peut être affiché sur l indicateur du récepteur RX des séries S4 Un balayage rapide de canal et un paramétrage canal auto Paramétrage canal auto infrarouge Taille compacte et grande fiabilité 4 PRECAUTIONS D USAGE Ne pas exposer l appareil à la ...

Page 29: ...orsque le récepteur confirme un signal radio signal depuis le transmetteur 5 Témoin Crête AF PEAK S allume en rouge quand le niveau sortie récepteur atteint le point environ 3 dB en dessous du niveau d écrêtage 6 Port IR Infrarouge IR Transmet le signal infrarouge suite à pression sur touche SYNC 7 Affichage Numérique LED Indique le n de canal en cours en état normal En mode paramétrage le n de ca...

Page 30: ...rée Antenne A B S4 10 RXA seulement Connecteurs BNC pour antennes Alimentation fantôme pour l antenne externe en option Pour le système sans fil couvrant une zone relativement étroite utilisez les deux antennes tiges fournies et placez les à 45 à partir d une ligne verticale Conseil Le gain du récepteur S4 10 RXA est réglable en continu Si le signal du récepteur est trop élevé il y aura distorsion...

Page 31: ...31 Microphone à main S4 04 HDX S4 10 HDX ...

Page 32: ...32 Emetteur Ceinture S4 04 BTX S4 10 BTX ...

Page 33: ...connecter l instrument 9 Contrôle Niveau Audio BTX uniquement Réglez le niveau audio avec le tournevis fourni La sensibilité du transmetteur augmente quand la touche de contrôle est tournée dans les sens horaire et diminue lorsqu elle est tournée dans le sens anti horaire 10 Connecteur d entrée BTX uniquement Prise jack 3 5 MM Branchez le microphone ou le câble instrument 11 Antenne BTX uniquement...

Page 34: ...t environ 3 secondes Le balayage canal démarre et un n de canal vacant clignote sur l affichage des canaux Etape 2 Une fois le balayage canal terminé les canaux vacants s affichent l un après l autre Etape 3 Appuyez simultanément sur les touches SET et SYNC et le récepteur paramètre automatiquement le canal vacant Note Avant de démarrer le balayage canal éteignez tous les transmetteurs et tout aut...

Page 35: ...as vous approcher trop près du microphone 5 cm et moins pour préserver la clarté de la voix si vous parlez fort dans le microphone Amenez le microphone pourvu de sa protection en face de votre bouche Puis écartez le de 3 à 5 cm de votre bouche pour une reproduction sonore optimale Lorsque le microphone est placé trop près de la bouche ou que vous parliez trop fort la clarté de la parole s en trouv...

Page 36: ...que TRANTEC Puissance de la porteuse RF 10 mW 10 mW Réponse Fréquence Audio 80 15000 Hz 50 15000 Hz Niveau Entrée Audio 140 dB SPL maximum 6dBV maximum mic gain 0dB Durée de vie batterie approx 10 heures approx 10 heures Alimentation 1 batterie AA alcaline 1 5 V 1 batterie AA alcaline 1 5 V Finition Résine enduit Résine enduit Dimensions 250 x φ50 mm 62 W x 100 H x 25 D mm avec clip Poids 245 g av...

Page 37: ... FUNCIONES 6 NUMERACIÓN MANUAL DE CANAL 7 NUMERACIÓN DE CANAL POR SINCRONIZACIÓN INFRARROJA 8 ESCANDIDO DE CANAL 9 ALARMA DE BATERÍA 10 INSTRUCCIONES DE USO 11 FALLAS Y SOLUCIONES 12 ESPECIFICACIONES Gracias por su adquisición del Micrófono Inalámbrico de serie TRANTEC S4 de TOA Se le ruega seguir atentamente las instrucciones dadas en este manual por uso duradero y sin problema de su equipo ...

Page 38: ...el aparato en lugares inestables tales como una insegura mesa ó inclinada superficie Ya que resultaría en aparato caido causando herida y ó daños en material Para prevenir ataques de ralámpago instale el aparato por lo menos 5 metros alejado de un pararrayos y dentro del alcance de protección ángulo de 45 del pararrayos Ataques de ralámpago causaría incendio electrocución ó herida personal Como el...

Page 39: ... Ud Use el dedicado adaptador AC para el aparato Note que el uso de otro adaptador causaría incendio En caso de polvo acumulado en el enchufe ó en el toma AC de pared incendio resultaría Lo limpie periódicamente Además inserte el enchufe en el toma de pared firmemente Apague el aparato y saque el enchufe del toma AC por seguridad al limpiar ó dejar el aparato sin uso por 10 ó más días incendio ó e...

Page 40: ...l receptor S4 serie R X Rápida instalación de escandido de canal y auto canal Instalación de auto canal infrarrojo Tamaño compacto y alta fiabilidad 4 PRECAUCIONES EN EL USO No exponga el aparato en lluvia ó un ambiente donde pueda quedar rociado por agua u otros líquidos ya que resultaría en fallas del aparato Nunca abra ni remueva la caja del para modificar el aparato Refiera todo servicio a su ...

Page 41: ...l receptor iguala al signo de radio del transmisor 5 Lámpara AF pico PEAK La lámpara se pone roja cuando el nivel de salida del receptor alcanza el punto de 3 dB debajo del nivel de recorte 6 Puerta infrarrojo IR IR Transmite el signo infrarrojo al presionar la perilla SYNC 7 Pantalla LED numérico Indica el actual número de canal en estado normal En el modo de programación el indicado número de ca...

Page 42: ...e salida 15 Entrada de antena A B S4 10 RXA solamente Conectores BNC para antenas Alimentación fantasma para la antena externa opcional Para el sistema inalámbrico cubriendo un área relativamente angosta use las 2 antenas de vara disponibles que se deben instalar en 45 hacia fuera de una línea vertical Nota El aumento del receptor S4 10 RXA es continuamente ajustable En caso de muy alto el signo d...

Page 43: ...43 Micrófonos portátiles S4 04 HDX S4 10 HDX ...

Page 44: ...44 Transmisor de Cinturón S4 04 BTX S4 10 BTX ...

Page 45: ...rol audio usando el destornillador disponible La sensibilidad del transmisor aumenta mientras el control se da vuelta en el sentido del reloj y disminuye mientras el control se da vuelta en el sentido contrario de las agujas del reloj 10 Conector de entrada BTX solamente Con el soquete de 3 5mm de enchufe hembra conecte el micrófono ó el cable de instrumento 11 Antena BTX solamente 12 Clip BTX sol...

Page 46: ...s 3 segundos El escandido de canal comienza y un parado número de canal viene indicado parpadeando la pantalla de número de canal Paso 2 Luego de terminar el escandido de canal los parados canales vienen exhibidos de turno Paso 3 Presione la perilla SET y la perilla SYNC al mismo tiempo el receptor instala los parados canales automáticamente Nota Antes de empezar el escandido de canal apague todos...

Page 47: ...ono colocado más cerca de la fuente de sonido Tenga cuidado en no tener su boca muy cerca del micrófono dentro de 5cm ya que eso perjudicaría la claridad de su palabra si Ud habla en voz alta En caso de audífono ajustando el tubo localice el micrófono con el parabrisas disponible en frente de su boca y lo coloque 3 5cm alejado de su boca como precaución por mejor sonido Cuando el micrófono queda m...

Page 48: ...0 mW 10 mW Respuesta Frecuencia Audio 80 15000 Hz 50 15000 Hz Nivel audio de entrada 140 dB SPL Máximo 6dBV Máximo mic aumento 0dB Duración de batería Aprox 10 horas Aprox 10 horas Fuente de energía 1 AA size batería alcalina 1 5 V 1 batería alcalina AA 1 5 V Terminado Resina capa Resina capa Dimensiones 250 φ50 mm 62 A 100 A 25 F mm with clip Peso 245 g con batería 85 g con batería RECEPTOR S4 04...

Page 49: ...ERAÇÃO MANUAL DE CANAL 7 DEFINIÇÃO DO NÚMERO DE CANAL POR SINCRONIZAÇÃO INFRAVERMELHA 8 EXAME DE CANAL 9 ALARME DE PILHA 10 INDICAÇÕES DE OPERAÇÃO 11 LOCALIZADOR E REPARADOR DE DEFEITOS 12 ESPECIFICAÇÕES Obrigado por adquirir o Sistema de microfone sem fios série TOA s TRANTEC S4 Siga cuidadosamente as instrucções dadas neste manual para guarantor o funcionamento prolonga e sem problemas do produt...

Page 50: ...uperfície inclinada Isso pode resultar na queda da unidade para baixo e causando ferimentos pessoais e ou danos materiais Para prevenir choques de relâmpago Instale a unidade a pelo menos cinco metros de distância de uma haste de relâmpagos e ainda dentro da faixa de protecção ângulo de 45 de conductor de raios Choques de relâmpago podem provocar um incêndio choques eléctricos ou ferimentos pessoa...

Page 51: ...as reparações para o seu concessãoário mais próximo de TOA Utilizar o adaptador de AC dedicada para a unidade Observe que o uso de outro adaptador pode provocar um incêndio Se a poeira se acumula no plugue de alimentação da parede tomada AC pode causar um incêndio Limpe periodicamente Ademais insira o plugue na tomada da parede de forma segura Desligar o produto e desconecte o plugue de alimentaçã...

Page 52: ...e automática instalação de canal Automática instalação infravermelha de canal Compacto tamanho e alta confiabilidade 4 PRECAUÇÕES RELATIVAS AO MANUSEIO Não exponha o produto a chuva ou um ambienteem que possa haver respongos de água u outros liquidos pois isso pode danificar o produto Nunca abra nem retire o gabinete do equipo para modificar o produto Solicite qualquer reparo ao seu revendedor TOA...

Page 53: ...fica amarelo quando o receptor iguala um sinal de rádio do transmisor 5 Luz pico AF PEAK A luz vermelha fica o nível de saída do receptor ao ponto de 3 dB debaixo do nível de corte 6 Porta infravermelha IR IR Transmite o sinal infravermelho com o botão SYNC 7 Pantalha numérica LED Indica o número do canal atual em estado normal No modo de instalação o indicado número de canal reflete até registrad...

Page 54: ...ada de antena A B S4 10 RXA somente Contectores BNC para antenas Alimentação fantasma pela antena externa opcional Pelos sistema sem fios cobrindo uma relativamente estreita área use as duas antenas de varinha fornecidas que debem ter instaladas en 45 for a de uma linha vertical Sugestão O aumento do receptor S4 10 RXA é continuamente ajustável Em caso de muito alto o sinal do receptor torcerá seu...

Page 55: ...55 Microfone portátil S4 04 HDX S4 10 HDX ...

Page 56: ...56 Transmisor de cinta S4 04 BTX S4 10 BTX ...

Page 57: ...ontrol de nível audio usando a fornecida chave de fenda A sensibilidade do transmisor aumenta com o controle em direção a direita e descresce em direção a esquerda 10 Conector de entrada BTX somente Soquete de suporte de 3 5mm conecte o cabo do microfone ou o instrumento 11 Antena BTX somente 12 Clip BTX somente Grampee o transmisor a um cinta pelo clip do transmisor É melhor ter o cinta pressiona...

Page 58: ... O exame de canal começa e um fixo número de canal te indicado lampejando na pantalha do número de canal Passo 2 Logo do exame de canal os fixos canais tem exibidos em turno Passo 3 Pressione o botão SET e o botão SYNC ao mesmo tempo o receptor instala o fixo canal automáticamente Nota Antes de começar o exame de canal desligue todos os transmisores e todo outro equipamento que causaria a interfer...

Page 59: ... toda direção É melhor ter o microfone mais cercado da fonte do som Tome cuidado em não ter a sua boca muito cercada ao microfone dentro de 5 cm pela claridade de fala se você fala ruidosamente No caso do fone de ouvido ajustando o cano curvado coloque o microfone com o pára brisa fornecido à frente de sua boca e coloque o 3 5cm afastado de sua boca pela melhor reprodução de som O ter o microfone ...

Page 60: ... 10 mW 10 mW Resposta de Freqüência Audio 80 15000 Hz 50 15000 Hz Nível de entrada audio 140 dB SPL máximo 6dBV máximo aumento mic 0dB Duração da pilha Aprox 10 horas Aprox 10 horas Fonte de energia 1 pilha alcalina tamanho AA 1 5 V 1 pilha alcalina tamanho AA 1 5 V Acabado Resina camada Resina camada Dimensões 250 φ50 mm 62 L 100 A 25 F mm com presilha Peso 245 g com pilha 85 g com pilha RECEPTOR...

Page 61: ... 250 822 650 826 700 754 725 639 625 611 450 621 775 582 350 544 675 512 300 7 935 400 856 575 800 900 820 150 828 100 756 000 641 225 612 600 622 200 583 950 546 275 513 900 8 925 700 857 950 801 600 820 775 828 750 756 775 642 275 613 350 622 825 585 000 547 325 514 950 9 926 950 858 200 803 350 821 900 829 900 757 800 644 800 613 900 623 250 587 525 549 85 518 950 A 928 350 858 650 804 450 822 ...

Page 62: ...م ﻨﺸوب إﻟﻰ اﻟوﺤدة ﻟﻬذﻩ اﻟﻤﺤدد ﻤن أﻋﻠﻰ ﺒﺎﺌﻲ ر ﻛﻬ ﺠﻬد ام ﺒﺎﺌﻴﺔ ر اﻟﻛﻬ اﻟﺼدﻤﺎت و اﺌق ر اﻟﺤ ﺘﺠﻨب ذﻟك إﻟﻰ ﺒﺎﻹﻀﺎﻓﺔ وﻴﻨﺒﻐﻲ اﻟﺘﻴﺎر ﻟﺘﻘوﻴم ﺒﺎﺌﻴﺔ ر اﻟﻛﻬ ة ر اﻟداﺌ وﺼﻼت ﺘﻌدﻴﻝ أو اﻟﻀرر إﻟﺤﺎق ﺴﻴﺘم ﻻ ٕ ا و ﺜﻨﻲ أو ﻗطﻊ ﺒﺄي ﺘﻘم ﻻ ﺒﺎﻟ اﻟﺘﻴﺎر ﻟﺘﻘوﻴم ﺒﺎﺌﻴﺔ ر اﻟﻛﻬ ة ر اﻟداﺌ وﺼﻼت اﺴﺘﺨدام اﻟوزن ﺜﻘﻴﻠﺔ أﺸﻴﺎء ﻻﺘﻀﻊ و اﻟﻤﻴﺎﻩ ﺴﺨﺎﻨﺎت ﻤن ﻘرب ذاﺘﻬﺎ اﻟوﺤدة ذﻟك ﻓﻰ ﺒﻤﺎ ﺒﺎﺌﻴﺔ ر اﻟﻛﻬ اﻟﺼدﻤﺎت أو اﺌق ر اﻟﺤ ﻨﺸوب إﻟﻰ ﻫذا ﻴؤدي ﻗد إذ اﻟﺘﻴﺎ...

Page 63: ...ي اﻟﺘرﻛﻴب ﺨﺴﺎﺌر ع وﻗو إﻟﻰ ﻴؤدي ﻤﻤﺎ اﻟﻌﻨﺎﺼر ﻫذﻩ أو اﻟوﺤدة ﺴﻘوط إﻟﻰ ﻴؤدي ﻗد وﻤﺨﺎﻟﻔﺔ اﻟﺘﺠﻤﻴﻊ ﻋﻤﻠﻴﺔ أﺜﻨﺎء اﻟﻤﻨﺎﺴﺒﺔ اﻟﻌﻨﺎﺼر اﺴﺘﺨدم ﻴﺔ ر ﺒﺸ ﻟﻼﻫﺘز ﻋرﻀﺔ أﻤﺎﻛن ﻓﻲ اﻟوﺤدة ﺒﺘرﻛﻴب ﺘﻘم ﻻ ﻴؤدي أن اﻟﻤﺤﺘﻤﻝ وﻤن اﻟﺘرﻛﻴب ﺤﺎﻤﻝ ﺘﻠف ﻓﻲ اﻟﻌﺎﻟﻲ از ز اﻻﻫﺘ ﻴﺘﺴﺒب ﻗد اﻟﻤﺘﺒﺎﻴن از ﻴﺔ ر ﺒﺸ إﺼﺎﺒﺎت ﻓﻲ اﻟﺘﺴﺒب و اﻟوﺤدة ﺴﻘوط إﻟﻰ ذﻟك ﺘﻠف إﻟﻰ ﻴؤدي أن ﺸﺄﻨﻪ ﻓﻤن اﻟﻤطﺎطﻴﺔ اء ز اﻷﺠ أو اﻟﺼﻤﻐﻴﺔ اﻟﻤﺎدة إﻟﻰ اﻟﺸﺤم ﻫذا وﺼﻝ ﻓﺈذا ﻟﻠﺼدأ اﻟﻤﻀﺎد ﻟﻴق ...

Page 64: ...ا ـﻰ ﻟ إ ذﻟك ﻴؤدي وﻗد اﻟوﺤدة ﺘﻐطﻲ اﻟﺘﻲ اﻟﺘﻬوﻴﺔ ﻓﺘﺤﺎت ﺒﺴد ﺘﻘم ﻻ ـق ﻴ ر اﻟﺤ ـﺘﻌﺎﻝ ﺸ ا ﻰ ﻴﺔ ر دو ﺒﺼﻔﺔ اﻟﻐﺒﺎر ﻤن اﻟﺘﻬوﻴﺔ ﻓﺘﺤﺎت ﺘﻨظﻴف أﻴﻀﺎ ﻴﻨﺒﻐﻲ ـن ـ ـ ﻤ ـﺎﻟﻘرب ـ ـ ﺒ أو ـر ـ ـ ﺸ اﻟﻤﺒﺎ ـﻤس ـ ـ ﺸ اﻟ ـوء ـ ـ ﻀ ﻟ ـﺔ ـ ـ ﻀ ﻤﻌر ـﺎﻛن ـ ـ ﻤ أ ـﻲ ـ ـ ﻓ ـﺎ ـ ـ ﻬ ﺘرﻛﻴﺒ أو ـﺔ ـ ـ ﺒ ر ﻟﻸﺘ ـﺔ ـ ـ ﻀ ﺘﻌر أو ـﺔ ـ ـ ﺒ رط ـﺎﻛن ـ ـ ﻤ أ ـﻲ ـ ـ ﻓ ـدة ـ ـ ﺤ اﻟو ـب ـ ـ ﻴ ﺘرﻛ ـب ـ ـ ﻨ ﺘﺠ ﻤﺨﺎﻟﻔﺔ ﻴؤدي ﻗد إذ ة ر اﻷﺒﺨ أو ات ر اﻟﺴ...

Page 65: ...ﺤﺎ ـﻲ ﻓ ـدة ـ ﺤ اﻟو ـف ـ ﻴ ﻟﺘﻨظ ﺒﻬﺎ اﻟﻀرر إﻟﺤﺎق ـﺎﺌط ـ ﺤ ﺒ أو ـﺎﺌﻲ ـ ﺒ ر اﻟﻛﻬ ـﺎر ـ ﻴ ﺒﺎﻟﺘ ـﻴﻝ ـ ﺼ اﻟﺘو ـﺒس ـ ﻘ ﻤ ـﻰ ـ ﻠ ﻋ اب ر ـ ـ ﺘ اﻟ اﻛم ر ـ ـ ﺘ إذا ـﻪ ـ ﻔ ﺘﻨظﻴ ـب ـ ﺠ ﻓﻴ ـق ـ ﻴ ر اﻟﺤ ـﺘﻌﺎﻝ ـ ﺸ ا ـﻰ ـ ﻟ إ ـؤدي ـ ﻴ ـﺎ ـ ﻤ ﻤ ـردد ـ ﺘ اﻟﻤ ـﺎر ـ ﻴ اﻟﺘ ـدر ـ ﺼ ﻤ ﺒﺄﻤﺎن اﻟﺤﺎﺌط ج ﻤﺨر ﻤن اﻟﻤﻘﺒس وﻀﻊ ذﻟك إﻟﻰ ﺒﺎﻹﻀﺎﻓﺔ وﻴﻨﺒﻐﻲ ﻴﺔ ر دو ﺒﺼﻔﺔ اﻟﺘﻨظﻴف ﺒﻌﻤﻠﻴﺔ اﻟﻘﻴﺎم ﻋﻨد أﻤﻨﻴﺔ اض ر ﻷﻏ اﻟﻤﺘردد اﻟﺘﻴﺎر ﻤﺼدر ﻤن ﺒﺎﺌﻲ ر...

Page 66: ...s subject to the following conditions 1 this device may not cause harmful interference and 2 this device must accept any interference received including interference that may cause undesired operation In compliance with EN 301 489 01 V1 9 2 2011 09 EN 301 489 09 V1 4 1 2007 11 EN 300 422 2 V1 4 1 2015 06 EN 62368 1 2014 CE Declaration of Conformity 2014 53 EU RED 2011 65 EU RoHS Traceability Infor...

Page 67: ...htojen mukainen FR CH France Suisse Par la présente TOA Electronics Europe GmbH déclare que l appareil microphone sans fil récepteur est conforme aux exigences essentielles et aux autres dispositions pertinentes de la directive 2014 53 EU GB Great Britain Hereby TOA Electronics Europe GmbH declares that this wireless microphone receiver is in compliance with the essential requirements and other re...

Page 68: ...68 URL http www toa jp 133 07 00040 00 ...

Reviews: