background image

VCR

REC

PROGRAM

DUBBING

VCR

VCR

HDD

HDD

DVD

DVD

DVD

HDD

DVD

REC

HDD/DVD

ON / STANDBY

I /

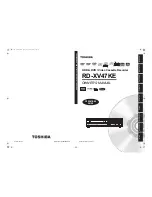
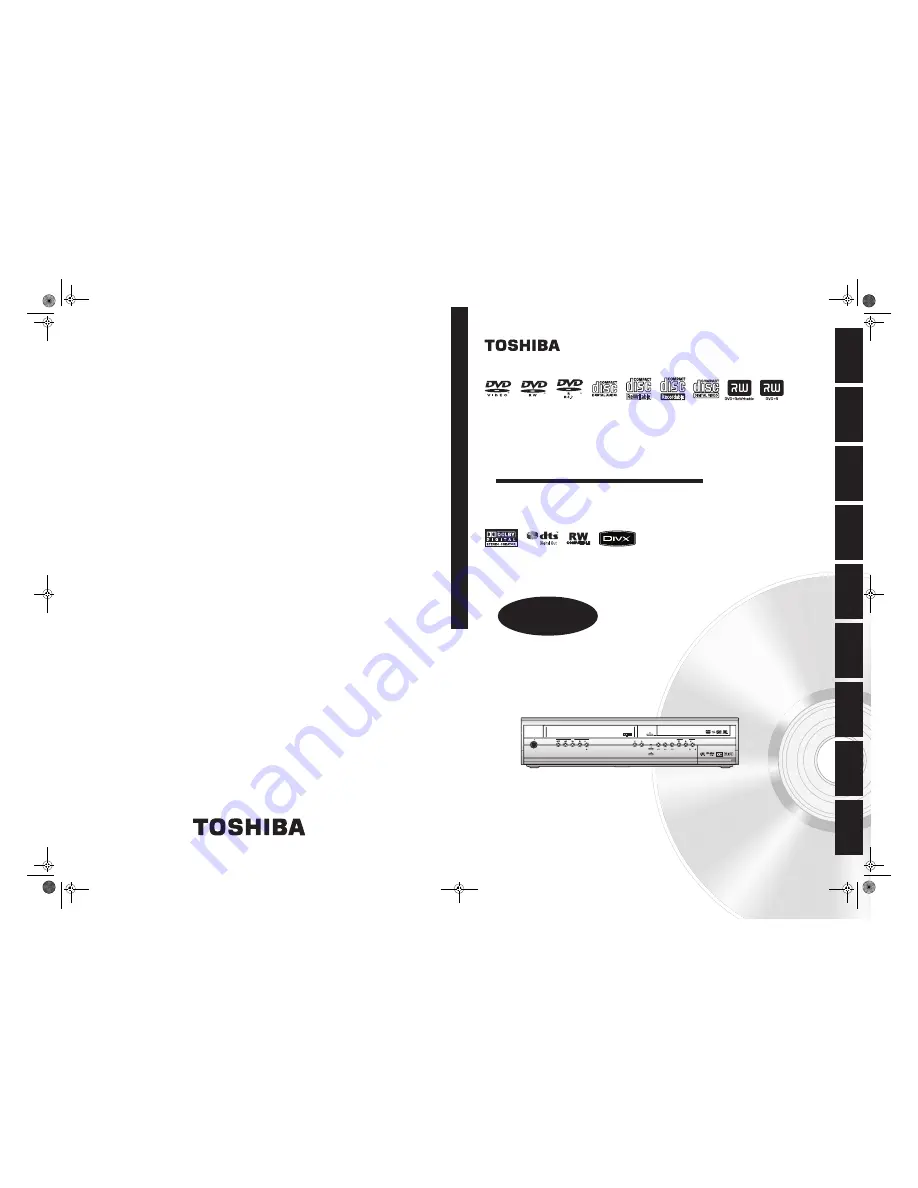
HDD & DVD / Video Cassette Recorder

RD-XV47KE

T

O

SHIBA H

DD 

& DVD

 / 

V

ideo 

Cassette R

ecorder RD-XV47K

E

In

troduc

ti

on

Connecti

o

ns

Ba
si

c Setup

P

la

yb

ack

Ed
it

ing

Others

Fu
nct
ion
 S

e

tup

Recordi

n

g

OPERATIONS

GUIDE

Printed in China

1VMN23421 / E3B90ED 

★★★★

© 2007 Toshiba Corporation

OWNER’S MANUAL

V

C

R Fu

nc
ti

on
s

COV_E3B90ED_EN.fm  Page 1  Friday, February 9, 2007  11:06 AM

Summary of Contents for RD-XV47KE

Page 1: ...rder RD XV47KE TOSHIBA HDD DVD Video Cassette Recorder RD XV47KE Introduction Connections Basic Setup Playback Editing Others Function Setup Recording OPERATIONS GUIDE Printed in China 1VMN23421 E3B90ED 2007 Toshiba Corporation OWNER S MANUAL VCR Functions COV_E3B90ED_EN fm Page 1 Friday February 9 2007 11 06 AM ...

Page 2: ...uid on the unit If liquid is spilled and enters the unit consult qualified service personnel 7 Do not stand the unit vertically Use the unit in a horizontal flat position only 8 This product is in Stand by mode when turned off while the mains cable is connected 9 Do not place any combustible objects on the device candles etc 10 Before moving the unit be sure to remove any discs and unplug the main...

Page 3: ...ion may occur inside the unit when it is moved from a cold place to a warm place after heating a cold room or under conditions of high humidity Do not use the unit for at least 2 hours to allow the inside to dry About Copyright Unauthorised copying broadcasting public performance and lending of discs are prohibited This product incorporates copyright protection technology that is protected by U S ...

Page 4: ...using Dolby Digital Stereo Creator will play back on all DVD Video players Note This is true when the players are compatible with actual recordable DVD discs DTS and DTS Digital Out are registered trademarks of DTS Inc DivX DivX Certified and associated logos are trademarks of DivX Inc and are used under license CHAPTER MARK OPEN CLOSE TIMER PROG INPUT SELECT ABC DEF GHI JKL MNO PROG PQRS TUV WXYZ...

Page 5: ...vents such as benzine thinner commercially available cleaners detergent abrasive cleaning agents or antistatic spray intended for analogue records If this unit still does not perform properly although you refer to the relevant sections and to Troubleshooting in this Owner s Manual the laser optical pickup unit may be dirty Consult your dealer or an Authorised Service Centre for inspection and clea...

Page 6: ...rnal Connection AV3 56 Dubbing from the External Devices 56 Finalising a Disc 57 Setting Disc Protection 58 Playback 60 Information on Playback 60 Basic Playback 61 PBC Function for Video CDs 68 Special Playback 69 Repeat Programme Playback Slide Show 73 Search 74 Selecting the Format of Audio and Video 75 Editing 77 Guide to the Editing on this Unit 77 Adding or Deleting Chapter Marks Manually 78...

Page 7: ...s finalised Automatic Finalise Page 58 You can set the disc to be finalised automatically when the disc space runs out Relay Recording Page 44 When you Timer Record to DVD if the disc runs out of the space or if there is no recordable disc in the unit it automatically changes the recording media to the HDD Dubbing With this unit you can enjoy bi directional dubbing with HDD DVD or VCR Fast Dubbing...

Page 8: ...es It is possible to edit VR mode recorded edited on other unit in case you can undo the finalisation of the disc on this unit Compatibility Playing back discs recorded in Video mode on any regular DVD player Pages 57 58 Discs recorded in Video mode can be played back on regular DVD players including computer DVD drives compatible with DVD Video playback You will need to finalise the discs recorde...

Page 9: ...party with this unit transfer them to the unit and make copies to send to your friends or relatives The discs can be played back on other compatible DVD players DVD RW RW discs which are rewritable can be used as well We cannot guarantee that DVD RW R and DVD RW R discs recorded on this unit will be playable on all DVD recorders players Similarly there is no guarantee that all DVD RW R and DVD RW ...

Page 10: ...4 3 4 in Version 1 1 and 2 0 or Toshiba is not liable for any damage or loss caused directly or indirectly by the malfunction of this unit including without limitation any one of the following Failure to record contents intended to be recorded by the consumer Failure to edit contents as intended by the consumer When a DVD RW R disc and DVD RW R disc created on this unit is used e g insertion playb...

Page 11: ...x On DVD R DVD RW Discs DVD R 1x 16x and DVD RW 1x 4x discs can be used in this unit We strongly recommend for good recording quality TDK DVD R 4x 8x 16x SONY DVD R 4x 8x 16x MAXELL DVD R 4x 8x 16x SONY DVD RW 4x Discs that have been tested and are proven to be compatible with this unit VERBATIM DVD R 8x VERBATIM DVD RW 4x Although DVD RW R discs are playable on other units without finalisation in...

Page 12: ... into several chapters by marking borders in it to facilitate scene search On Handling Discs Do not touch the playback side of the disc Do not stick paper or tape to discs On Cleaning Discs Fingerprints and dust on the disc cause picture and sound deterioration Wipe the disc from the centre outwards with a soft cloth Always keep the disc clean Do not use any type of solvent such as thinners benzin...

Page 13: ...me Yes Yes Yes Erasing recorded contents Yes Yes Yes Undo the finalisation of the disc first to delete the contents Undo the finalisation of the disc first to delete the contents Deleting contents cannot restore the disc space After you execute Video mode finalising process on a recorded disc you cannot delete contents of the disc Indexing recorded contents Yes Yes Yes Naming a title Yes Yes Yes C...

Page 14: ...nts Deleting contents cannot restore the disc space After you execute VR mode finalising process on a recorded disc you cannot delete contents of the disc Indexing recorded contents Yes Yes Naming a title Yes Yes Collecting favourite scenes Playlist Editing No No Making a new title from a Playlist containing favourite scenes Copy within the same disc No No Playing contents recorded on this unit on...

Page 15: ...DVD RW discs in VR mode Available to DVD R discs in Video mode Available to DVD RW discs in VR mode Available to DVD R discs in VR mode Available to Audio CDs Available to Video CDs Available to CD RW R discs with MP3 files Available to CD RW R discs with JPEG files Available to DVD RW R DVD RW R and CD RW R discs with DivX files Available to VHS tapes Use only cassettes marked VHS HDD HDD DVD V D...

Page 16: ...BING VCR DVD button Press to start One Touch Dubbing from VCR to DVD 19 PROGRAM buttons HDD DVD Press to change the channel up or down VCR Press to change the channel up or down Press to adjust the tracking during playback or in slow motion of the tape While playback is in still mode you can adjust the vertically blurred picture 20 Front Panel Display Shows information and messages Refer to Front ...

Page 17: ...TV Use a commercially available Audio cable 6 S VIDEO OUT jack HDD DVD Connect to the S Video input jack on your TV Use a commercially available S Video cable 7 COMPONENT VIDEO OUT jacks HDD DVD Connect to an optional component video cable through the component video input jacks of a TV 8 ANTENNA IN HDD DVD VCR Connect to an antenna cable 9 ANTENNA OUT HDD DVD VCR Connect to the Aerial jack on you...

Page 18: ...oint has been set the playback will start from the resume point 12 ADJUST button HDD DVD During playback press to play backward by one frame at a time 13 PAUSE p button Press to pause playback or recording 14 REC MODE button Press to select the Rec Mode 15 REPEAT button HDD DVD Press to play back the chapter title group disc and track repeatedly 16 SEARCH button HDD DVD Press to call up the chapte...

Page 19: ...ress to play back in fast forward In still mode press to view the videotape in slow motion During playback in slow motion press to increase the speed in slow motion Press to fast forward the videotape in stop mode 32 STOP S button Press to stop playback or recording 33 ADJUST button HDD DVD During playback press to advance one frame at a time 34 VCR button Press to activate the VCR See page 20 35 ...

Page 20: ...t located close to the unit Replace the batteries when the operating range of the remote control reduces HDD DVD VCR Modes Switching Because this unit is a combination of a VCR a HDD and a DVD recorder you must select first which component you wish to operate Press HDD on the remote control Verify that the HDD indicator is lit Press DVD on the remote control Verify that the DVD indicator is lit Pr...

Page 21: ...ENTER These menus provide entries to all main functions of the unit 1 Disc Management To set up the disc to manage 2 Editing To edit a recorded disc or HDD 3 Dubbing To dub a content among HDD DVD and VCR 4 Timer Programme To programme a Timer Recording 5 Title List To select the title list 6 Initial Setting To make the settings of the basic items 7 Digital Audio Setting To select the digital audi...

Page 22: ...ppears when an Audio CD or a disc with MP3 JPEG DivX files is on the disc tray R Appears when a DVD R disc or a DVD R disc is loaded on the disc tray RW Appears when a DVD RW disc or a DVD RW disc is loaded on the disc tray 6 Displays the following Played back time Current title chapter track number Recording time Clock Channel number VCR tape counter Remaining time for a One touch Timer Recording...

Page 23: ...canning 625p 525p connect the TV to the COMPONENT VIDEO OUT jacks of the unit and set Video Out setting to Component Progressive in the setup menu see page 92 Next set your TV to the progressive scan mode If your TV is not compatible with progressive scan set Video Out setting to Component Interlace Use a commercially available adaptor if the Video input jacks of your TVs or monitors are the BNC t...

Page 24: ...ear digital sound quality use the DIGITAL AUDIO OUT COAXIAL jack to connect your digital audio equipment If the audio format of the digital output does not match the capabilities of your receiver the receiver will produce a strong distorted sound or no sound at all Note for a TV with no S Video input jack or Scart socket This unit has no RF modulator so this type of TV cannot be used Only componen...

Page 25: ...d in Dolby Digital Multi channel surround format cannot be recorded using an MD or DAT deck as a digital sound If not connected to a Dolby Digital decoder set Dolby Digital to PCM in Digital Audio Setting see page 93 Playing back a DVD using incorrect settings may generate noise distortion and damage speakers Set Dolby Digital and MPEG to PCM and set DTS to Off in Digital Audio Setting see pages 9...

Page 26: ...ge for the on screen displays and the menus Channel Setting on page 27 to setup the channels and Setting the Clock on page 30 to set the clock If you press PLAY P at this point English will be selected automatically and step 3 can be skipped 3 Select the desired setting using Cursor U D then press ENTER 4 Press ENTER to start Auto Channel Tuning If you like to skip this step press RETURN 5 Use Cur...

Page 27: ...annel Setting using Cursor U D then press ENTER 4 Select Auto Tuning using Cursor U D then press ENTER The unit will start storing channels available in your area Setup Menu 01 01 07 Mon 19 34 Disc Management Editing Dubbing Timer Programme Title List Initial Setting Digital Audio Setting Playback Recording Display 01 01 07 Mon 19 34 Initial Setting Clock Setting Channel Setting TV Aspect Select V...

Page 28: ...on numbers 01 to 99 You can jump to the next or the previous page using SKIP F or SKIP B 6 Press Cursor U D to start searching for the available channel Search direction can be switched by pressing Cursor U D If you already know the channel number you can directly enter the channel number using the Number buttons Refer to the following Channel Plan table and press the three digits to select the ch...

Page 29: ...ter 2 seconds You can only select channels 1 to 99 About an external input You can select the external input mode AV1 AV2 or AV3 using INPUT SELECT or PROG You cannot change the channel when either HDD DVD or VCR is in any recording mode normal recording One touch Timer Recording or Timer Recording Move You can replace two channels 1 Press SETUP in stop mode Setup Menu will appear 2 Select Initial...

Page 30: ... press ENTER 3 Select Clock Setting using Cursor U D then press ENTER 4 Select Auto Clock Setting using Cursor U D then press ENTER 01 01 07 Mon 19 34 Move Pos Channel Decoder Skip Station P02 45 P03 63 P04 80 P05 88 P06 95 P01 21 P08 2 P07 110 Off Off Off Off Off On Off Off Off Off Off Off Off Off On Off ARD Setup Menu Disc Management Editing Dubbing Timer Programme Title List Initial Setting Dig...

Page 31: ...ormed the unit will correct the current time by receiving PDC broadcasts whenever the unit is in standby mode The unit will correct the current time automatically at 8 00 if the unit is in standby mode From 23 00 to 1 00 the Auto Clock function will not operate even if the unit is in standby mode Manual Clock Setting 1 Follow the steps 1 to 3 in Auto Clock Setting on page 30 2 Select Clock Setting...

Page 32: ...NTER The selected setting will be checked and activated The default setting is 4 3 Letter Box 5 Press SETUP to exit Mode Audio output Display on the TV screen Main Main audio from both speakers Main Sub Sub audio from both speakers Sub Main Sub Main audio from the left speaker Sub audio from the right speaker Main Sub Setup Menu 01 01 07 Mon 19 34 Disc Management Editing Dubbing Timer Programme Ti...

Page 33: ...If you have 16 9 TV and select this setting the aspect ratio of the image will be distorted and parts of the image will be cropped 7 This setting is for 4 3 TV If you have 16 9 TV and select this setting black bars will appear on the top and bottom of the screen and the image will be squeezed vertically 8 The image will be squeezed horizontally to fit the 4 3 TV screen 9 The aspect ratio of the im...

Page 34: ...deo Recording mode is a basic recording format for DVD RW discs You can record and edit material repeatedly It is impossible to record additional materials on a disc formatted in VR mode and already recorded in another video system other than PAL such as NTSC VR mode is a recording format for DVD RW R You can play back in this format on most of the DVD player Recording You want to HDD DVD RW VR DV...

Page 35: ...REC MODE repeatedly to change the Rec Mode The speed will be changed each time you press it with the following order SLP mode is not available for VR mode discs If DVD RW R were used for the Timer Programming with SLP mode the Rec Mode will change to EP mode The recording time is an estimate and actual recording time may differ Audio and video quality of the content being recorded may degrade if t...

Page 36: ...mbling copy protection system for the protection of copy once broadcast programmes This unit is CPRM compatible which means that you can record copy once broadcast programmes but you cannot make a copy of those recordings CPRM recordings can only be played back on DVD players that are specifically compatible with CPRM Maximum recordable numbers of title chapters HDD 600 titles per each Playlist an...

Page 37: ...D If there is mechanical trouble with the HDD grinding or other sounds may be heard or blocky noise may appear on the image If you continue to use as it is deterioration may continue and eventually the HDD may not be used at all If you notice these symptoms of a failing HDD promptly dub the data to a DVD disc or a videotape When an HDD fails recovery of recorded content data may be impossible Abou...

Page 38: ... default setting is VR Mode 5 Select Yes using Cursor L P then press ENTER Formatting will start Example VR Format The screen returns to normal after formatting is completed This operation may take awhile to be completed Note When you reformat the DVD RW RW disc all contents of the disc will be erased A disc once formatted with this unit cannot be used on other DVD recorders unless finalised Depen...

Page 39: ...Audio Setting Playback Playback Recording Recording Display Display DVD Disc Control 01 01 07 Mon 19 34 Disc Management DVD Format HDD Initialise DVD Disc Control 01 01 07 Mon 19 34 Disc Management DVD Format HDD Initialise All Erase Part Erase DVD Disc Control 01 01 07 Mon 19 34 Disc Management DVD Format HDD Initialise All Erase Part Erase Delete the contents of the HDD Protected titles will als...

Page 40: ...a VR mode disc both Main and Sub will be recorded regardless of your setting here And when you play back you can choose either audio format or a combination of both as your playback audio If you are recording the bilingual programme onto the HDD with Fast Dubbing Audio Video Mode set to On the recording will be made in whichever the audio format type you choose here Make sure to set the audio form...

Page 41: ...on It changes analogue sound to digital sound without compressing audio data When the recording mode is set at other than XP the unit records Dolby Digital audio automatically even if you selected LPCM With HDD or VR mode DVD RW discs you cannot record both main and sub audio together when LPCM is selected Instead whichever the type of audio selected in Bilingual Recording Audio will be recorded S...

Page 42: ...layback by pressing HDD DVD or VCR button during HDD DVD VCR recording And then follow the normal playback procedure One touch Timer Recording OTR This is a simple way to start a Timer Recording You can start recording right away by just one touch of a button and each press of the button sets the end time for the recording The recording time will increase by 15 minute to the max of 4 hours If you ...

Page 43: ...time you set Insert a recordable disc if you are recording to a DVD Use only the HDD or CPRM compatible VR mode DVD RW discs for recording copy once programmes See page 36 1 Press TIMER PROG Timer Programme List will appear You can access this screen from the Setup Menu also 2 Select a line which is not yet set using Cursor U D then press ENTER 1 Available recording time left on the recording medi...

Page 44: ...lay Recording When you Timer Record to DVD the unit automatically changes the recording media to HDD under the conditions listed below when there is no recordable disc in the unit when the disc does not have enough space for the recording if the unit is formatting or finalising a disc This feature is available only for Timer Recording but not for OTR Note If you have not set the clock the clock se...

Page 45: ...00 on the next day If the starting time of the VPS PDC Timer Recording is between 4 00 and 23 59 on a given day the VPS PDC function will operate from 0 00 on the given day to 4 00 on the next day This means that if the relevant programme is broadcasted within this period it is recorded correctly If the timer is not programmed correctly the incorrect timer setting stays in effect unless you cancel...

Page 46: ...tting is Stereo 5 Press SETUP to exit Hint If you try to record bilingual audio onto a Video mode DVD RW R and VR mode DVD RW R disc and when Bilingual is selected only either one of main or sub audio will be recorded See Setting Bilingual Recording Audio on page 40 for more detail When recording the bilingual audio from the external equipment make sure to select Bilingual If you select Stereo a m...

Page 47: ...de unless you cancel the Satellite Link function To cancel the Satellite Link function while in the Satellite Link standby mode Press ON STANDBY or SATELLITE LINK to turn on the unit To cancel the Satellite Link function while the Satellite Link Recording is in progress Press STOP S Note You cannot set the Start End time for the Satellite Link Timer Recording on this unit The Satellite Link will n...

Page 48: ...iginal List and Playlist finish up the dubbing of one list first and then make dubbing of the other list NTSC dubbing is prohibited in this unit During Fast Dubbing of copy once programmes the following operations are not available Playback of the titles in HDD When any Rec Mode other than Fast is selected you only can watch the playback image of the title being dubbed the audio cannot be changed ...

Page 49: ... Copy once programmes which are copied from the HDD DVD to a videotape cannot be dubbed further from the videotape to the HDD DVD Be noted that with videotape to DVD dubbing the unit recognise DVD s remaining time as the dubbing duration although the actual dubbing will end when the videotape ends 1 There are three ways to start One Touch Dubbing Method 1 Videotape to DVD Play the contents of vide...

Page 50: ...ng Videotape to DVD dubbing When dubbing starts the video image may be distorted because of the Digital Tracking function This is not a malfunction Play the videotape until the image clears up and then start the dubbing Playback audio is determined by the setting you make in Selecting the Sound Mode section on page 102 Dubbing takes as much time as the playback does You cannot switch the device mo...

Page 51: ... of the Dubbing Titles is highlighted select Add to Title using Cursor U D then press ENTER To switch Original and Playlist press MODE before you press ENTER If you have registered any dubbing before they will be listed in the Dubbing Title List Contents in the Dubbing Title List will be deleted when you select the different dubbing direction To sort the titles 1 Press ENTER anywhere in the Title ...

Page 52: ...ng on the dubbing direction or the recording format type the available Rec Mode will vary 9 Select Yes using Cursor L P then press ENTER Dubbing will start It may take awhile to prepare for the dubbing To stop the dubbing in progress Press DUBBING for 4 seconds Note You cannot change the device mode between VCR and HDD DVD during the HDD DVD to VCR dubbing If you want to watch the duplicated mater...

Page 53: ...you have registered any dubbing before they will be listed in the Dubbing Title List To sort the titles 1 Press ENTER anywhere in the Title List 2 Select Title Sorting 3 Select the desired sort type and press ENTER 5 Select a desired title using Cursor U D then press ENTER 6 Select Register using Cursor U D then press ENTER Example HDD Original The selected title is added to the Dubbing Title List...

Page 54: ...Auto is selected Just Dubbing Basically the Rec Mode is set to Fast but it will be changed automatically under the conditions listed below HDD to DVD dubbing the Rec Mode will automatically be adjusted so the titles will fit nicely in the remaining space of the disc when there is not enough space in the disc DVD to HDD dubbing the Rec Mode will automatically be adjusted for the titles to fit a 4 7...

Page 55: ...ar 3 For HDD dubbing Select VCR HDD Dubbing using Cursor U D then press ENTER For DVD dubbing Select VCR DVD Dubbing using Cursor U D then press ENTER Example VCR HDD 4 Select a desired Rec Mode using Cursor L P then press ENTER Confirmation window will appear 5 Select Yes using Cursor L P then press ENTER Dubbing will start When the dubbing is completed completion message will be displayed on the...

Page 56: ...G If you are using the jacks on the front set the channel to AV3 If you are using the jacks on the rear set the channel to AV1 and AV2 4 Select a Rec Mode by pressing REC MODE Refer to Rec Mode on page 35 for HDD DVD or page 100 for VCR 5 Press I REC of the dubbing device on this unit to start dubbing 6 Press the PLAY button on the external device to dub from 7 For HDD or DVD Press STOP S to stop ...

Page 57: ...s ENTER 5 Select Yes using Cursor L P then press ENTER If the disc has already been finalised Undo Finalise will be listed in the menu instead of Finalise DVD RW and DVD RW To Undo the finalisation of the disc select Undo Finalise and press ENTER Finalising will start This operation may take awhile to be completed Note You cannot cancel finalising the disc once it has started After the finalisatio...

Page 58: ...he menu instead of Disc Protect DVD RW DVD RW VR DVD RW DVD RW Video DVD R DVD R D DVD R VD RW W DVD RW D DVD R VD R DVD R Setup Menu 01 01 07 Mon 19 34 Disc Management Editing Editing Dubbing Dubbing Timer Programme Timer Programme Title List Title List Initial Setting Initial Setting Digital Audio Setting Digital Audio Setting Playback Playback Recording Recording Display Display HDD Initialise ...

Page 59: ...ed The default setting is No 6 Press SETUP to exit Note Disc Protect is available for VR mode DVD RW discs and VR mode DVD RW R discs HDD Initialise DVD Format 01 01 07 Mon 19 34 Disc Management Finalise DVD Disc Control Auto Finalise Disc Protect Protect the disc OK to proceed Protect the disc OK to proceed No Yes E3B90ED_EN book Page 59 Friday February 23 2007 12 38 PM ...

Page 60: ...SC Region Codes This unit has been designed to play back DVDs for Region Two 2 It is only possible to play back DVDs in this unit that are labelled for Region 2 or for ALL regions You cannot play back DVDs that are labelled for other regions Look for DVDs that bear either of the symbols shown below If these region symbols do not appear on your DVD you cannot play back the DVD in this unit The numb...

Page 61: ...P S to pause or stop the operation Playback from the Title List Menu Not available for the DVD Videos the finalised Video mode DVDs or the Video mode discs made on other unit If you are playing the HDD press HDD first If you are playing a disc press DVD first 1 Follow steps 1 to 4 in Direct Playback on the left If you are playing the HDD follow step 2 2 Press TOP MENU Title List Menu will appear P...

Page 62: ...no longer available Follow the steps below to play back a disc using the DVD Menu Press DVD first 1 Insert a disc DVD Menu may appear automatically Otherwise press TOP MENU to call up the DVD Menu Example DVD R 2 Select a desired title using Cursor U D L P then press PLAY P or ENTER Playback will start Select or to jump to the next previous Title List page Select then press ENTER to exit If you ca...

Page 63: ...te MP3 files cannot be recorded as digital sound using an MD or DAT deck Files with extensions other than mp3 MP3 will not be listed in the File List Some folders or files listed in the File List may be unplayable due to their recording status The File List displays only up to 8 folder and file names Playing Back a JPEG Press DVD first 1 Press TOP MENU to call up the JPEG List after a disc is inse...

Page 64: ...vX VOD services Refer to DivX VOD on page 66 Some DivX VOD files are restricted with the limited playable times you cannot play them back beyond the limit If your DivX VOD file has such limit confirmation window will appear Use Cursor L P to select Yes if you want to play back the file or to select No if you do not wish to play it back Then press ENTER You cannot play back the DivX VOD files of wh...

Page 65: ...tration codes on this unit Press TOP MENU and select other files that can be played back DivX Subtitle The subtitle created by the user can be displayed during DivX playback 1 After the DivX file is selected the Subtitle List will appear 2 Select the desired setting using Cursor U D then press ENTER DivX with the subtitle starts playback The subtitle will not be displayed when the setting is Off I...

Page 66: ...valid for one DivX VOD file You must first download the file from the Internet and play it back on this unit before you are able to get another code You must follow this step every time you purchase or rent a DivX VOD file from the Internet For more information for DivX please visit http www divx com vod Setup Menu 01 01 07 Mon 19 34 Disc Management Editing Dubbing Timer Programme Title List Initi...

Page 67: ...uttons Selects a numbered menu option available on certain discs 3 Press DISC MENU to exit the disc menu Depending on discs pressing DISC MENU may not exit the disc menu Note Menus vary among discs Refer to the information accompanying the disc for details Playing Back Discs Using the Title Menu Some DVDs have a title menu which lists the titles available on the DVD You can start playing back such...

Page 68: ...ng and Recalling the PBC Function Insert a Video CD 1 Press SETUP in stop mode Setup Menu will appear 2 Select Playback using Cursor U D then press ENTER 3 Select CD Playback Mode using Cursor U D then press ENTER 4 Select PBC using Cursor U D then press ENTER 5 Select Off using Cursor U D then press ENTER 6 Press SETUP to exit To recall the PBC function select On at step 5 above Note The default ...

Page 69: ...ng of the track last played Press STOP S twice at step 1 if you do not want to set a resume point In this case next time you press PLAY P the playback will start from the beginning of the disc To cancel the resume playback and start playing back the disc from the beginning Press STOP S while playback is stopped Note For Video CDs if you turn PBC on using the setting menu the resume function is can...

Page 70: ...mal playback press PLAY P Note For some DivX files Slow forward may not function Only slow forward is available when playing back Video CDs and discs with DivX files Time Shift Playback You can play back a title being recorded from the beginning while recording continues Press HDD first 1 Press PLAY P during recording Playback of the title you are recording will start from the beginning Elapsed pl...

Page 71: ...e current recording point SLP mode 105 seconds before the current recording point Simultaneous Playback and Recording You can play back a title on HDD while making a recording on the same device To do so press TOP MENU during recording and select a title you like to play and then press ENTER Press Cursor U D to select Play on the option window and then press ENTER To play back a title being record...

Page 72: ...a is displayed 4 While the picture is enlarged press Cursor U D L P to move the zoomed image up down left or right The grey box with an inner orange box that shows during Zoomed Playback is the position guide The position of the orange box inside the grey box indicates the position of the zoomed image within the overall picture The position guide disappears about after 3 seconds if there is no inp...

Page 73: ...layback does not work while PBC function is on Programme Playback You can programme the disc to play back in your desired order 1 Press SETUP in stop mode Setup Menu will appear 2 Select Playback using Cursor U D then press ENTER 3 Select CD Playback Mode using Cursor U D then press ENTER 4 Select Programme Play using Cursor U D then press ENTER 5 Select the desired track using Cursor U D then pre...

Page 74: ...ip to the next title except HDD or chapter track during playback To go back to the previous title except HDD or chapter track press SKIP B twice in quick successions Using the SEARCH button By using the SEARCH button you can select following search options 1 Select a type of search by pressing SEARCH Every time you press SEARCH type of search changes 2 Enter the desired chapter track title number ...

Page 75: ...ring DVD playback press AUDIO repeatedly to select one of the available languages Audio display appears at the left top of the TV screen and the new audio will be heard The display will disappear after about 5 seconds Note With some discs it is only possible to change the soundtrack from the disc menu Press DISC MENU to display the disc menu When playing back Audio CDs Video CDs or MP3 files you c...

Page 76: ...2 using Cursor U D then press ENTER Off no effect Type 1 Natural effect Type 2 Emphasised effect Note Select Virtual Surround to Off if the sound is distorted The setting will be kept even when the unit is turned off User Setup options default Brightness to adjust brightness 0 dark 10 bright 0 Contrast to adjust contrast 5 weak 5 strong 0 Colour to adjust colour 5 pale 5 brilliant 0 Sharpness to a...

Page 77: ...d edited on other unit in case you can undo the finalisation of the disc on this unit Editing 01 01 07 Mon 19 34 Editing PlaylistEditing PlaylistEditing Original Playlist HDD Playlist New HDD Playlist New HDD PL Scene Delete HDD PL Scene Delete HDD PL Title Combine HDD PL Title Combine HDD PL Title Divide DVD PL New DVD PL Scene Delete DVD PL Title Combine DVD PL Title Divide HDD PL New 2 1 HDD HD...

Page 78: ...arks become edit marks once they are dubbed to the HDD Adding or Deleting Chapter Marks Manually You can add or delete chapter marks After a title is marked with chapters you can use the chapter search feature You can set a chapter mark anywhere you want You can add up to 999 chapter marks per title for DVD RW 99 chapter marks per title for DVD RW R and 99 chapter marks per title for HDD To add th...

Page 79: ... HDD PL New or DVD PL New using Cursor U D then press ENTER Chapter Mark Delete HDD HDD HDD Playlist DVD RW DVD RW DVD RW VR Playlist Setup Menu 01 01 07 Mon 19 34 Disc Management Editing Editing Dubbing Dubbing Timer Programme Timer Programme Title List Title List Initial Setting Initial Setting Digital Audio Setting Digital Audio Setting Playback Playback Recording Recording Display Display 01 0...

Page 80: ...tle Name 3 11 04 07 Wed Title Name 4 11 04 07 Wed P01 12 22 1 04 40 XP 11 04 07 Wed P01 12 22 1 04 40 XP New New HDD Remain 72h00m SP 001 016 HDD PL New Title Name Recording Date P01 11 19 0 00 06 SP 11 04 07 Wed P01 11 22 0 14 13 XP 10 04 07 Tue P02 09 19 0 22 40 SP 09 04 07 Mon Title Name 1 11 04 07 Wed Title Name 2 11 04 07 Wed Title Name 3 11 04 07 Wed Title Name 4 11 04 07 Wed P01 12 22 1 04 ...

Page 81: ... then press ENTER The first will be marked HDD HDD HDD Original HDD HDD HDD Playlist DVD RW DVD RW DVD RW VR Original DVD RW DVD RW DVD RW VR Playlist DVD RW DVD RW Video DVD R DVD R D DVD R VD RW W DVD RW D DVD R VD R DVD R HDD HDD Remain 72h00m SP Page 1 4 Remain 76 13 SP 001 016 Title Name Recording Date P01 11 19 0 00 06 SP 11 04 07 Wed P01 11 22 0 14 13 XP 10 04 07 Tue P02 09 19 0 22 40 SP 09...

Page 82: ...NTER HDD HDD Remain 72h00m SP Page 1 4 Remain 76 13 SP 002 016 Title Name Recording Date P01 11 19 0 00 06 SP 11 04 07 Wed P01 11 22 0 14 13 XP 10 04 07 Tue P02 09 19 0 22 40 SP 09 04 07 Mon P01 12 22 1 04 40 XP 11 04 07 Wed Title Name 1 11 04 07 Wed Title Name 2 11 04 07 Wed Title Name 3 11 04 07 Wed Title Name 4 11 04 07 Wed P01 12 22 1 04 40 XP New New HDD HDD Remain 72h00m SP Page 1 4 Remain 7...

Page 83: ...EPLAY VARIABLE SKIP PAUSE p or STOP S which is substitute for PAUSE p to find the end point easily 01 01 07 Mon 19 34 Editing PlaylistEditing PlaylistEditing Original Playlist HDD PL Scene Delete HDD PL Title Combine HDD PL Title Combine HDD PL Title Divide DVD PL New DVD PL Scene Delete DVD PL Title Combine DVD PL Title Divide HDD PL New HDD Remain 72h00m SP 001 016 HDD PL Scene Delete P01 11 19 ...

Page 84: ...ill be highlighted HDD PL Scene Delete 01 01 07 Mon 12 22 1 1 1 04 40 T C P01 12 22 1 04 40 XP End 0 35 00 Start 0 31 00 Duration after editing 1 04 36 total time after deleting chapter mark seam after deleting deleted scene start point HDD PL Scene Delete 01 01 07 Mon 12 22 1 1 1 04 40 T C P01 12 22 1 04 40 XP Start 0 31 00 End 0 35 00 Select more Delete Duration after editing 1 00 40 HDD PL Scen...

Page 85: ...nstead of Protect To cancel the protection select Undo Protect and press ENTER The protect icon will disappear 4 Press RETURN or SETUP twice to exit To protect the VR mode DVD RW and DVD RW discs themselves refer to Setting Disc Protection on page 58 HDD HDD Remain 72h00m SP Page 1 4 Remain 76 13 SP 001 016 Title Name Recording Date P01 11 19 0 00 06 SP 11 04 07 Wed P02 09 19 0 22 40 SP 09 04 07 M...

Page 86: ...VD PL New DVD PL Scene Delete DVD PL Title Combine DVD PL Title Divide HDD PL New HDD Remain 72h00m SP 001 016 HDD PL Title Combine Playlist Creation Date 1 04 40 P01 11 19 0 00 06 SP 11 04 07 Wed P01 11 22 0 14 13 XP 10 04 07 Tue P02 09 19 0 22 40 SP 09 04 07 Mon Title Name 1 11 04 07 Wed Title Name 2 11 04 07 Wed Title Name 3 11 04 07 Wed Title Name 4 11 04 07 Wed P01 12 22 1 04 40 XP 11 04 07 W...

Page 87: ...TUP in stop mode Setup Menu will appear 2 Select Editing using Cursor U D then press ENTER 3 Select Playlist or Original using Cursor U D then press ENTER 4 Select HDD PL Title Divide or DVD PL Title Divide using Cursor U D then press ENTER Example Playlist HDD HDD HDD Original HDD HDD HDD Playlist DVD RW DVD RW DVD RW VR Playlist Setup Menu 01 01 07 Mon 19 34 Disc Management Editing Editing Dubbi...

Page 88: ...nnot divide the titles if the total number of chapters has already reached 999 HDD Remain 72h00m SP 001 016 HDD PL Title Divide Playlist Creation Date P01 11 19 0 00 06 SP 11 04 07 Wed P01 11 22 0 14 13 XP 10 04 07 Tue P02 09 19 0 22 40 SP 09 04 07 Mon Title Name 1 11 04 07 Wed Title Name 2 11 04 07 Wed Title Name 3 11 04 07 Wed Title Name 4 11 04 07 Wed P01 12 22 1 04 40 XP 11 04 07 Wed P01 12 22...

Page 89: ...y Move Page 29 Move the channel to different position TV Aspect Page 32 4 3 Pan Scan 16 9 Wide 16 9 Shrink Set a picture size according to aspect ratio of your TV Select Video Page 56 S Video In Set the video input type for the external input Video Out Page 92 Component Progressive Component Interlace Sets the video output signal to be fixed accordingly to your TV set Digital Audio Setting Down Sa...

Page 90: ...Set the TV system V Replay Skip Speed Page 97 Variable Skip 15 seconds 1 minute Set the amount of skip time when you press VARIABLE SKIP Variable Replay 30 seconds 1 minute Set the amount of rewind time when you press VARIABLE REPLAY CD Playback Mode Pages 73 74 Programme Play Set the disc to play back in your desired order Slide Show 10 seconds Set the display time PBC Off Enable you to play back...

Page 91: ...bbing Audio Video Mode Page 98 On Set the HDD bilingual recording audio for fast dubbing External Input Audio Page 46 Bilingual Set the external input audio type for recording Recording Audio Select XP Page 41 LPCM Set the recording audio type Only when the Rec Mode is set to XP Initialise Page 97 Initialise Yes Return the initial settings to the factory default Display FL Dimmer Page 99 Bright Da...

Page 92: ...th progressive scanning select Component Progressive Component Interlace If your TV has component jacks select Component Interlace 5 When you finish with the setting press SETUP to exit Setup Menu 01 01 07 Mon 19 34 Disc Management Editing Dubbing Timer Programme Title List Initial Setting Digital Audio Setting Playback Recording Display 01 01 07 Mon 19 34 Initial Setting Clock Setting Channel Set...

Page 93: ...ted setting will be checked and activated Bit Stream Outputs Dolby Digital signals If your amplifier decoder is compatible with Dolby Digital set to Bit Stream PCM Converts the Dolby Digital into PCM 2 channel If your amplifier decoder is NOT compatible with Dolby Digital set to PCM Hint When playing back the HDD or a DVD RW disc recorded in VR mode If the audio source on a disc is in Dolby Digita...

Page 94: ...1 Press SETUP in stop mode Setup Menu will appear 2 Select Playback using Cursor U D then press ENTER 3 Select a desired item using Cursor U D then press ENTER 4 Refer to 1 to 10 on pages 94 to 97 and set the selected item 5 When you finish with the setting press SETUP to exit 1 Audio Language Default Original Set the Audio language Follow steps 1 to 2 above Select Language using Cursor U D then p...

Page 95: ...fault English Set the Disc Menu language Follow steps 1 to 2 on page 94 Select Language using Cursor U D then press ENTER Language Menu will appear Select Disc Menu Language using Cursor U D then press ENTER Select the desired language using Cursor U D then press ENTER The selected setting will be checked and activated 4 DivX Subtitle Default Off You can set the DivX Subtitle language Follow steps...

Page 96: ... during entering the password After that the numbers will change to When the password has been set already the password will be displayed as for your security If the password you have entered is wrong the error message will appear Press ENTER and enter the correct 4 digit password again 2 Select a desired level using Cursor U D then press ENTER Rating Explanation All Parental Controls is inactive ...

Page 97: ...em TV Discs recorded with the PAL system cannot be viewed on an NTSC system TV With discs recorded using the NTSC system an NTSC signal is output for viewing on an NTSC or Multi system TV With discs recorded using the NTSC system select PAL to view on a PAL system TV 9 V Replay Skip Speed Assign the VARIABLE REPLAY or VARIABLE SKIP button to rewind or skip by a certain amount of time Follow steps ...

Page 98: ...HDD to DVD Video Mode Follow steps 1 to 2 on the left Select Fast Dubbing Audio Video Mode using Cursor U D then press ENTER Option window will appear Select the desired setting using Cursor U D then press ENTER The selected setting will be checked and activated 3 Initialise Default No Initialise the setting in Recording Follow steps 1 to 2 on the left Select Initialise using Cursor U D then press...

Page 99: ...cked and activated On Shows the operating display Off Does not show the operating display 3 Background Colour Default On Set the background colour When there is no signal for the picture signal input the screen changes to blue background Follow steps 1 to 2 on the left Select Background Colour using Cursor U D then press ENTER Option window will appear Select the desired setting using Cursor U D t...

Page 100: ...E p After the unit has been in pause mode for 5 minutes it will stop automatically to protect the tape and the video head from damage 4 Press STOP S when the recording is completed Accidental erasure prevention To prevent accidental recording on a recorded cassette remove its record tab To record on it later cover the hole with cellophane tape Note Although you can playback a videotape recorded in...

Page 101: ...annel is the same the Timer Recording will start without cancelling the VCR recording and the recording will be made on both VCR and the HDD DVD Search Index Search An index mark will be assigned at the beginning of each recording you make You may skip to a specific marked point by following the steps below 1 Press VCR 2 Press SEARCH to display the index search menu 3 Enter the number of recording...

Page 102: ...ess MODE Each time you press MODE the colour system will change as follows Note If the playback picture on the TV screen is black and white change the video colour system manually When you change the video colour system manually be sure to change it before recording If you select the wrong video colour system for recording the colour of the picture may be deteriorated Hi Fi Stereo Sound System Thi...

Page 103: ...sc Copy once programmes can only be moved to a CPRM compatible disc Use a CPRM compatible disc Could not perform the dubbing There may be insufficient space in the HDD because the Fast Dubbing from DVD to HDD and the HDD recording are proceeding simultaneously Check the dubbing title or the recording media The operation is currently unavailable You are not allowed to edit a Timer Programme during ...

Page 104: ...er of Edit Marks or chapters has been exceeded You are trying to dub when total chapter or Edit Mark number in the DVD is already at its limit Delete unnecessary chapters in the DVD See page 78 Edit Marks cannot be deleted Insufficient disc space The space in the recording media is not enough Make sufficient space in the recording media Error message for HDD DVD Possible Cause Solution E3B90ED_EN ...

Page 105: ...nged Check if the connections are made securely and correctly Check if the cables are damaged Try Channel Setting by following the steps on pages 27 to 30 Only specific channels do not appear The channels may be set to be skipped See page 28 The external input channels such as AV1 AV2 or AV3 cannot be skipped This unit does not skip the external input channels This is not a malfunction Symptom Sol...

Page 106: ...uaranteed on this unit The disc may be dirty or flawed Clean the disc Check if all the connections are made correctly Check the Parental Lock Setting See page 96 There is no sound or no subtitle Check if the Digital Audio Setting is set correctly See pages 93 to 94 There is a possibility that the selected subtitle language is not supported by the disc Digital Audio Setting cannot be changed to mai...

Page 107: ...sed Undo the finalisation by following the steps on page 57 The capacity of the disc doesn t increase even if the recorded programme is deleted With Video mode DVD RW discs the disc space will increase only when the last title in the Original is deleted With DVD R R discs deleting a title will not increase the disc space Dubbing cannot be executed Video mode discs made on other recorder cannot be ...

Page 108: ...rean 5761 Kurdish 5767 Laothian 5861 Latin 5847 Latvian Lettish 5868 Lingala 5860 Language Code Lithuanian 5866 Macedonian 5957 Malagasy 5953 Malay 5965 Malayalam 5958 Maltese 5966 Maori 5955 Marathi 5964 Moldavian 5961 Mongolian 5960 Nauru 6047 Nepali 6051 Norwegian 6061 Occitan 6149 Oriya 6164 Oromo Afan 6159 Panjabi 6247 Pashto Pushto 6265 Persian 5247 Polish 6258 Portuguese 6266 Quechua 6367 R...

Page 109: ... compressing still image files You can copy JPEG files on CD RW R discs from a computer and play back the files on this unit MP3 MPEG Audio Layer 3 MP3 is a method of compressing files You can copy MP3 files on CD RW R discs from a computer and play back the files on this unit PBC Video CD only Playback Control This function enables you to play back interactive software using a menu screen See als...

Page 110: ...rding format Sampling frequency Compression format 48 kHz Dolby Digital Tuner Receivable channels E2 E69 Input Output Front Panel AV3 Video input Input level One RCA connector 1 Vp p 75 Ω S Video input Input level One Mini DIN 4 pin jack Y Iuminance 1 Vp p 75 Ω C colour 300 mVp p 75 Ω Audio input Input level Two RCA connectors 2 Vrms input impedance more than 10 kΩ Rear Panel VHF UHF antenna input...

Page 111: ...111 EN E3B90ED_EN book Page 111 Friday February 23 2007 12 38 PM ...

Reviews: