background image

Thank you for purchasing this Toshiba product.
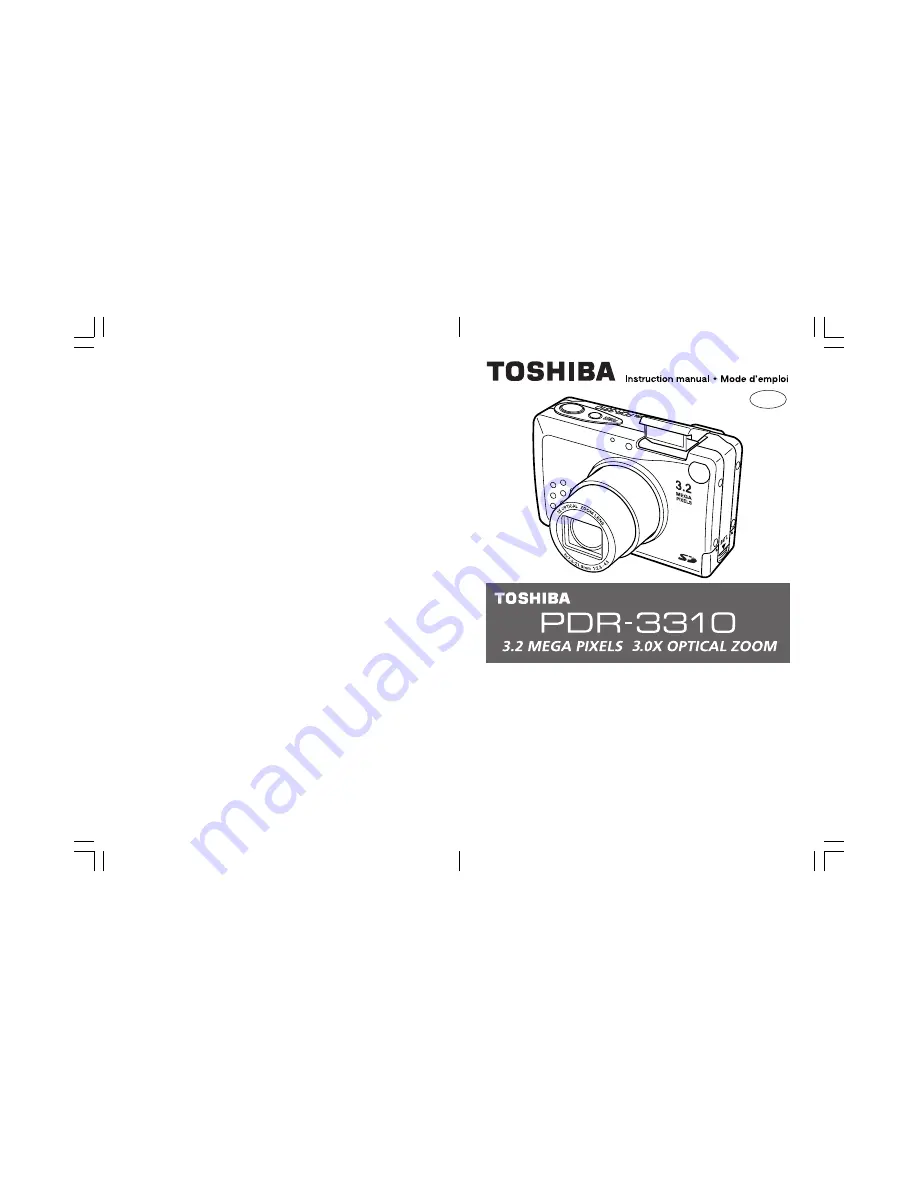
The TOSHIBA PDR-3310 is a digital camera equipped with a 3.22
mega-pixel CCD for high quality digital still photography.
Before using the camera, please read this User’s Manual carefully and
follow its instructions to assure proper use.

Nous vous remercions d’avoir acheté ce produit TOSHIBA.
La TOSHIBA PDR-3310 est un appareil photographique numérique
disposant d'un CCD à 3,22 méga-pixels pour des photos numériques
de haute qualité.
Afin d’utiliser correctement cet appareil photo, veuillez lire
attentivement les explications de ce manuel.

GB/F

Summary of Contents for PDR-3310

Page 1: ...ase read this User s Manual carefully and follow its instructions to assure proper use Nous vous remercions d avoir acheté ce produit TOSHIBA La TOSHIBA PDR 3310 est un appareil photographique numérique disposant d un CCD à 3 22 méga pixels pour des photos numériques de haute qualité Afin d utiliser correctement cet appareil photo veuillez lire attentivement les explications de ce manuel GB F ...

Page 2: ...deo Output Mode 83 Creating a New Folder on the Memory Card 84 Returning Settings to their Default Values 86 Changing the Display Color for the Setting Buttons 88 Formatting Memory Cards 75 Turning the Electronic Tone ON OFF 77 Selecting Auto Power Off 78 Mode Lock ON OFF 80 Camera Setup Options Connecting the USB Cable to your PC 95 Installing the USB Driver 92 Installing the image software 94 Tr...

Page 3: ...esponsibility and shall be held harmless for any damages or losses incurred by the user in any of the following cases Fire earthquake or any other act of God acts by third parties misuse by the user whether intentional or accidental use under extreme operating conditions Malfunction of non function resulting in indirect additional or consequential damages including but not limited to loss of expec...

Page 4: ... shower This might cause a fire or electric shock Do not allow metallic objects or other flammable foreign matter inside the camera This might cause a fire or electric shock Do not open the SD Memory Card cover and insert or allow such objects to fall inside DANGER Do not disassemble change or repair the camera This might cause fire or electric shock For details on repair and internal inspection c...

Page 5: ... at the sun through the camera viewfinder This may cause injury of the eyes Do not use the flash close to anyone s eyes This might cause temporary damage to the person s eyesight Do not walk around with the camera swinging from the shoulder strap If you walk around with the camera hanging from your hand through the shoulder strap the camera might bump into people or other objects damaging the came...

Page 6: ...laces Places subject to humidity dust and dirt Places subject to direct sunlight Places subject to high or low temperature Places filled with highly flammable gas Places near gasoline benzene or paint thinner Places subject to strong vibrations Places subject to smoke or steam Places subject to strong magnetic fields such as near motors transformers or magnets Places contacting chemicals such as p...

Page 7: ... a while store it after there is no power left If the battery is stored for a long time in a fully charged state its performance may be impaired When the battery is to be stored for a long time fully charge the battery and then use the battery until there is no power left once every year and then store it When the battery is not in use be sure to remove it from the camera body If the battery is le...

Page 8: ...y hot and humid locations Do not plug in the AC adapter while you are using the battery Switch the camera OFF first The AC adapter is for indoor use only Use only the specified AC adapter Do not use other AC adapters The AC adapter may sometimes become warm during use This is normal and not a malfunction Buzzing or whirring noises may come from inside the camera This is normal and not a malfunctio...

Page 9: ...kaged with this Software Application are subject to change without notice 6 The personal computer screens shown in this Instruction Manual are examples and may differ from actual screens 7 Toshiba Corporation is not liable whatsoever for any compensation arising from errors in descriptions in this Instruction Manual 8 Do not play back the CD ROM packaged with this Software Application on a regular...

Page 10: ...nd Indicators Self timer LED red page 39 This LED flashes during using the self timer and it is on continuously during the recording and playback of moving images or in the setup mode Also it flashes rapidly in the PC mode Caution LED red This LED is used to signal the charge status of the lithium ion battery the charging status of the electronic flash and the camera shake warning During Recording...

Page 11: ...om the figure Macro Landscape mode page 37 Flash mode page 35 Metering mode page 52 Focus mark lights when focus is set Color mode page 46 White balance mode page 43 Image quality page 40 Number of images recordable Auto Exposure mode page 47 Sensitivity page 51 Long time exposure page 49 Exposure compensation value page 42 Self timer page 39 Displays the number of seconds remaining until the self...

Page 12: ... the caution LED will light steadily When recharging is completed the caution LED will go out and the standby LED will light Basic Preparations 2 1 Standby LED Caution LED Check the Contents Make sure all the items below are in the box The shape of the plug is different in Great Britain Make sure of the shape of the plug used in each country before you use the camera Digital camera TOSHIBA PDR 331...

Page 13: ...E PROTECT Loading and Removing Memory Cards Loading Slide the memory card door release to open the card door Removal Slide the memory card door release to open the card door and pull out the memory card Close the memory card door Insert the memory card Slide in the card until it stops with a secure click Be careful to insert the memory card in the correct direction Press the edge of the memory car...

Page 14: ...e time and calendar display mode Operation Set the mode select lever to SET UP Press the button The monitor will show the date time setting display Press the and buttons to change the setting item and the and fi buttons to change the numerical values To cancel the setting operation Press the MENU button the setting contents will revert to those before the setting operation was begun 2 1 3 ...

Page 15: ...h closed when the camera is turn on for use Use the LCD monitor to compose your pictures when particularly accurate composition is needed The image recorded will be the same as that seen through the monitor Using the LCD Monitor to Shoot Still Pictures An electronic beep will be heard for several seconds followed by the appearance of the LCD monitor Automatically displayed for 3 seconds then turns...

Page 16: ...d when focus is locked Card access LED The magnification ratio is displayed on the screen 3 Compose your picture while watching through the LCD monitor Press the zoom buttons to select between telephoto and wide angle lens settings thus enlarging or reducing the size of your subject Press the T button to enlarge the subject and the W button to reduce the size of the subject 3 The card access LED w...

Page 17: ...era s built in LCD monitor turns off whenever a video cable is connected to the camera Use the supplied video cable to connect the camera to a television Precautions when Recording Wait until the caution LED has stopped flashing before taking your next photograph When the camera is in the mode setting the auto Power Save function allows the camera to automatically enter the auto power off power sa...

Page 18: ...inder while composing your picture Press the T button to enlarge the subject and the W button to reduce the size of the subject Precaution when using the optical viewfinder When using the optical viewfinder take note of the distance to your subject As distance to the subject decreases parallax the difference between what you see in the viewfinder and the actual image recorded through the lens incr...

Page 19: ...shooting an evening sunset or to preserve indoor mood The camera automatically determines lighting conditions and switches between flash and available light exposure as needed Usable Flash Range A variety of flash modes are available for different conditions When sensitivity is normal Camera About 60 cm Usable flash range About 2 5 meters About 2 meters Zoom set at wide Zoom set at telephoto Flash...

Page 20: ...mode Landscape mode No display Normal mode Operation 1 Press the button to select the desired flash mode 2 Press the shutter release button to take the picture NOTE If the caution LED flashes when the shutter release button is depressed halfway it indicates that a slow shutter speed will be selected low light conditions in this case use of a tripod is recommended to prevent camera shake Display ap...

Page 21: ... button Follow the same procedure to return to normal shooting mode Display appearance when 10 second delay is selected Operation 1 Press the button and select the desired mode Display appearance when the macro mode is selected 2 Press the shutter release button to take the picture NOTE When shooting with the optical viewfinder LCD monitor turned OFF if the button is pressed the LCD monitor will t...

Page 22: ...ompression Use this function to change the amount of file compression and thus image quality and when shooting movies Quality Image Dimensions Pixels File Size N Normal 1024 768 About 280 KB F Fine 2048 1536 About 1 MB S Super Fine 2048 1536 About 2 MB Movie 320 240 Maximum 15 seconds Capacities are only given as general references Actual file size will differ depending on the color and other char...

Page 23: ...UTO or 4 Press MENU button to turn off the menu display 5 Press the shutter release button to take the picture Display appearance when is selected Exposure Compensation Operation 1 Press the MENU button 2 Press the or button and select then press the button to confirm the selection 3 Press or fi button to select the desired amount of exposure compensation then press the button to confirm the select...

Page 24: ... or fi button to select WB PRESET then press the or button Adjusting the Preset Value Use this function to manually set the white balance value It allows you to select what part of the subject you wish to serve as the standard for white in the final image For more exacting settings use of a piece of white paper or cardboard is recommended Electronic zoom must be disabled when setting the preset whi...

Page 25: ...on 4 Press the or fi button to select F9 6 or F2 8 5 Press the or button 6 Press the MENU button twice to turn off the menu display 7 Press the shutter release button to take the picture Display appearance when F9 6 is selected Using Color Mode for B W and Sepia Images In addition to the normal color picture mode you can also take pictures in black and white B W or sepia tone Sepia Operation 1 Pres...

Page 26: ... Press the or button Selecting the Focus Distance before Shooting The camera is set by default to automatic focus AF but is can also be used with manual focus MF if desired When MF is selected a focusing scale is displayed on the screen the user specifies the desired focusing distance Operation 1 Press the MENU button 2 Press the button to select then press the button to confirm the selection 3 Pr...

Page 27: ...utton to select x4 x2 or STANDARD 5 Press the or button 6 Press the MENU or button twice to turn off the menu display 7 Press the shutter release button to take the picture Display appearance when x4 is selected This flash mode is effective when shooting pictures of human subjects against a sunset or night scene Other Applications By pressing the button the red eye reduction fill in flash mode can...

Page 28: ...ht Metering LCD monitor Spot meter Center weighted meter EVALUATION Evaluative Metering default The evaluative metering method divides the entire screen area into areas and evaluates the amount of light striking the screen area setting the optimum exposure for the available lighting conditions This mode provides correct exposures for general photography and a wide variety of conditions CENTER Cent...

Page 29: ...y 7 Press the shutter release button to take a picture Setting the REC Review Operation 1 Press the MENU button 2 Press the button to select then press the button 3 Press or fi button to select REC REVIEW then press the or button 4 Select OFF or ON using or fi button 5 Press or to finish the setting 6 Press MENU button twice SETTING DETALIS menu will disappear 7 Press the shutter release button to t...

Page 30: ...asured and locked when the shutter is depressed halfway If you find that your focus is occasionally incorrect particularly when shooting subjects located at the edge of the screen use this feature in conjunction with the exposure mode to produce better focus results Operation 1 Point the center focus frame at the subject you wish to be in clear focus and depress the shutter button halfway The focu...

Page 31: ...ntaining photographic images is loaded in the camera Set the mode select lever to and turn camera power ON Displaying Images on the LCD Monitor Image Playback Basics The image will be displayed on the LCD monitor To display images in the order they were taken press the button to display images in the reverse order press the button ...

Page 32: ...3 then begin the movie playback by pressing Other Applications A television screen can be used to preview your photographs When connected to a television in this way the LCD monitor turns off automatically Playing Movies on the LCD Monitor Reverse playback Pause Reverse frame advance Forward frame advance ...

Page 33: ...Advanced Image Playback and Delete Functions ...

Page 34: ...d or reverse direction Thumbnails are reduced size versions of the original images in your camera and are displayed as follows Thumbnail Picture Review in Forward Reverse Direction 1 Set the mode select lever to then hold the or button depressed Closeup Image Playback 2x Images can be enlarged to twice their original size during playback to focus on certain features when desired Operation 1 Displa...

Page 35: ...t function you can confirm your selections by displaying the information screen page 61 or by using the multiple image display function page 62 and looking for the lock mark on the image Multiple Image Display Index Display This function allows you to display six small images at a time on the LCD monitor providing a quick way to find and index your pictures This feature can be used in conjunction ...

Page 36: ...d image is present it will be displayed Display during the all erase operation Erasing Individual Images Operation 1 Press the MENU button Press the or button to select ERASE 2 Press the button 3 Press the or button to select the picture you wish to erase 4 Press the button to select EXECUTE 5 Press the button to confirm the selection and erase the image When an image is erased the next image on t...

Page 37: ... or end the operation select RETURN followed by or press the MENU button To erase multiple images Simultaneous use of the all erase function and image protect function is a convenient way to quickly erase multiple images from a memory card while leaving other images on the card Example Out of 30 images on a memory card you wish to leave 5 while erasing all the others Multiple image display is show...

Page 38: ...ss the MENU button Use the button to select PRINT 3 Press the button Press to cancel the PRINT and INDEX setting contents Set number of prints and date imprint ON OFF Select index print ON OFF Automatic Playback Slide Show This function plays back images automatically at set intervals Operation 1 Press the MENU button Press the or button to select AUTO PLAY 2 Press the button Use the fi and buttons...

Page 39: ...ess the button 6 To print an index sheet press INDEX followed by SET UP INDEX PRINT and the button NOTE Since DPOF data is preserved as part of the overall memory of the memory card setting may not be possible if the memory card has insufficient remaining space Do not use a personal computer to delete or modify DPOF image data on a memory card When submitting a memory card to a commercial photo pr...

Page 40: ...ws click the Removable Disk icon in My Computer In Macintosh click Untitled folder icon on Desktop see page 97 2 The trimmed image is recorded in the following location Open the TRIMMING folder and double click the name of the file you want to see Memory Card MISC TRIMMING DCIM 100TOSHI PDR_0001 jpg PDR_0002 jpg T00_0001 jpg T00_0002 jpg T00_9999 jpg 6 When you finish to select the area press the ...

Page 41: ...hen using the formatting function since reformatting a memory card will also result in the loss of protected images When SD Memory Cards are set to write protect formatting is not possible 4 Press the button to begin formatting Formatting cannot be canceled after it begins 5 The setup function menu will appear to indicate completion of formatting 1 Set the mode select lever to set up and turn came...

Page 42: ...mory Card Memory Card Memory Card Memory Card 100TOSHI PDR_0001 jpg PDR_0002 jpg PDR_0003 jpg PDR_0004 jpg PDR_0005 jpg DCIM DCIM DCIM 100TOSHI PDR_0001 jpg PDR_0002 jpg PDR_0003 jpg PDR_0004 jpg PDR_0005 jpg The Difference between Erasing and Formatting Image erasing and memory card formatting functions differ in the following ways Photographed images are recorded on the memory card in data folde...

Page 43: ...without the power turning off To restore the camera to its normal shooting mode depress the shutter button halfway or press one of the other function buttons 1 MIN 1 MIN 2 MIN 2 MIN 2 MIN 2 MIN 3 MIN 2 MIN 3 MIN NO PWR OFF 3 MIN Power on and camera in ready but inactive state Sleep mode camera operation stops with lens in extended position but function can be restored by pressing shutter button ha...

Page 44: ...tored when the camera is turned on again When mode lock is disabled all function modes are returned to their default values when the power is turned on again For default values see page 87 Functions and Contents of Default Values Difference in Displays when Mode Lock is ON and OFF When enabled this function preserves the camera mode functions set when the camera power is turned OFF As a result the...

Page 45: ...Operation 1 Press the or fi button to select VIDEO OUT 2 Press the or button 3 Use either the or fi button to select PAL or NTSC 4 Press the button or button to complete the setting Selecting the Display Language The camera s display language can be set to one of the following languages English Japanese French German Spanish Operation 1 Press the or fi button to select LANGUAGE 2 Press the or button ...

Page 46: ...from 0001 This is convenient when you wish to keep photographs filed separately for separate shooting scenes etc Recording Status Before and After Resetting File Numbers Before reset Images are stored as files named with consecutive numbers After reset A new folder is created and subsequent photographs are stored there beginning again with the file name PDR_0001 jpg DCIM 100TOSHI PDR_0001 jpg PDR_...

Page 47: ...OFF Digital zoom ON Beep ON Power Save 2 MIN Mode lock ON Display Language ENGLISH Color select PURPLE setup Mode Modes BRIGHTNESS CONTROL Normal Returning Settings to their Default Values This function is used to restore the default values of recording mode settings made with mode lock ON and setup mode values excluding DATE VIDEO OUT and LANGUAGE Operation 1 Press the or fi button to select MODE ...

Page 48: ...the color of the active Setting buttons menus Choose the color you can easily see from PURPLE RED YELLOW or BLUE Operation 1 Press the or fi button to select COLOR SELECT then press the or button 2 Select PURPLE or RED YELLOW BLUE using or fi 3 Press the or button to finish the setting ...

Page 49: ...Transferring Images to a Personal Computer ...

Page 50: ... with your computer Edit static images By using Image Expert you can edit captured static images and output to a printer connected with your computer Replay movies You can replay captured movies Save movies You can save captured or edited movies to your computer Software and Hardware Requirements Recommended Windows Environment Operating System Microsoft Windows 98 98SE ME 2000 Professional XP Hom...

Page 51: ... You have to install the USB driver to your PC before connecting the camera to it The USB driver is included in the CD ROM which is shipped with the camera Connect the PC and the camera with the USB cable after you have finished to install the USB driver Otherwise you cannot install the USB driver correctly When you are using Windows PC To install the driver Be sure to install the driver when you ...

Page 52: ...h 1 Insert the attached CD ROM into the CD ROM drive 2 Click Install Image Expert Follow the display instructions to proceed with setup 3 Select English Installing the movie play software Installing the Quick Time Windows 1 Open the CD ROM using the Explorer software or the like Sample procedure Move the mouse pointer on the CD ROM icon click the right button on the mouse and select the Open O 2 O...

Page 53: ...TOSHI or TRIMMING folder in DCIM then select and double click the image file you want to view Viewing the Images on your PC Install the USB driver correctly See pages 92 and 93 Installing the USB Driver for the instructions how to install the USB driver The card access LED flashes while connecting to the PC and viewing or copying the image Do not disconnect the USB cable nor turn off the power of ...

Page 54: ...or rotating first copy the original image to your PC then edit the copied image DO NOT modify the original Modifying directly the data stored in the memory card will cause a problem that you cannot view the image on the camera DO NOT format the memory card using a PC DO NOT delete or move image data directly from the memory card to a PC If you want to delete any image data from the memory card use...

Page 55: ...he monitor brightness as desired Press the button Monitor brightness cannot be adjusted when the camera is connected to a television monitor Adjusting LCD Monitor Brightness Turning the LCD Monitor ON OFF In the recording mode the LCD monitor can be turned ON OFF by pressing the DISP button To conserve power it is recommended that the monitor be turned off whenever not being used Other Information...

Page 56: ...e memory card has insufficient free memory available Insert a new memory card or erase unneeded images on the current card The LCD monitor displays Card has not been inserted No memory card is loaded Insert a memory card The LCD monitor displays Card Error The inserted memory card has been formatted on a different camera or information device Reformat the memory card on the camera see page 75 Reco...

Page 57: ...perate and interrupt the recharging function Ambient temperature during recharging should be between 10 C and 30 C In practice a range of 5 C 40 C is possible but the recharging time may become somewhat longer Nothing appears on the LCD monitor Battery power is depleted or no battery pack is loaded Insert the lithium ion battery pack into the camera and recharge if necessary Nothing appears on the...

Page 58: ...c equipment Do not bend cause excessive shock or drop it You should also avoid putting it in the pocket of your pants since it may be damaged when you sit down Avoid using or storing the SD memory card under high electrostatic or electric noise Avoid using or storing the SD memory card in a high temperature and humid or corrosive environment Do not touch or allow dust or alien substances to make c...

Page 59: ...g multi image protect erase all erase rotate slide show DPOF setting Trimming setup mode date format electronic tone auto off mode lock display language video output file number reset default reset Select Normal playback Type Digital still camera with record playback and erase modes Recording media SD Memory Card Multi Media Card MMC Recording Capacity Guideline and Image Dimensions in Pixels when...

Page 60: ...help consult your equipment dealer or experienced radio TV technician for help CAUTION If you modify the camera in any way without getting approval from Toshiba Corporation your camera may violate FCC regulations Violation of FCC regulations may cause the FCC to void your right to use the modified camera For customers in Canada CAUTION This Class B digital apparatus complies with Canadian ICES 003...

Page 61: ...227 226 ...

Page 62: ...228 Printed in China BRJ040411 ...

Reviews: