background image


User Manual 

Intelligent Power Distribution
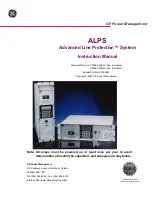


Single Unit 


Web Configuration Utility 


Rack Mounted Units 


The  PowerHub  power  distribution  modules  provide  eight  outputs  at  5V,  12V  or 
24V,  and  are  controlled  over  Ethernet  for  easy  integration  with  unmanned  and 
autonomous  vehicle  computer  systems.    The  modules  are  capable  of  distributing 
up to 500W and are available in standalone or rackmount configurations. 

Summary of Contents for PowerHub

Page 1: ...The PowerHub power distribution modules provide eight outputs at 5V 12V or 24V and are controlled over Ethernet for easy integration with unmanned and autonomous vehicle computer systems The modules...

Page 2: ...ns 7 5 2 Interface Contact Ratings 11 5 3 Visual Indicators 11 5 4 Environmental 11 6 WEB BASED CONFIGURATION 12 6 1 The Status Tab 12 6 2 The Output Settings Tab 14 6 3 The Network Settings Tab 15 7...

Page 3: ...PowerHub TM User Manual Version 1 2 2 9 1 Rack mount Faceplate Dimensions 24 9 2 Standalone Mounting Configuration 26 10 LIMITED WARRANTY 27...

Page 4: ...ESTRICTIONS OPERATING PRODUCT IN VIOLATION OF USER RESTRICTIONS COULD RESULT IN PRODUCT MALFUNCTION PROPERTY DAMAGE AND PERSONAL INJURY INCLUDING DEATH NOTICE USER ASSUMES ALL RISKS ASSOCIATED WITH PO...

Page 5: ...ub Make sure to read this manual in its entirety before using the PowerHub Failure to follow the instructions and warnings contained in this manual could result in damage to the unit or the external d...

Page 6: ...ents of the package includes the following items PowerHub Module with Faceplate Network Cable User Manual Starter Kit Remote Enable Jumper Input Connector and Pins Output Cables x4 single output cable...

Page 7: ...nt control over Ethernet allows each of the 8 outputs to be switched and monitored remotely An intuitive web interface allows the user to directly configure and use the PowerHub during testing and dev...

Page 8: ...ed output voltage 10 5 12 16 5 Vdc nominal input full load 25 C Output Power 400 W nominal input 12VDC output Output ripple 85 mV p p nominal input full load Load regulation 0 02 0 2 nominal input no...

Page 9: ...5 Vdc nominal input full load 25 C Output Power 320 W nominal input 12VDC output Output ripple 160 mV p p nominal input full load Load regulation 0 02 0 2 nominal input no load to full Efficiency 85 n...

Page 10: ...6 5 Vdc nominal input full load 25 C Output Power 160 W nominal input 12VDC output Output ripple 220 mV p p nominal input full load Load regulation 0 02 0 2 nominal input no load to full Efficiency 81...

Page 11: ...V Internal 100k pull down Internal 100k pull down OUTPUT DERATING The PowerHub is both current limited and power limited When operating below the nominal output voltage the current is constant and th...

Page 12: ...MOTE ENABLE CONNECTION Connector Part Number Molex 43650 0303 Mating Part Number Molex 43645 0300 Max Current 5 0 Amps ETHERNET CONNECTION Standard RJ 45 jack supporting CAT5 CAT5e and CAT6 network ca...

Page 13: ...page is loaded the status tab will be displayed as shown below in Figure 3 The status tab displays the current state of each output the measured input and output voltages the internal temperature of t...

Page 14: ...nce confirming the current state of the module The internal temperature of the PowerHub corresponds to the exhaust air temperature and is provided with 1o C resolution If the internal temperature of t...

Page 15: ...for that channel Settings will be applied only when the Save Settings button is selected Current limits can be adjusted by typing the desired value in the text box The current limit may be entered wi...

Page 16: ...aults button is pressed the current power up configuration is displayed 5 3 The Network Settings Tab The PowerHub can be configured to be accessed as a part of any network by changing the configuratio...

Page 17: ...ud 8 data bits no parity 1 stop bit and no flow control The following commands are available ON Switches an output to the ON state Usage ON output numbers separated by spaces r n Example ON ALL r n wi...

Page 18: ...PuTTY can be used to test the PowerHub advanced communication protocol The necessary setup required to use the PuTTY client is outlined in the following section 6 1 PuTTY configuration To configure t...

Page 19: ...e PuTTY configuration menu Commands can now be entered into the PuTTY console validating the PowerHub control over the TCP communications protocol A screenshot from an example PuTTY session is include...

Page 20: ...ternal electronics and are turned on automatically anytime an output is active Internal fan speed monitoring ensures both fans are functioning properly The direction of air flow through the PowerHub i...

Page 21: ...e network interface is a 10 100 Mbps auto sensing connection The remote enable connection 3 allows the PowerHub to be enabled and disabled via external circuitry e g a vehicle key switch When disabled...

Page 22: ...lts Once the button is released the PowerHub will reset to apply the settings The input power connector 6 is a Molex 42820 2212 connector The mating plug is Molex part number 42816 0212 Pin 1 is posit...

Page 23: ...put terminal 3 SIG Remote Enable Input 5 60V ETHERNET CONNECTION PIN 1 PIN DESCRIPTION 1 TXD Ethernet Transmit Data 2 TXD Ethernet Transmit Data 3 RXD Ethernet Receive Data 6 RXD Ethernet Receive Data...

Page 24: ...r the input voltage of the unit EXAMPLE CONFIGURATION 3 2 12V ACC Figure 10 Remote enable configuration example vehicle key switch The accessory line of a vehicle key switch can be a used as a conveni...

Page 25: ...s two PowerHub devices to occupy just one unit of space in a standard 19 inch computing rack If an odd number of PowerHub units are desired a single PowerHub faceplate is available which also occupies...

Page 26: ...PowerHub TM User Manual Version 1 2 25 Figure 14 Dimensioned side by side rack mount faceplate drawing Figure 15 Dimensioned single rack mount faceplate drawing...

Page 27: ...n is available if rack mounting is not desired Figure 16 shows an exploded assembly view of this option A dimensioned drawing showing mounting locations is given in Figure 17 Figure 16 Exploded assemb...

Page 28: ...ies TORC s liability is limited to the cost of repair or replacement of the product Such remedy shall be the sole and exclusive remedy for any breach of warranty TORC shall not be liable for 1 Damage...

Reviews: