

K2 ASI Media Client
Quick Start Guide
Before you begin, unpack the following items...
...and locate the documentation you need.
K2 ASI Media Client
Power cords
K2 ASI Media Client CD
Rack slides
Recovery CD
1. Make cable connections and, if necessary, configure network
2. Power on
3. Set-up system configuration
4. Make remote connection
You must add the K2 ASI device to a K2 Storage System.
Refer to step 3 for more details.
Shared storage
Press both bezel-release buttons and flip down front bezel.
Continue with Quick Start procedures on the reverse side.
Control point PC
Connect other cables as needed. Refer
to the
K2 ASI Media Client Installation
and Service Manual
for complete
cabling and network instructions.
K2 ASI Media Client Network configuration
In Network Connections, configure Control Connection #1
(NIC Port 1). Set IP address and other network properties for
establishing the connection to the K2 Storage System control
network
1
3
1
2
1
2
3
Open the K2 ASI video application and connect as Configurator.
1
Documentation path to install
K2 ASI Media Clients with (shared) K2 Storage System
*Release
Notes
System
Guide
Quick Start
Guide
Storage System
Instruction Manual
*Storage Release Notes and Cabling Guide packed with RAID primary chassis
*Cabling
Guide
The K2 ASI Media Client operates as a K2 Appliance
into the K2 Storage System.
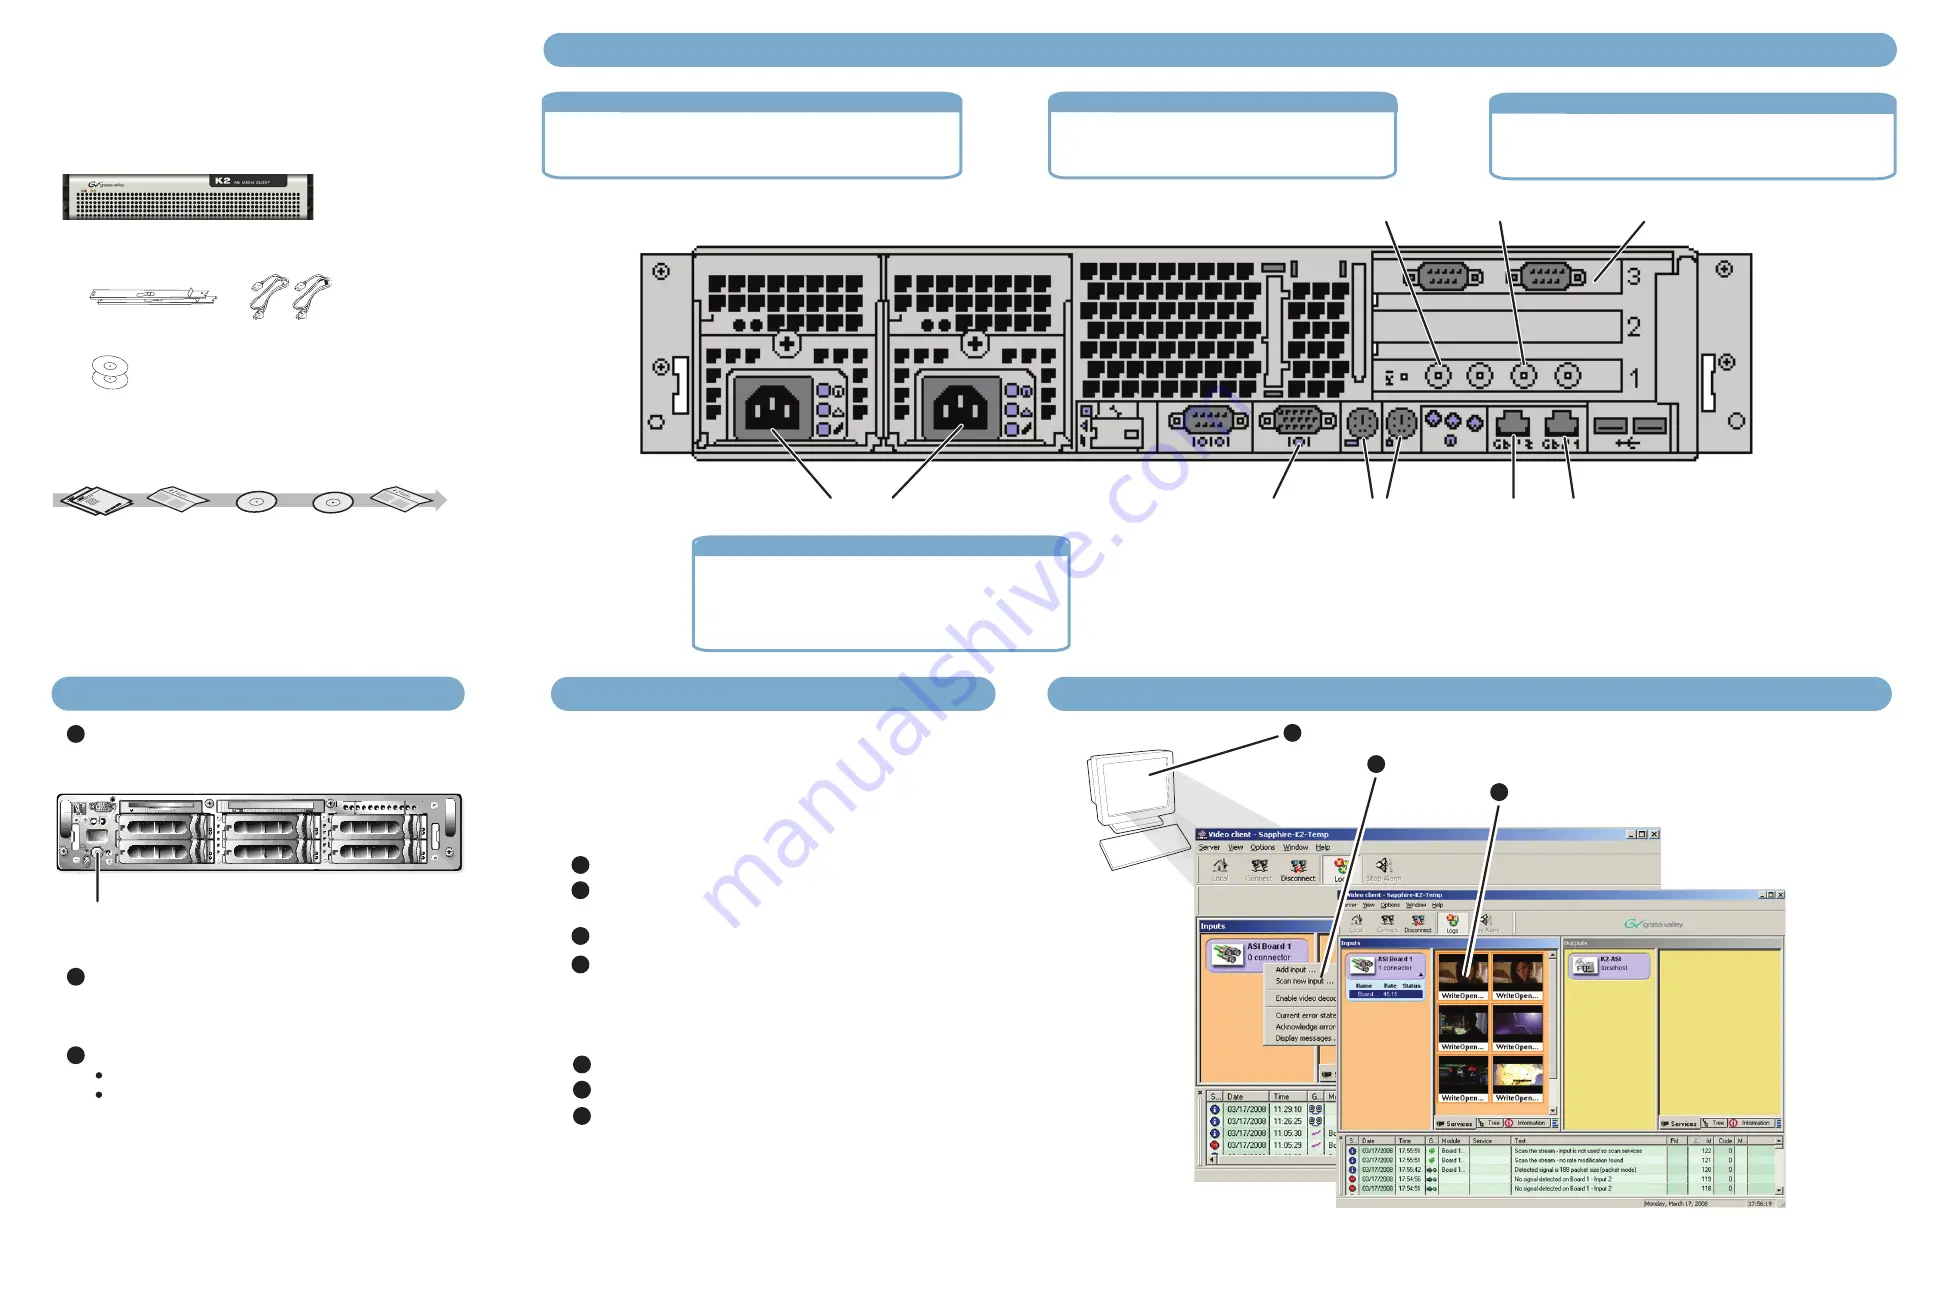
Port 1: Control network
Port 2: Media (iSCSI) network
GigE connections
071-8676-00 August
14,
2008
3
Logon with the default Windows account:
Username:
administrator
Password: adminK2
Input sources become available for record.
Select the ASI input, right-click and choose Scan new input.
Two ASI input connectors are available to receive
MPEG-2 transport streams. Only one can be
scanned at a time.
ASI connections
Connect the RS-422 ports to control the device from an
automation system. Refer to the
K2 ASI Media Client
Installation and Service Manual
.
RS-422 connections
Connect power cords
VGA monitor
Keyboard/Mouse
NIC port 2
NIC port 1
RS-422 ports
ASI In 2
ASI In 1
Power button
Press the standby switch to power on. Power LED
goes on and stays on. Service LED stays off. Startup
processes complete in approximately two minutes.
Add the K2 ASI Media Client to a K2 Storage System
Log-on to the K2 Storage System control point PC.
Open the K2 System Configuration Application and log in with
permissions equivalent to K2 Administrator or higher.
Select the K2 Storage System top node.
Add the K2 ASI Media Client device as a K2 Appliance.
4
Refer to the
K2 Media Client Installation and Service Manual
for complete procedures.
Install the K2 ASI Media Client Graphical Interface
1
2
3
From the Control Point PC, insert the K2 ASI Media Client CD.
Run the setup application.
Follow on-screen instructions and install the Client module only.
The
K2 ASI Media Client Installation and Service Manual
and
User Manual
can be found on the K2 Documentation
CD.
3
2


