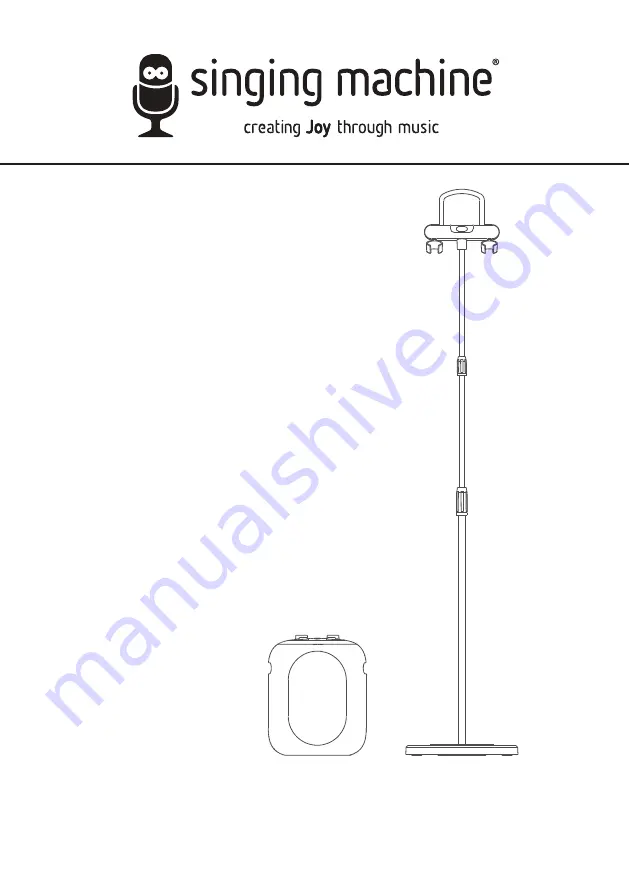
background image

TM

SMC2040

INSTRUCTION MANUAL/
MANUAL DE INSTRUCCIONES/
MODE D’EMPLOI

www.singingmachine.com

The Singing Machine® is a registered trademark of The Singing Machine Co., Inc.

The Singing Machine® es marca registrada de The Singing Machine Co., Inc.

The Singing Machine® est une marque déposée de The Singing Machine Co., Inc.

Summary of Contents for SMC2040

Page 1: ...MODE D EMPLOI www singingmachine com The Singing Machine is a registered trademark of The Singing Machine Co Inc The Singing Machine es marca registrada de The Singing Machine Co Inc The Singing Machine est une marque déposée de The Singing Machine Co Inc ...

Page 2: ...o constitute a risk of electric shock to persons ATTENTION The exclamation point within an equilateral triangle is intended to alert the user to the presence of important operating and maintenance servicing instructions in the literature accompanying this product CAUTION RISK OF ELECTRIC SHOCK DO NOT OPEN Warnings WARNING TO PREVENT FIRE OR SHOCK HAZARD DO NOT EXPOSE THIS UNIT TO RAIN OR MOISTURE ...

Page 3: ... E2 Included Please make sure that the following items are included Wireless Microphone Base Main Unit Cradle with mic holders Detachable Extendable Mic stand AC Adapter Manual Mic 1 Mic 2 ...

Page 4: ...the top of the Main unit Insert the Mic stand into the Main unit and rotate clockwise to tighten it 3 Untighten cradle pole cap pull up on the cradle pole Retighten cap to keep in place 4 Insert then rotate to tighten the Cradle with Mic holders on the mic stand 5 Untighten height adjustment cap to adjust to a suitable height Retighten cap to hold in place All in one assembly Cradle pole adjustmen...

Page 5: ...hen rotate clockwise to tighten the cradle onto the mic stand 4 Untighten height adjustment cap to adjust to a suitable height Retighten cap to hold in place 5 Its recommended to have the main unit within 30 feet 10 meters from the mic stand to serve as a speaker Note Always remember to put the rubber cover back in place v x Cradle pole adjustment cap Height adjustment cap Extendable Mic Stand Cra...

Page 6: ...utton 13 On Standby LIGHTS button 14 HOME Button 15 BACK Button 16 EFFECTS STRENGTH Control 17 PERFECT PITCH Button 18 Display 19 DC IN Jack 20 HDMI Jack 21 Mic 3 Jack 22 Handle 23 Bluetooth indicator 24 Battery indicator 25 Mic 1 indicator wireless 26 Mic 2 indicator wireless 27 Mic 3 indicator wired 28 Wireless Mic battery indicator 29 Wireless Mic ON OFF button u v y x w TOP br WIRELESS MIC bs ...

Page 7: ... off 3 Disconnect the AC cord and the fully charged unit can be used for approximately 4 10 hours depending on the function chosen ATTENTION The sound volume will adjust automatically when the battery is not full Recycling and Disposal Information Do not dispose of electronic devices or any of their components especially batteries and LCD displays in your municipal trash collection Consult your lo...

Page 8: ...rd into a conveniently located AC outlet having 120V AC 60Hz Charging the unit Connecting the Unit to a TV To output the casting video and casting audio to your TV perform the following steps Plug the HDMI cable not included into the HDMI Jack on the back of the unit Plug the other end of the HDMI cable into the HDMI input on your TV NOTES This unit can be used with or without a TV but it is highl...

Page 9: ...e the connection u Battery Precautions The precautions below should be followed when using batteries in this device 1 Use only the size and type of batteries specified 2 Be sure to follow the correct polarity when installing the batteries as indicated in the battery compartment Reversed batteries may cause damage to the device 3 Do not mix different types of batteries together e g Alkaline and Car...

Page 10: ...s Cradle PULL Connecting the optional wired Microphone Connect the wired microphone not included into Mic jack u when desired NOTE Maximum of two microphones wired or wireless can be connected to the unit at one time After inserting the wired microphone Mic 3 the wireless microphone 1 Mic 1 will be turned off automatically u ...

Page 11: ...R code will pop up on screen NOTE Rotate the NAV ENTER control to navigate press it to enter 3 CONNECT THIS UNIT TO YOUR Wi Fi NETWORK Use your mobile device to scan the step 2 QR code and allow it to load The Wi Fi list will pop up on your mobile device Search for and select your home Wi Fi and input your Wi Fi password to complete the login process If the unit does NOT connect to your home Wi Fi...

Page 12: ...ant to connect to another Wi Fi network you can go to the main menu and select SETTINGS WiFi setting DISCONNECT to disconnect from the Wi Fi network this will allow you to connect to another network 6 Press the BACK button to go back to the previous screen 7 Press the HOME button to go to the main menu SETTINGS Manually access your options MENU OPTIONS Software update Software info Factory setting...

Page 13: ...onnect from the Wi Fi network and check the Wi Fi signal level 3 Select Software update to update the software of the unit 4 Select Software info to check the latest software version of this unit 5 Select Factory setting to delete all data stored in the unit Settings x w v y SETTINGS Manually access your options MENU OPTIONS Software update Software info Factory setting WiFi setting ...

Page 14: ...e videos from your mobile device to your TV make sure your mobile device and the unit are connected to the same Wi Fi network 4 Press the icon on your device screen and select SingCast Ultimate to cast an HD karaoke video from the Singing Machine app to your TV 5 Adjust the volume to a comfortable level using the MUSIC VOL MIC VOL control 6 Press the MUSIC VOL MIC VOL control key MIC appears on th...

Page 15: ... button again to stop recording REC will turn off This unit is able to record for 5 minutes It will also stop recording automatically after 5 minutes and REC will turn off NOTE Please note that new recordings will cause previous recordings to be deleted 9 PLAYBACK YOUR SINGING PERFORMANCE To playback your singing performance you can press the PLAYBACK button PB will appear on the display and light...

Page 16: ... the EFFECTS STRENGTH control to select the level of the selected vocal effects 12Press the PERFECT PITCH button to switch between the different levels of voice pitch Display will show level NOTE This function is only available for either Wireless Mic 1 or Mic 3 13Press and hold the ON STANDBY LIGHTS button to turn off the unit ...

Page 17: ...n menu the unit should be connected to a TV 4 The unit automatically searches and pairs a previously paired Bluetooth device if previously paired If no previously paired devices are present and you cannot find this unit on your bluetooth compatible device s search list Press and hold the VOCALS OFF button the PR and bluetooth indicator will start flashing for 60 seconds NOTE You can also press and...

Page 18: ...ce NOTE Bluetooth music and your singing performance are only played on the unit 8 Press the MUSIC VOL MIC VOL control key MIC appears on the display rotate the MUSIC VOL MIC VOL control within 2 seconds to adjust the volume of both microphones After a few seconds of release it will revert to the music volume control y U NOTES If your Bluetooth prompts you for a passcode during the pairing process...

Page 19: ...lid Press the RECORD button again to stop recording the REC will turn off This unit is able to record for 5 minutes It will also stop recording automatically after 5 minutes and the REC will turn off NOTE Please note that each time when the new recording is being recorded the existing recording will be deleted 11PLAYBACK YOUR SINGING PERFORMANCE To playback your singing performance you can press t...

Page 20: ...ess again NOTE Lead vocal removal might work better on some songs than others 14Toggle the EFFECTS STRENGTH control to select the level of the selected vocal effects 15Press the PERFECT PITCH button to switch between the different levels of voice pitch Display will show level NOTE This function is only available for either Wireless Mic 1 or Mic 3 16Press and hold the ON STANDBY LIGHTS button to tu...

Page 21: ...hone has no battery left Change the batteries Make sure the mic s ON OFF switch is set to the ON position Make sure the MUSIC VOL MIC VOL control is not set too low Microphone input cannot output to the TV The Bluetooth device cannot be paired or connected with the unit Ensure any other Bluetooth devices are turned off to avoid accidental pairing You have not activated the Bluetooth function of yo...

Page 22: ...cannot connect to the router with WPA3 or lower security standard you are recommended to factory reset your router Make sure you have written down your existing customized SSID name and password This will help in reconnecting your previously connected devices and revert to your previous Wi Fi security settings If the Singing Machines unit s Wi Fi is connected to the router successfully But you sti...

Page 23: ...m optional Base 11 9 x 11 9 x 1 5 inches 30 1 x 30 1 x 3 9cm Weight Main Unit only 9 7 Lbs 4 4 kgs Base Mic Stand Mic holders 7 7 Lbs 3 5 kgs Wireless Microphone VHF band 210 5MHz 215 5 MHz Freq Dynamic Microphone Specifications are subject to change without notice The Bluetooth word mark and logos are registered trademarks owned by Bluetooth SIG Inc and any use of such marks and logos by The Sing...

Page 24: ...al rayo del sol fuego u otras fuentes de calor ADVERTENCIA SOBRE EL CARRO PORTÁTIL símbolo provisto por RETAC Advertencias PRECAUCIÓN PARA REDUCIR EL RIESGO DE DESCARGAS ELÉCTRICAS NO QUITE LA CUBIERTA NI LA TAPA POSTERIOR NO HAY PIEZAS REPARABLES POR EL USUARIO ADENTRO DERIVE LAS REPARACIONES A PERSONAL DE SERVICIO CALIFICADO PRECAUCIÓN PARA EVITAR DESCARGAS ELÉCTRICAS INSERTE COMPLETAMENTE UNA H...

Page 25: ...Asegúrese de que estén incluidos las siguientes piezas Base Unidad Principal Adaptador de CA Manual Micrófono inalámbrico Cuna con soportes para micrófono Desmontable Soporte de micrófono extensible MICRÓFONO 1 MICRÓFONO 2 ...

Page 26: ...te el soporte del micrófono en la unidad principal y gírelo en el sentido de las agujas del reloj para apretarlo 3 Afloje la tapa del poste de la cuna levante el poste hacia arriba Vuelva a apretar la tapa para mantener en su lugar 4 Inserte y luego gire para apretar la cuna con soportes para micrófono en el poste 5 Afloje la tapa de ajuste de altura para ajustar a una altura adecuada Vuelva a apr...

Page 27: ...soporte del micrófono 4 Inserte y luego gire para apretar la cuna con soportes para micrófono en el poste 5 Afloje la tapa de ajuste de altura para ajustar a una altura adecuada Vuelva a apretar la tapa para mantenerla en su lugar 6 Se recomienda tener la unidad principal dentro de los 30 pies 10 metros del soporte del micrófono para que sirva como altavoz NOTA Recuerde siempre poner el cubierta d...

Reviews: