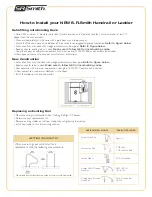
background image

SAFETY AND

OPERATING MANUAL

SAFETY AND

OPERATING MANUAL

FOR THE 24 & 35 CONFIGURATION KIT

FOR THE 24 & 35 CONFIGURATION KIT

Summary of Contents for Transforma 24

Page 1: ...SAFETY AND OPERATING MANUAL SAFETY AND OPERATING MANUAL FOR THE 24 35 CONFIGURATION KIT FOR THE 24 35 CONFIGURATION KIT...

Page 2: ...2 OPERATING SAFETY INSTRUCTIONS...

Page 3: ...rolonged use whilst giving untroubled performance The Transforma Ladder has been introduced into the market at a competitive price and provides outstanding versatility that sets a high standard in the...

Page 4: ...the Extension Positions 8 E Using the Step Level Positions 9 F Scaffolding Trestle Instructions 10 12 G Work Platform Configuration Instructions 13 15 H Final Precautions 16 I Caring for your Transfo...

Page 5: ...ng assemblies on the two outer ladder units allow the telescoping and height adjustment of the outer ladder sections up and down the inner ladder unit This mechanism locks into the rungs of the inner...

Page 6: ...Unlock the hinges by pushing both Palm Buttons straight in until they stay in the open position See Figures A 4 and A 5 a NOTE Any pressure on the hinge lock pins may make it difficult to unlock the...

Page 7: ...ension posi tion by pushing straight in on the palm buttons of both hinges See Figures A 4 and A 5 Rotate the ladder halves until the hinge locks snap into their locked position See Figure A 8 HINGE L...

Page 8: ...part until the hinges lock into place and the ladder stands in the A Frame position 8 Insert the work platform as a spreader to brace the ladder 120KG MODEL ONLY 9 To reset the ladder to the storage p...

Page 9: ...1 Figure D 1 4 To stow the ladder from its extension position reverse the above procedure starting with the ladder base 5 NOTE Always hold the inner ladder securely when unlocking the lock assemblies...

Page 10: ...o their rungs face outwards and spread the footings apart to form an A frame position See Figure F 4 3 Gather both of the outer ladder railings together See Figure F 3 2 Open the inner ladder assembly...

Page 11: ...f both bases line up with the Trestle Joint holes then insert the lock assemblies See Figure F 7a 7b 5 Orientate the Trestle Joints so that the Wide Plate slides over the inside of the Ladder Rail and...

Page 12: ...ITION 10 Set out the two trestles and position a compatible scaffolding plank on a set of rungs at the required working height See Figure F 9 Figure F 9 Figure F 8 8 The stepladder is now set up for u...

Page 13: ...igure G 4 4 Slide platform in and carefully climb up above the platform See Figure G 4 Figure G 6 6 Ensure the platform is securely in place by applying light pressure with your foot before putting yo...

Page 14: ...atform can also be used as a utility shelf See Figure G 8 DANGER 1 Inspect upon receipt and before each use never use on bottom rung or when damaged bent or broken 2 Make sure nuts and bolts are tight...

Page 15: ...ure G 10 11 Insert the horizontal bar of the work platform into the upper channel on the back of the step See Figure G 11 IMPORTANT When using the spreader on the inner ladder rails 9 Rotate the forks...

Page 16: ...d Keep body centred between both side rails e Read additional instructions on ladder 5 When using the ladder in the extension position use the proper working angle which requires that the distance fro...

Page 17: ...ladder place in a dry location out of the weather This will enhance the life of your ladder 3 Keep the rails clean and free of debris so that the ladder will extend and move easily 4 Keep the hinge m...

Page 18: ...and Developers Limited Brand Developers Limited TMT 0010 Name TMT Transforma Cartoon 10 Tough Man Tools Safety Advice Ladders can be a serious safety hazard if not used properly Portable Ladders PART...

Page 19: ...g surface and there s an increased chance that a ladder set on a slope will tip over sideways Attaching a leg leveller at the base of the ladder decreases the chance of tipping allowing for a safer wo...

Page 20: ...oon 03 Tough Man Tools Do not set the feet of a ladder so far away that they may slip out at the bottom A ladder placed too close and upright may tip backwards Use the 4ft to 1ft angle rule or the 75o...

Page 21: ...ry Brand Developers Limited Brand Developers Limited TMT 0004A Name TMT Transforma Cartoon 04A Tough Man Tools Please read these Quick Ladder Tips before you or your Family use any Ladder CONDITION OF...

Page 22: ...signed to make working on uneven surfaces easier PART FOUR Wall Standoff The Wall Standoff is great to use when working around windows guttering overhangs and other obstacles The Wall Standoff s extra...

Page 23: ...er provides over a small or large work area such as painting coving in your house or maintaining your guttering Alternatively you could use your plank as a portable workbench to store your tools on Th...

Page 24: ...7 AUSTRALIA New Zealand Brand Developers Limited Unit H 686 Rosebank Road Avondale 1026 Auckland NEW ZEALAND The liability of Brand Developers Australia Pty Limited and Brand Developers Limited under...

Page 25: ...he following items have been individually checked and approved before boxing Positive locking of hinge in each opening Smooth operation of lock assemblies Inner ladder slides freely within outer ladde...

Page 26: ...26 2 4 L A D D E R S I N 1 M O D E L T W E N T Y F O U R PART SEVEN...

Page 27: ...27 3 5 L A D D E R S I N 1 M O D E L T H I R T Y F I V E PART EIGHT...

Page 28: ...s Aust Pty Ltd 461 Plummer Street PORT MELBOURNE VIC 3207 FAX 61 3 9681 7825 AUST Customer Care 1800 890 840 Brand Developers Limited Unit H 686 Rosebank Road Avondale 1026 Auckland NEW ZEALAND FAX 64...

Reviews: